
Tools
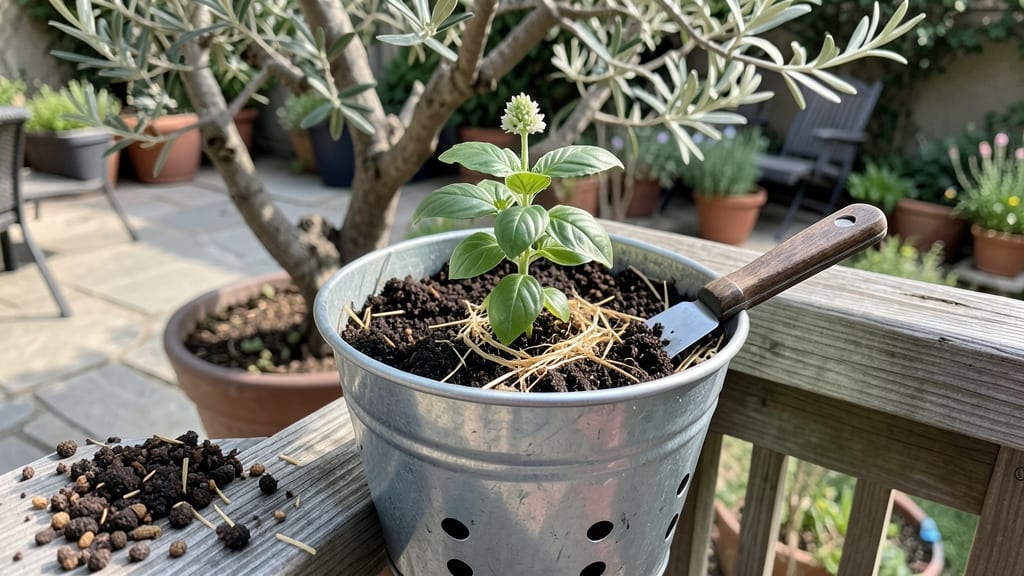
Building a bucket garden turns even the tiniest balcony into a productive oasis. 🌱 I started with just five 5-gallon buckets and now grow enough herbs to stock my kitchen all summer—no yard required.
The best part? You can set one up in under an hour with supplies you already have.
You’ll need sturdy buckets (at least 5 gallons), drainage holes, quality potting mix, and a sunny spot. My first mistake was skipping the drainage—roots need air too. Choose compact plants like basil, lettuce, or cherry tomatoes that thrive in small spaces.
The right mix of sun, water, and patience turns these simple containers into a thriving mini-farm.
Within weeks, you’ll snip fresh cilantro for tacos or pluck ripe cherry tomatoes straight from your porch. The plants stay healthy with consistent watering and occasional fertilizer, and you’ll avoid common garden pests that plague in-ground plots. Plus, no weeding—just pure, satisfying growth.
Works for patios, fire escapes, or even windowsills. Start with one bucket, then expand as you see what grows best. My neighbor now has a whole wall of buckets—proof that even small spaces can feed big dreams.
📚 In This Guide
- What you need
- Instructions
- Tips and common mistakes
- Wrapping up and next steps
What you need
Before diving into your bucket garden adventure, gather these essentials to ensure a smooth, productive setup! Whether you're a beginner or a seasoned gardener, having the right tools and materials will make the process effortless and fun. Here’s your
Step-by-step instructions for building a bucket garden
Here's my go-to method for creating a thriving bucket garden that fits on patios, balconies, or even windowsills.
🪴 Step 1: Gather and Prepare Your Buckets
Start with 4-5 gallon buckets—I prefer food-grade plastic because they're lightweight and won't crack in freezing temps. Clean them thoroughly with soapy water and rinse well. Poke 5-6 drainage holes in the bottom using a nail and hammer, then place a piece of hardware cloth or mesh over each hole to keep soil from washing out.
For extra stability, add a 1-inch layer of pebbles or broken pottery at the bottom before filling with soil. This creates room for roots to breathe and prevents clogging. I like to use buckets with handles—they make moving plants easier later. If your buckets have a narrow base, place them on 1-inch thick rubber pads to protect decks or balconies.
🌱 Step 2: Fill with the Right Soil Mix
Use a high-quality potting mix designed for containers—never garden soil, which compacts and drains poorly. I blend mine with 20% perlite or vermiculite to improve aeration. Fill each bucket to within 2 inches of the rim, leaving room for watering and top-dressing.
Tap the bucket gently on the table to settle the soil without compacting it. You want the mix to feel like a damp sponge—moist but not soggy. Press down lightly with your fingers to create a small planting hole. This ensures your plant starts with good root-to-soil contact right away.
☀️ Step 3: Choose and Plant Your Specimens
For a 4-bucket garden, I recommend pairing plants with similar water needs: one tomato, one pepper, one herb like basil, and one leafy green like lettuce. Remove the plant from its nursery pot and loosen the roots if they're circling. Place it in the hole so the top of the root ball sits ½ inch below the bucket rim—this prevents soil from washing away when you water.
Fill the hole with additional soil and press gently around the base to eliminate air pockets. Water thoroughly until it runs out the drainage holes. You'll know it's done when water stops dripping from the bottom. Avoid fertilizing immediately—let the plant establish roots for 1-2 weeks first.
💧 Step 4: Position for Sun and Water Wisely
Place your buckets where they'll get 6-8 hours of sunlight daily. South-facing spots work best, but west-facing buckets get enough light for most vegetables. Group them together to create a microclimate that retains moisture and regulates temperature. I like to arrange them in a square so I can reach all plants easily.
Water when the top inch of soil feels dry. Stick your finger in the soil—if it's dry at that depth, it's time to water. Pour water slowly around the plant's base until it runs out the drainage holes. Avoid wetting the leaves to prevent disease. In hot weather, I water in the morning so plants have time to dry before evening.
✂️ Step 5: Maintain and Harvest Regularly
Check your buckets daily for pests like aphids or spider mites—catching them early makes treatment easy. Prune leggy growth by pinching back the tips to encourage bushier plants. For tomatoes, I tie vines to a small stake inserted in the bucket as they grow. Harvest regularly to encourage more production: pick peppers when they're firm and green, and harvest basil leaves when they reach 3 inches.
Every 4-6 weeks, top-dress with a ½ cup of compost or slow-release fertilizer. This gives plants a steady supply of nutrients without overwhelming them. If you notice yellowing leaves, it's usually a sign of overwatering—let the soil dry out more between waterings. With proper care, your bucket garden will produce all season long!
Tips & tricks for perfect bucket garden setups
Real talk: Your container garden's success starts with these small but game-changing details that most beginners miss.
Bucket Material Matters: While food-grade plastic is my go-to for its lightweight durability, you can also use fabric grow bags or even repurposed five-gallon paint buckets. Just avoid metal containers—they heat up too fast and can damage roots. I've had great luck with fabric pots too, as they allow for better airflow to the roots.
Drainage System Upgrade: Don't just poke random holes in your buckets! Use a drill with a ¼-inch bit to create 5-6 evenly spaced holes around the bottom perimeter. Cover them with hardware cloth to prevent soil loss while still allowing water to escape. This simple step prevents root rot and keeps your plants thriving. I've seen buckets with uneven holes develop waterlogged bottoms within weeks.
Soil Mix Secret: That 20% perlite or vermiculite isn't optional—it's the difference between a thriving plant and one struggling to breathe. I like to add a handful of worm castings to my mix too, which gives plants a gentle nutrient boost right from the start. The key is to keep it loose enough that when you squeeze a handful, it holds its shape but crumbles easily when released.
Plant Pairing Strategy: When selecting your 4-bucket lineup, group plants by their sunlight needs rather than just water requirements. For example, pair tomatoes and peppers together (both need full sun) and keep basil with lettuce (they tolerate partial shade better). This creates microclimates where each plant gets optimal growing conditions without competing too aggressively for resources.
Pro Tips for Build A Bucket Garden
- Real talk: Your container garden's success starts with these small but game-changing details that most beginners miss.
- Bucket Material Matters: While food-grade plastic is my go-to for its lightweight durability, you can also use fabric grow bags or even repurposed five-gallon paint buckets.
- Drainage System Upgrade: Don't just poke random holes in your buckets!
Frequently asked questions
Got questions about bucket gardening?
You’re not alone—this method is simple but raises a few common concerns. Below, we’ve tackled the most asked questions to help you grow with confidence!
What’s the best time of year to start a bucket garden?
Start in early spring (after the last frost) or late summer for a fall harvest. Containers warm up faster than soil, so you can extend your growing season. Just avoid planting when nighttime temps drop below 50°F (10°C)—most veggies need warmth to thrive!
Can I reuse buckets from cleaning products or paint?
No—never reuse buckets that held toxic chemicals (like paint, pesticides, or motor oil). Even after cleaning, residue can harm plants. Stick to food-grade buckets (like those from food storage or 5-gallon water jugs) or sterilize old ones with a 10% bleach solution, then rinse thoroughly.
How do I keep my bucket garden from overheating in summer?
Buckets absorb heat fast! Paint them white or wrap them in reflective bubble wrap to reduce temps. Add a layer of mulch (straw or shredded leaves) on top of soil, and place them in partial shade during peak heat. Water deeply in the morning to cool roots.
What are the easiest plants to grow in buckets?
Start with fast-growing, shallow-rooted plants like:
- Leafy greens (lettuce, spinach, kale)
- Herbs (basil, parsley, cilantro)
- Cherry tomatoes
- Peppers
- Radishes (ready in 3 weeks!)
How do I prevent pests in a small bucket garden?
Pests love confined spaces! Inspect plants daily for aphids or spider mites. Use neem oil or insecticidal soap for mild infestations. Encourage beneficial bugs (like ladybugs) by adding a small pot of marigolds nearby. Elevate buckets off the ground to deter slugs and snails.
Wrapping up and next steps
Building a bucket garden is a game-changer for small spaces—it’s fast, affordable, and packed with potential! 🌱 With just a few supplies and a little creativity, you’ve got a thriving mini-farm ready to grow herbs, veggies, or flowers in record time.
Whether you’re a beginner or a seasoned gardener, this project proves that big harvests don’t need big yards.
Ready to level up your green thumb? Start small—try one bucket this season, then expand! 🌿 Next step: Pick your first plants, grab a bucket, and let the growing begin.