
Flowers
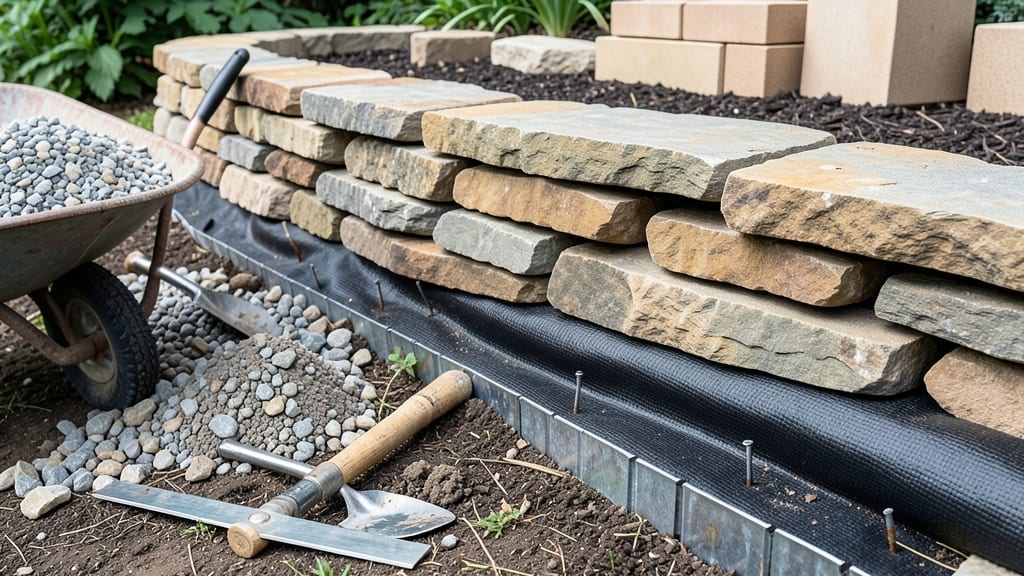
Building a stone flower bed on a slope transforms uneven terrain into stunning, functional terraces. 🌿 The key is stabilizing the soil first—without proper drainage, even the prettiest stones won’t save your garden from erosion or muddy puddles after rain.
You’ll need flat stones for steps, gravel for drainage layers, and sturdy edging to keep everything in place. My first attempt used random rocks, but adding a 3-inch gravel base under each terrace made all the difference—water now flows away instead of pooling.
By the end, you’ll have a durable, drought-resistant garden that looks intentional, not improvised. The terraces create perfect microclimates for plants, from sun-loving lavender at the top to moisture-tolerant ferns at the bottom. Works for any slope, from gentle inclines to steep hillsides. Let’s get those stones stacked!
📚 In This Guide
- What you need
- Instructions
- Tips and common mistakes
- Wrapping up and next steps
What you need
- ● Landscape fabric: 10–20 ft² (depending on slope size) – water-permeable, weed-blocking type
- ● Stone border edging: 50–100 lbs of flat, irregular stones (2–6 inches thick) – granite, flagstone, or river rock work best
- ● Soil: 2–3 cubic yards of well-draining potting mix or native soil amended with compost (50% soil, 50% compost)
- ● Gravel or crushed stone: 1–2 cubic yards (½–¾ inch size) – for drainage and base stability
- ● Mulch: 2–4 bags of organic mulch (pine bark or shredded wood) – helps retain moisture and suppress weeds
- ● Shovel and spade – for digging and leveling
- ● Wheelbarrow – for hauling materials
- ● Rake and tamper – to smooth and compact layers
- ● String line and stakes – for marking terraced levels
- ● Safety gear: gloves, knee pads, and dust mask (for handling gravel)
- ○ Optional: rubber mallet (for fitting stones), level (to check terraces), and edging tool (for clean borders)
- ● Clear the slope of debris, weeds, and existing vegetation (use a sod cutter or manual removal)
- ● Check local regulations for permits (if terraces exceed 2 ft in height)
- ● Assess slope stability – avoid building on loose or eroding soil
Step-by-Step instructions for building a stone flower bed on a slope
Here's how to transform a tricky slope into a stunning, functional terraced garden that prevents erosion while showcasing your plants.
🪴 Step 1: Assess the Slope and Mark Terrace Levels
Start by walking the slope and identifying where natural breaks or changes in grade occur—these will guide your terrace heights. Use a 4-foot level and a measuring tape to mark consistent horizontal lines at 12-18 inch intervals (standard stone height). I like to use spray paint to mark these lines directly on the soil, as they'll be your reference points for excavation.
For a 4-foot wide bed, each terrace should be 2-3 feet deep to accommodate plants and soil. If your slope is steep, wider terraces (up to 4 feet) will provide better stability. Step back and visualize how the terraces will flow—each one should slightly overlap the one below to catch water and prevent erosion.
✂️ Step 2: Excavate and Build Retaining Walls
Begin at the top of the slope and dig out soil to create the first terrace, following your marked line. The depth should match your planned stone height (12-18 inches). Use a shovel and mattock to loosen the soil, then remove it to a wheelbarrow for later use in planting areas. I recommend digging a slightly sloped back (about 10 degrees) behind where the stones will sit—this helps water drain away from the wall.
Lay flat, irregular stones (at least 6-8 inches thick) along the back edge of the terrace, nesting them tightly together like puzzle pieces. Start with the largest stones at the bottom and work upward. For extra stability, bury the bottom 3-4 inches of the stones into the soil. Leave a 2-inch gap between terraces to allow water to flow through—this prevents pooling and keeps roots healthy.
💧 Step 3: Install Drainage and Prepare Planting Soil
Before adding soil, create a gravel drainage layer at the base of each terrace. Spread 1-2 inches of crushed stone or gravel along the back of the retaining wall, sloping it slightly downward to direct water away. This prevents water from saturating the soil and causing erosion. For slopes steeper than 30 degrees, add a perforated drain pipe buried in the gravel layer to channel excess water.
Fill each terrace with a mix of topsoil and compost (a 50/50 blend) to a depth of 6-8 inches. I like to add a 2-inch layer of organic matter at the bottom for better moisture retention. Avoid compacting the soil—just level it gently with a rake. This loose structure encourages root growth and prevents water runoff during heavy rains.
🌿 Step 4: Edge the Terraces and Plant Strategically
Use smaller, rounded stones to edge the front of each terrace, tucking them into the soil slightly for stability. This creates a clean finish while allowing water to flow through. For slopes, I recommend planting deep-rooted perennials (like coneflowers or black-eyed Susans) at the back of each terrace—they'll help anchor the soil. Add mid-height plants (like salvia or catmint) in the middle and spiller plants (like creeping thyme or ajuga) at the front to soften the edges.
Space plants based on their mature size, leaving 12-18 inches between them for airflow. On slopes, group plants with similar water needs together—drought-tolerant species (like lavender or sedum) at the top, where water drains fastest, and moisture-loving plants (like hostas or astilbes) at the bottom. Mulch with 2-3 inches of wood chips to suppress weeds and retain moisture.
⏰ Step 5: Maintain and Reinforce Over Time
After planting, water deeply to settle the soil and encourage root growth. Check the retaining walls after the first heavy rain—if stones shift, add more weight by burying them deeper or stacking larger stones behind them. I also recommend installing landscaping fabric behind the stones if your soil is particularly loose or sandy, as it reduces erosion and keeps roots from pushing the stones out.
Every 2-3 years, refresh the mulch and top-dress with 1-2 inches of compost to replenish nutrients. Monitor for gaps between stones and fill them with smaller rocks or soil to maintain stability. With proper care, your terraced stone bed will not only prevent erosion but also become a low-maintenance, high-impact feature in your landscape.
Tips & tricks for building a stone flower bed on a slope
Transforming a slope into terraced beauty requires precision—and these practical tips will help you avoid common pitfalls while creating a stunning, functional design.
Precision in Step 1: When marking terrace levels in Step 1, use a 4-foot level and check your marks at multiple points along the slope. Uneven marks can lead to crooked terraces that compromise both aesthetics and stability. I always double-check by walking the slope with my level at eye level—this ensures every line is perfectly horizontal. For slopes longer than 10 feet, consider using a laser level for even more accuracy, especially if you're working alone.
Stone Selection Strategy: In Step 2, prioritize stones with flat, stable bases—these will lock together better and resist shifting over time. I recommend collecting stones from your property first (if available) to reduce costs and ensure they match your landscape's natural look. For extra stability, bury the bottom 3-4 inches of each stone, as instructed, but also consider adding a layer of compacted gravel beneath the first row of stones to create a solid foundation. This prevents erosion from undermining your retaining walls during heavy rains.
Drainage Layer Detail: The 1-2 inch gravel drainage layer in Step 3 is non-negotiable for slope stability. For steeper slopes (over 30 degrees), I go the extra mile by installing perforated drain pipes along the center of each terrace's gravel layer—this channels excess water away from the planting area while preventing soil saturation. If you don't have drain pipes, create a slightly deeper gravel trench (3 inches) along the back edge of each terrace to serve the same purpose.
Plant Placement Pro Tip: In Step 4, when arranging plants, place the tallest varieties at the back of each terrace to prevent them from shading lower plants. I also recommend adding erosion-control plants like creeping juniper or Russian olive at the very top of your slope—their deep roots will help stabilize the entire structure. For the 2-3 inch wood chip mulch, use cedar or pine chips (they resist decomposition longer) and apply them in a single layer rather than piling them high, which can suffocate plant roots.
Pro Tips for Build A Stone Flower Bed On A Slope
- Transforming a slope into terraced beauty requires precision—and these practical tips will help you avoid common pitf...
- Precision in Step 1: When marking terrace levels in Step 1, use a 4-foot level and check your marks at multiple point...
- Stone Selection Strategy: In Step 2, prioritize stones with flat, stable bases—these will lock together better and re...
Frequently asked questions
about building a stone flower bed on a slope—let’s clear up the most common concerns before you get started!What’s the best time of year to build a stone flower bed on a slope?
The ideal time is early spring or fall when the ground is workable but not frozen or waterlogged. Avoid extreme heat or heavy rain, which can make excavation difficult or cause erosion. If you’re in a mild climate, spring is perfect—plants will have time to establish roots before summer.
How do I prevent erosion on my sloped flower bed?
Start with proper terracing—use retaining walls or stacked stones to create flat layers. Add a geotextile fabric under stones to block soil from washing out, and plant ground covers or deep-rooted plants (like creeping thyme or ornamental grasses) to stabilize the soil. A swale (shallow trench) at the top of the slope can also redirect water away.
Can I use just any stones, or do I need specific types?
You can mix natural stones (like fieldstone, river rock, or flagstone) or even concrete pavers for a modern look. Avoid sharp or unstable rocks—they can damage plants or shift over time. For drainage, larger, flat stones work best, while smaller stones (like pea gravel) can fill gaps between terraces.
What if my slope is too steep for terraces?
If the grade is over 30 degrees, consider stepped terraces with deeper soil layers or vertical gardens using wire mesh and pockets. For extreme slopes, retain walls with drainage pipes or even a gradual berm (raised mound) can help. Always check local building codes if the slope is very steep!
How do I fix stones that keep shifting after installation?
Shifting stones usually mean poor compaction or drainage issues. Recheck your base layer—it should be compacted gravel or crushed stone (2–3 inches deep). For extra stability, staple landscape fabric under stones and backfill with soil mixed with sand to reduce erosion. If stones still move, add landscape pins or edging to secure them.
What plants thrive in a sloped stone flower bed?
Opt for drought-tolerant, shallow-rooted perennials like lavender, sedum, or Russian sage. For color, try geraniums, penstemon, or alpine flowers. Ground covers (e.g., creeping phlox or ice plant) prevent soil erosion while adding texture. Avoid heavy feeders like roses—they need deep, rich soil that slopes can’t always provide.
Wrapping up and next steps
Building a stone flower bed on a slope isn’t just a landscaping project—it’s a chance to transform your outdoor space into a stunning, functional masterpiece! 🌿 With the right materials, careful planning, and a little elbow grease, you’ve got everything you need to create terraced beauty that drains naturally and showcases your favorite blooms.
The key? Taking it step by step and embracing the process.
Now that you’re armed with all the tips and tricks, roll up your sleeves and get started!
Once your flower bed is complete, consider adding mulch, planting seasonal flowers, or even installing subtle lighting for an extra touch of magic. Your garden will thank you—and so will your neighbors! 🌸