
Landscaping
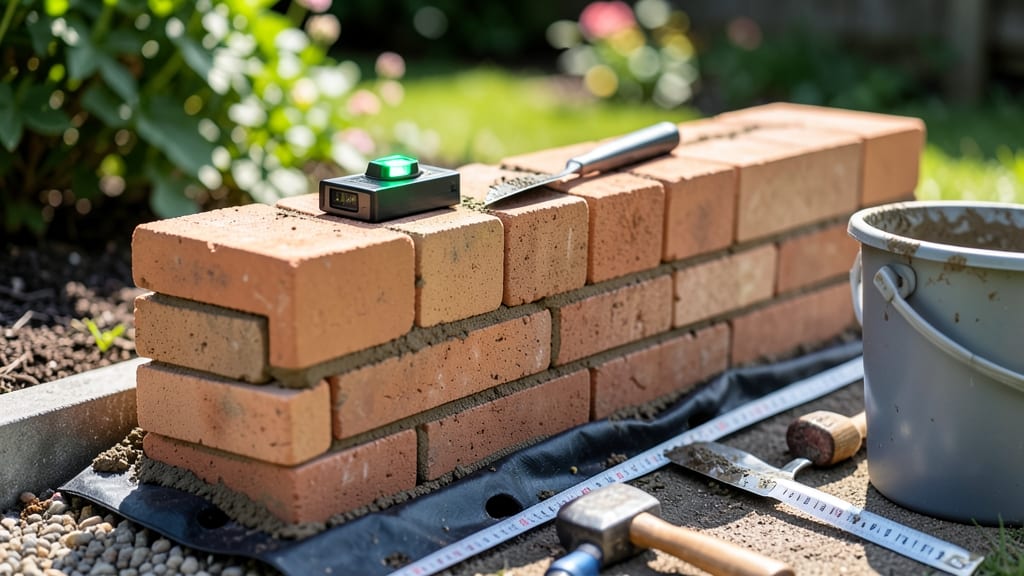
Building a brick planter transforms bare space into a lush, elevated garden that lasts for years. 🌿 I’ve constructed three brick planters in my backyard—herbs along the patio and flowers near the porch—and each one still looks brand new after five seasons.
The key isn’t just stacking bricks; it’s creating a structure that’s sturdy, functional, and beautiful enough to become a focal point.
You’ll need bricks (solid, not hollow), mortar mix, a trowel, a level, and a rubber mallet—plus a few optional extras like landscape fabric for drainage or a waterproof liner if you’re worried about moisture.
My first planter cracked because I skipped the sand layer at the base, so I learned the hard way that prep matters. The good news? Once you get the foundation right, the rest is straightforward assembly.
By the end, you’ll have a custom, weather-resistant planter that elevates your plants (literally and visually), reduces soil erosion, and adds texture to your garden. The bricks create a rustic, timeless look, while the elevated design keeps roots cozy and makes harvesting easier.
Plus, you can customize the size—mine range from 12” tall for herbs to 18” tall for deeper-rooted flowers—without breaking the bank.
Works for any outdoor space, from city balconies to sprawling backyards. The real magic happens when you see your herbs thriving at eye level or your flowers spilling over the edges in summer. Let’s get those bricks stacked!
📚 In This Guide
- What you need
- Instructions
- Tips and common mistakes
- Wrapping up and next steps
What you need
- ● Brick – 10-12 bricks (standard 4" x 8" x 2.25" clay bricks work best). Pro tip: 💡 Use concrete blocks if you want a heavier, more stable design!
- ● Landscape fabric – 1 roll (to prevent weeds and retain moisture).
- ● Gravel or crushed stone – 2-3 bags (20 lbs each) (for drainage at the base).
- ● Potting soil or garden mix – 2-3 bags (2 cu. ft. each) (depending on planter size).
- ● Mortar or brick adhesive – 1 small tub (for bonding bricks) OR landscape adhesive (if you prefer a cleaner look).
- ● Drainage holes material – Drill bit (for bricks) OR pre-drilled bricks (if you want built-in drainage).
- ● Tape measure – To ensure precise dimensions.
- ● Level – Keeps your planter perfectly even! ✨
- ● Wheelbarrow or bucket – For mixing mortar or carrying materials.
- ● Trowel or mortar spreader – For applying adhesive or mortar smoothly.
- ● Drill with masonry bit – Only if drilling your own drainage holes.
- ● Safety gloves & goggles – Because DIY safety first!
- ○ Optional: String line – For marking straight edges.
- ● Paint or stain – To customize your bricks.
- ● Plastic liner – For easier cleanup (if using mortar).
- ● A flat, stable surface (patio, deck, or garden bed).
- ● Access to water (for mixing mortar or cleaning tools).
- ● Basic DIY skills (or patience to learn!).
- ○ Optional but helpful: A helper (bricks can be heavy!).
Step-by-step instructions for building brick planters
Here’s how I build sturdy, weatherproof brick planters that last for years—ideal for herbs, flowers, or even small vegetables.
🪴 Step 1: Gather Materials and Tools
You’ll need 12-15 bricks per planter (depending on size), landscape fabric to line the base, gravel or crushed stone for drainage, and mortar mix (or a dry-stack method if you prefer no mortar). I use concrete blocks for the base—they add stability and prevent shifting. For tools, grab a trowel, level, rubber mallet, and safety gloves.
Check your bricks for cracks or chips before starting—using damaged ones weakens the structure. If you’re using mortar, mix it to a peanut butter consistency (thick but workable). For a dry-stack method, skip mortar and use landscape adhesive between bricks to prevent shifting. Either way, work on a flat, stable surface like a patio or driveway.
🌱 Step 2: Build the Base and First Layer
Start by laying down 2-3 concrete blocks side by side to form the base. These keep your planter elevated and stable. If you’re building a larger planter, add a 4th block at the center for extra support. Place the landscape fabric over the blocks, securing it with a few staples to prevent soil from falling through.
Next, add a 2-inch layer of gravel over the fabric—this ensures proper drainage and prevents root rot. Now, apply a thin layer of mortar (or adhesive) to the top of the blocks and begin stacking bricks in a running bond pattern (staggered, like a brick wall). Tap each brick gently with the rubber mallet to level it—you’ll hear a solid thud when it’s perfectly seated.
💧 Step 3: Stack Bricks and Check for Stability
Continue stacking bricks in a rectangular or square shape, keeping each layer slightly offset from the one below. For a 4-planter setup, use 3 bricks per side—this creates a 12-inch by 12-inch planter (ideal for herbs or small flowers). After every 3rd layer, run your level along the top to ensure everything stays plumb.
Here’s the thing—if your bricks shift after a few days, it’s usually because the base wasn’t stable enough. To prevent this, I recommend adding a 4th concrete block in the center of larger planters. Once you reach your desired height (usually 8-12 inches for most plants), let the mortar cure for 24 hours before adding soil. If you’re dry-stacking, skip the curing time and proceed immediately.
☀️ Step 4: Add Drainage and Soil
After the mortar sets, line the inside of the planter with another layer of landscape fabric, securing it to the sides with staples. This keeps soil in while allowing excess water to drain. Fill the bottom 2 inches with gravel, then add a high-quality potting mix (avoid garden soil—it compacts and suffocates roots). For herbs and flowers, a mix with 20% perlite or vermiculite improves drainage.
Leave a 1-inch gap between the soil and the top of the bricks—this prevents spills when watering. If you’re planting succulents, add a thin layer of coarse sand on top of the gravel for even better drainage. Water the soil lightly before adding plants to help it settle.
✂️ Step 5: Plant and Maintain
Fill the planter with your chosen plants, spacing them according to their mature size. Herbs like basil and thyme thrive in tight quarters, while flowers like petunias need 6-8 inches between plants. Water deeply after planting to encourage root growth, then maintain a consistent moisture schedule—brick planters dry out faster than ground-level beds.
To keep your planters looking sharp, remove weeds regularly and top off soil as it decomposes. If mortar cracks over time, patch it with fresh mix. With proper care, these planters will last 5-10 years**—long enough to enjoy seasons of beautiful, bountiful gardens.
Tips & tricks for building brick planters
These practical insights will help you create planters that stay sturdy, look polished, and last for years—no matter your skill level.
Base Stability is Everything: The 2-3 concrete blocks you use for the base might seem simple, but they're the secret to preventing wobbles. For larger planters (or if you're worried about shifting), add that 4th block at the center—it creates a proper support grid. I've seen planters topple when people skip this, especially on uneven surfaces. Place your blocks on a level surface first, then check with your level tool before adding bricks. A crooked base means crooked planters.
Mortar Consistency Matters: When mixing mortar, aim for that peanut butter consistency mentioned in the instructions—but don't guess. Test it by picking up a small amount with your trowel: it should hold its shape but still be easy to spread. Too thin and your bricks will slide; too thick and you'll struggle to get even coverage. For dry-stacking, use landscape adhesive sparingly—just a thin line between bricks prevents shifting without looking messy. Pro tip: Keep your mortar in a sealed container with a damp towel over it to prevent drying while you work.
Brick Selection and Placement: Not all bricks are created equal. Look for uniform size and shape—mismatched bricks create uneven edges and weak spots. Before building, sort your bricks by size and arrange them in your desired pattern. For the running bond pattern, offset each brick by at least half its length from the one below. This interlocking design is what gives brick planters their signature strength. If you're using secondhand bricks, clean them thoroughly with a wire brush to remove old mortar or debris before assembling.
Drainage Upgrade: The 2-inch gravel layer is non-negotiable for drainage, but you can enhance it further. For planters with succulents or cacti, replace the bottom 1 inch of gravel with coarse sand or small pebbles—this creates better airflow and prevents compaction. Also, consider adding a perforated drainage pipe in the center of your base layer if you're building particularly large planters. This hidden feature prevents waterlogging while keeping your planter looking clean and simple from the outside.
Pro Tips for Build Brick Planter
- These practical insights will help you create planters that stay sturdy, look polished, and last for years—no matter your skill level.
- Base Stability is Everything: The 2-3 concrete blocks you use for the base might seem simple, but they're the secret to preventing wobbles.
- Mortar Consistency Matters: When mixing mortar, aim for that peanut butter consistency mentioned in the instructions—but don't guess.
Frequently asked questions
Got questions about building your own brick planters? You’re not alone! Here are some of the most common concerns—and their straightforward solutions—to help you create a sturdy, stylish elevated garden with confidence.
Can I use any type of brick for a planter?
While any brick can technically work, concrete blocks or pavers are ideal for planters because they’re durable, weather-resistant, and easy to stack. Avoid soft or porous bricks (like clay) unless you seal them—they can degrade faster with moisture. For a rustic look, consider sandstone or brick pavers, but reinforce corners with metal brackets for extra stability.
How tall should my brick planter be?
Standard heights range from 12 to 18 inches, but accessibility matters! For herbs or shallow-rooted flowers, 12–14 inches is perfect for easy planting and harvesting. If you’re growing deeper-rooted plants (like rosemary or lavender), aim for 16–18 inches. Pro tip: Add a drainage layer (gravel or broken pottery) at the bottom to prevent root rot, regardless of height.
Do I need mortar between the bricks?
Not necessarily! For a no-mortar design, interlock bricks with landscape adhesive or brick-specific glue for stability. Mortar adds permanence but can crack over time—ideal if you want a permanent, seamless look. For movable planters, skip mortar and use metal corner braces or L-brackets to secure stacks. Just ensure your bricks are level to avoid wobbling!
How do I protect my brick planter from weather damage?
Bricks are tough, but freeze-thaw cycles and heavy rain can weaken them over time. Seal the bricks with a waterproofing sealer (like silicone-based products) before filling with soil. For extra defense:
- Use weed barrier fabric under the bricks to block moisture from the ground.
- Add a drip edge or slight overhang to shed water away from the sides.
- Elevate planters on feet or pavers to improve airflow underneath.
What’s the best soil mix for brick planters?
Brick planters drain fast, so use a lightweight, well-draining mix:
- 50% potting soil (for nutrients)
- 30% perlite or vermiculite (for aeration)
- 20% compost (for organic matter)
My planter is leaning—how do I fix it?
If your planter feels unstable, don’t panic! Start by leveling the base—remove any uneven bricks or debris underneath. For quick fixes:
- Add adjustable shims (like scrap wood or rubber washers) under wobbly bricks.
- Use metal rebar stakes hammered into the ground at the corners for extra support.
- For tall planters, tie them to a post or fence with bungee cords for wind resistance.
Wrapping up and next steps
Building your own brick planters is a rewarding project that adds charm, functionality, and a personal touch to your outdoor space! 🌱 With just a few materials and some elbow grease, you’ve got the perfect elevated garden for herbs, flowers, or even veggies.
Whether you’re a beginner or a seasoned DIYer, this sturdy design ensures durability while keeping your green thumb happy.
Now that you’re armed with all the tips and tricks, why not start sketching your dream planter layout? Grab a pencil, measure your space, and let your creativity grow—literally! Happy building, and enjoy your thriving brick garden oasis. 🌿✨