
Picking
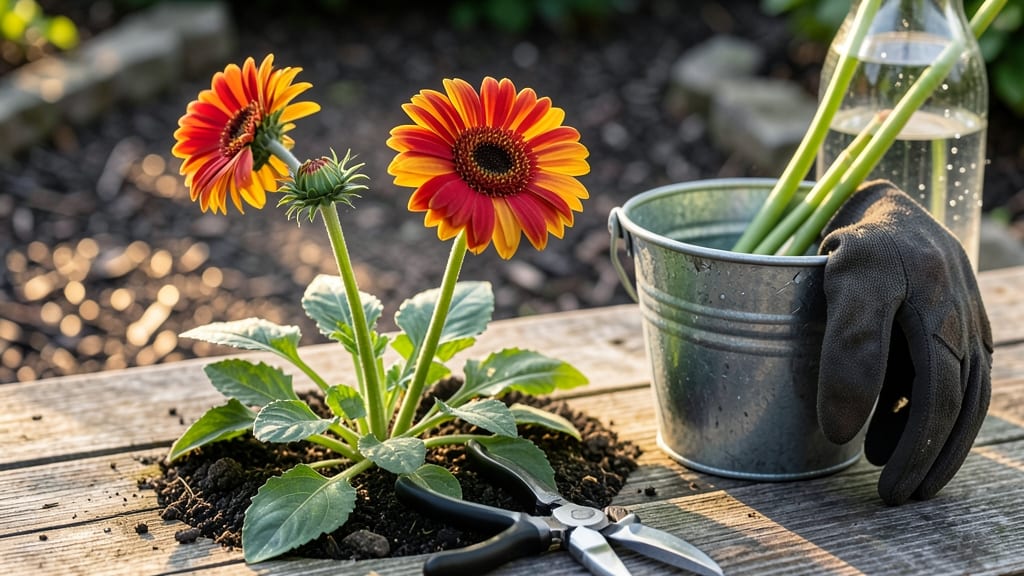
Cut daisies at dawn when petals stay crisp and dew keeps stems hydrated. ✨ The secret to vase life isn't just timing—it's how you handle those stems.
I've learned that a clean cut at the right angle makes all the difference between blooms that last a week and ones that wilt in days. Start with sharp pruners or clean scissors, cutting stems at a 45-degree angle about 6 inches from the base.
This increases water uptake, which is key for those delicate petals. Remove lower leaves that would sit underwater, or they'll rot and shorten your bouquet's life. Once cut, plunge stems immediately into lukewarm water—cold water can shock them.
Re-cut stems every 2-3 days to keep water flowing freely, and change the water every 2 days to prevent bacterial growth. Your daisies will stay fresh for 7-10 days with this care. The good news? Cutting daisies properly encourages more blooms.
The plant senses the cut as a signal to produce new stems, so you're actually helping it grow bushier. Just avoid cutting more than 1/3 of the plant at once—that's the golden rule for keeping your daisy patch happy and productive.
📚 In This Guide
- What you need
- Instructions
- Tips and common mistakes
- Wrapping up and next steps
What you need
- ● Fresh daisies: 10–15 stems (or more, depending on your vase size). Choose daisies with fully opened blooms and sturdy stems—avoid wilted or overly mature flowers.
- ● Sharp floral shears or pruning scissors: A clean pair (sterilized with rubbing alcohol if reused) to make precise cuts without crushing stems.
- ● Clean vase or container: Glass, ceramic, or even a mason jar—just ensure it’s spotless to prevent bacterial growth.
- ● Fresh, cool water: Fill the vase halfway (adjust based on stem length). Room-temperature water works best.
- ○ Floral preservative (optional but recommended): A packet of commercial preservative (like Floralife) or a DIY mix of 1 tsp sugar + 1 tsp bleach per quart of water to extend vase life.
- ● Decorative elements: Grapevine, twine, or a ribbon to tie stems for a rustic look.
- ● Greenery or filler flowers: Baby’s breath, eucalyptus, or ferns to add texture and volume.
- ● Scissors or a knife: As a backup if your floral shears aren’t handy.
- ● Newspaper or wet paper towels: To line your workspace and keep stems clean while arranging.
Step-by-Step instructions for cutting daisies for a vase
Here’s the simple method I use to keep cut daisies fresh and vibrant for over a week.
🌿 Step 1: Choose the Right Daisies at Peak Freshness
Pick daisies when their buds are just starting to open—this is called the "bud stage." Fully open flowers will wilt faster because they’ve already used up their energy. Look for stems that feel sturdy but not woody, and avoid any with brown or yellowing leaves.
Cut daisies early in the morning when they’re fully hydrated. This gives them the longest vase life. If you’re harvesting from your garden, go out right after the dew dries but before the heat of the day sets in. You’ll know you’ve picked the best ones when the petals are tight and the centers are still closed.
✂️ Step 2: Cut Stems at the Perfect Angle and Length
Use sharp pruners or a clean knife to cut stems at a 45-degree angle about 6 inches long. This angle increases the surface area for water absorption, which helps the flowers stay hydrated longer. Avoid using dull scissors—they crush stems and block water uptake.
Make your cut just above a leaf node (the bump where leaves grow out). This encourages new growth and keeps the stem healthy. If you’re cutting multiple stems, trim them all to the same length so they absorb water evenly in the vase.
💧 Step 3: Prepare Stems for Maximum Hydration
Place the cut stems in a bucket of lukewarm water for about 30 minutes before arranging them in your vase. This rehydrates the stems and removes any air bubbles that could block water flow. You can also add a commercial flower food packet (like those sold for roses) to the water to extend vase life.
While the stems soak, remove any lower leaves that will sit below the waterline in the vase. These leaves can rot and create bacteria that shorten the flowers’ life. Just strip them off gently with your fingers—no need to be rough.
🪴 Step 4: Arrange Stems in a Clean Vase with Fresh Water
Fill your vase with room-temperature water (cold water can shock the stems). Trim the stems again by about ½ inch right before placing them in the vase to create a fresh cut that absorbs water better. Arrange the stems loosely so they don’t compete for space—this helps each flower get enough water.
Change the water every 2-3 days and trim the stems by about 1 inch each time. This keeps the water fresh and prevents bacteria buildup. Place the vase in a spot away from direct sunlight, drafts, or ripening fruit (like apples or bananas), which release ethylene gas that speeds up wilting.
☀️ Step 5: Keep Daisies Fresh With Simple Daily Care
Check the water level daily and top it off as needed. Daisies are thirsty flowers and need consistent moisture to stay perky. If the water looks cloudy or smells bad, dump it out and refill with fresh, cool water. This small step makes a huge difference in how long your bouquet lasts.
Mist the flowers lightly with water once a day to keep the petals hydrated from the outside too. Avoid getting water on the centers of the daisies—this can cause them to discolor. With this care, your daisies will stay fresh and beautiful for 7-10 days, making them the star of your home decor.
Tips & tricks for perfect daisy arrangements
These simple secrets will help you extend your daisies' vase life from days to nearly two weeks.
Timing Secret: The 30-minute lukewarm water soak in Step 3 is non-negotiable for serious hydration. I've found that adding a splash of white vinegar (1 tablespoon per quart of water) during this soak helps prevent bacterial growth—just don't use it in the vase itself, as the smell can linger. This extra step gives your stems a fighting chance against those pesky microbes that cause wilting.
Equipment Upgrade: Don't have pruners? A clean kitchen knife works perfectly for Step 2, but here's the thing: always sterilize your cutting tool first by wiping it with rubbing alcohol. I learned this the hard way after using a knife that had touched other plants—my daisies wilted within 24 hours. A fresh cut with clean tools makes all the difference in how long your stems stay healthy.
Visual Cue: In Step 4, when arranging your stems, look for that "just-right" tension—they should stand upright but not feel rigid. If stems feel too stiff, they're not absorbing water properly. Gently bend them slightly at the base to encourage better water uptake. This subtle adjustment can add 2-3 extra days to your bouquet's life.
Daily Care Hack: The daily misting in Step 5 doesn't need to be fancy—just use a spray bottle with room-temperature water. I keep one dedicated to flowers only, and I've noticed my daisies stay perkier when I mist them in the morning rather than evening. This mimics natural dew patterns and helps maintain that fresh-picked look.
Pro Tips for Cut Daisies For A Vase
- These simple secrets will help you extend your daisies' vase life from days to nearly two weeks.
- Timing Secret: The 30-minute lukewarm water soak in Step 3 is non-negotiable for serious hydration. I've found that a...
- Equipment Upgrade: Don't have pruners? A clean kitchen knife works perfectly for Step 2, but here's the thing: always...
Frequently asked questions
Got questions about cutting daisies for your vase? You’re not alone! Here are some of the most common queries—plus quick, expert-friendly answers to keep your bouquet fresh and fabulous.
How do I know when daisies are ready to cut for a vase?
Pick daisies when about 70% of the buds are open—this ensures a mix of blooms for instant color and fresh buds that’ll unfurl over days. Avoid cutting fully open flowers or those with brown edges (a sign of age). Early morning is ideal: stems are hydrated, and you’ll catch the dew for extra freshness!
Should I cut daisies at an angle? Does it really make a difference?
Cutting stems at a 45-degree angle increases surface area for water absorption, helping daisies drink up faster and last longer. Use sharp scissors or pruners to avoid crushing stems. Pro tip: Re-cut stems every 2–3 days as they wilt to keep them happy in the vase!
What’s the best water treatment to extend daisy vase life?
Fill your vase with lukewarm water and add a splash of bleach (1 tsp per gallon) or a commercial flower food packet to prevent bacterial growth. Change the water every 2–3 days—never let it sit stale! For extra oomph, trim stems under water to avoid air bubbles blocking uptake.
Can I use daisies from my garden that have been cut for days?
If your daisies are already wilted or drooping, they’re past saving for a vase. However, if they’re just slightly limp, try this: Recut the stems, submerge them in cool water for 1–2 hours, then place them in fresh water with flower food. If they refuse to perk up, it’s time to let them go (or compost them!).
What’s the best way to arrange daisies in a vase for maximum impact?
Start by trimming stems to even lengths (within 1–2 inches of each other). Place 3–5 stems in a low vase for a lush look, or go bold with a high, narrow vase for drama. Remove lower leaves that’ll sit underwater to prevent rot. Arrange stems in a spiral or fan shape for a natural, full-bodied bouquet!
Wrapping up and next steps
Cutting daisies for your vase doesn’t have to be complicated—just follow the stem secrets we’ve shared! With the right tools, timing, and technique, your bouquet will stay fresh and vibrant for days.
Whether you’re a gardening pro or a beginner, these tips ensure your daisies shine like the stars they are.
Now that you’re ready to florally impress, why not take it a step further? Experiment with different vase setups, like adding a splash of floral preservative or mixing daisies with complementary blooms. Happy arranging! 🌼✨