
Landscaping
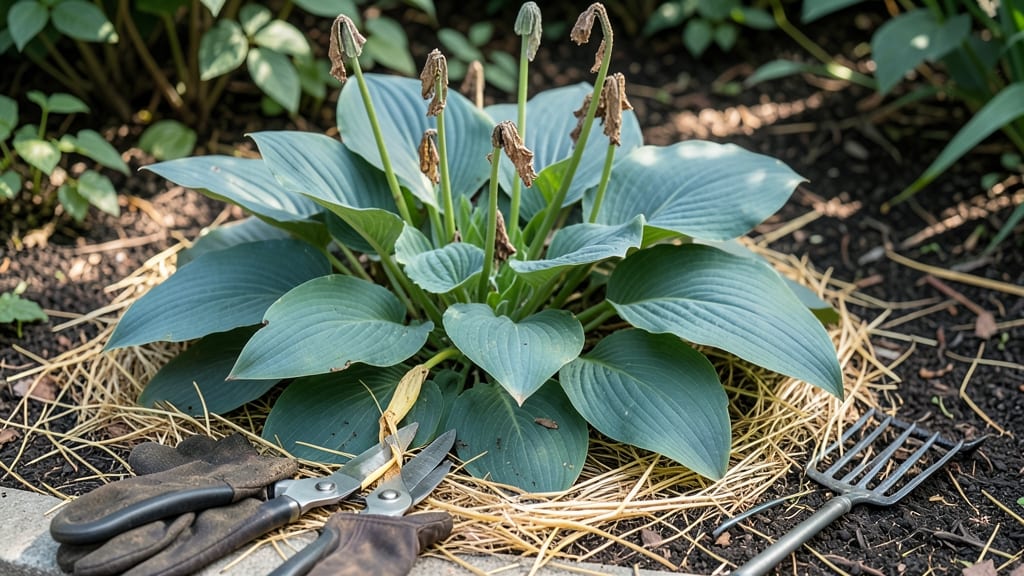
How to cut hostas for winter—the crisp air of late fall is the perfect signal to give your hostas a sharp trim, ensuring vibrant regrowth by spring. I’ve learned the hard way that skipping this step leads to slimy, diseased crowns and weak new shoots. The right technique transforms winter prep from a chore into insurance for next year’s lush foliage.
You’ll need clean, sharp pruners (dull blades crush stems), gloves (hosta leaves love to stain), and a clear day when temps hover above freezing. The goal is to remove yellowed foliage at ground level, never the crown itself—this prevents rot and invites pests to move in.
Think of it as giving your hostas a fresh haircut before hibernation.
Start at the base and cut just above the soil line, leaving the dark, healthy crown untouched. For large clumps, work in sections to avoid disturbing roots. Afterward, clear debris from the bed—this simple step cuts down on slugs and fungal spores over winter.
The result? Clean, dormant plants ready to burst with new growth by April.
This method works for all hosta varieties in zones 3-9, though milder climates may delay pruning until early spring. The key is timing: too early, and you risk frost damage; too late, and you invite disease.
Master this, and your hostas will reward you with thicker, more vigorous foliage every season.
📚 In This Guide
- What you need
- Instructions
- Tips and common mistakes
- Wrapping up and next steps
What you need
- ● Sharp pruning shears or garden scissors – A clean, sharp pair is a must to avoid crushing stems and spreading disease. Opt for bypass pruners (like Felco or Fiskars) for precision cuts.
- ● Disposable gloves – Heavy-duty gardening gloves (e.g., rubber or leather) to protect your hands from thorns, sap, and dirt.
- ● Disinfectant (70% isopropyl alcohol or bleach solution) – A small spray bottle or wipe to sterilize tools before and after use (1 part bleach to 9 parts water).
- ● Garden twine or burlap sacks – For tying up cut foliage or storing divided hostas (if repurposing).
- ○ Garden fork or spade – To loosen soil around hosta crowns before cutting (optional but helpful for large clumps).
- ● Wheelbarrow or large bucket – For collecting debris or storing cuttings if composting.
- ○ Labeling tags (optional but handy) – If dividing hostas, use waterproof plant tags to track varieties.
- ● Knee pads or cushion – For comfort if you’re on hands and knees for extended periods.
- ● Handheld leaf blower or rake – To clear away debris quickly after cutting.
- ● Compost bin or black plastic bags – If you plan to compost hosta leaves (avoid if diseased).
- ● Mulch (straw or shredded leaves) – To protect crowns after cutting (apply a 2–3 inch layer).
Step-by-step instructions for cutting hostas for winter
Protect your hostas from harsh winters with these precise steps—your plants will thank you next spring.
Wait Until After First Frost
Timing is everything here. Wait until after the first hard frost when foliage has turned brown and crispy. This ensures the plant has entered dormancy and won’t regrow from residual energy. If you cut too early, you risk stimulating new growth that winter will kill.
Check your hostas in the morning after a frost. If the leaves feel brittle and crunch when touched, it’s time. Avoid cutting before frost because the plant still has stored energy in its leaves that it needs for next year’s growth.
Gather Your Tools
You’ll need a sharp pair of pruning shears or clean garden scissors—never use dull tools. A sharp blade makes clean cuts that heal faster and reduces the risk of disease. Disinfect your tools with rubbing alcohol before you start to prevent spreading any pathogens.
Wear gloves to protect your hands from the sharp edges of old hosta leaves. A small bucket or trash bag will collect the cuttings, keeping your workspace tidy. I like to work on a dry day when the ground isn’t muddy—it makes cleanup easier.
Cut Back the Foliage
Stand back and assess the plant. Using your pruners, cut the foliage back to about 2 inches above the soil line. This leaves enough room for snow to insulate the crown without burying it. Avoid cutting into the soil—you want to leave the base of the plant intact.
Work methodically around the plant, cutting each stem at a slight angle. This prevents water from pooling on the cut surface, which can lead to rot. If you notice any dead or diseased leaves, remove them separately and dispose of them in the trash—not the compost.
Clean Up Debris and Mulch
Rake up all the cut foliage and remove it from the garden bed. Leaving old leaves can harbor pests and diseases over winter. Place the debris in a sealed bag and add it to your compost pile only if it’s completely free of disease.
After clearing the area, apply a 2-3 inch layer of mulch around the base of the plant. Use shredded bark, straw, or leaves—just avoid fresh wood chips, which can draw moisture away from the soil. This mulch layer acts as insulation, protecting the crown from extreme temperature fluctuations.
Monitor and Adjust
Check your hostas occasionally during winter to ensure the mulch hasn’t shifted or been blown away. If it does, add more to maintain that 2-3 inch layer. Avoid disturbing the plants unless absolutely necessary—every time you move mulch, you risk exposing the crown to cold.
In early spring, when new growth appears, remove the mulch and old foliage. This gives your hostas room to emerge and access sunlight. You’ll know you’ve done it right when you see fresh, vibrant growth within a few weeks.
Tips & tricks for perfectly prepping hostas for winter
Took me a while to figure these out, so here goes—your hostas will thank you next spring.
Timing Secret: Don't rush the frost check! Test leaves in the morning after a hard frost—they should feel completely crisp and crunch when touched. If you cut too soon, you'll wake up dormant buds that winter will kill. I've learned this the hard way after seeing new growth emerge only to freeze back.
Tool Prep: Sharpen your pruners before you start—dull blades tear leaves, creating jagged wounds that invite disease. I like to use a fine-grit sharpening stone to maintain my pruning shears between seasons. Also, disinfecting tools with rubbing alcohol between plants prevents cross-contamination if you're working with multiple hostas.
Cutting Precision: That 2-inch clearance above the soil line is critical—any lower risks burying the crown, which can lead to rot. Use a straightedge or ruler to verify your cuts if you're unsure. I mark the 2-inch point with a pencil on my pruners as a visual guide for consistency across multiple plants.
Mulch Strategy: For extra insulation in harsh climates, consider adding a second layer of mulch after the first snowfall. This creates an air pocket that traps heat. Just remember to remove any snow buildup that might compact the mulch too tightly against the crown.
Pro Tips for Cut Hostas For Winter
- Took me a while to figure these out, so here goes—your hostas will thank you next spring.
- Timing Secret: Don't rush the frost check! Test leaves in the morning after a hard frost—they should feel completely ...
- Tool Prep: Sharpen your pruners before you start—dull blades tear leaves, creating jagged wounds that invite disease....
Frequently asked questions
Got questions about prepping your hostas for winter? You’re not alone! Here are some of the most common concerns—plus straightforward answers to keep your plants thriving.
When is the best time to cut back hostas for winter?
Cut back hostas after the first hard frost (when foliage turns brown or crispy) but before heavy snow or freezing ground. Late fall to early winter (November–January, depending on your climate) is ideal. This timing prevents pests from hiding in dead leaves while still protecting the crown from winter moisture.
Do I need to cut hostas at all if they’re evergreen?
Even evergreen hostas benefit from light trimming! Remove only the yellowed or damaged leaves—never cut into the crown. Evergreens stay green year-round, but dead foliage can harbor slugs or rot. A quick tidy-up keeps them healthy without sacrificing their winter charm.
What’s the difference between cutting hostas and dividing them in winter?
Cutting back is about removing dead leaves to protect the crown, while dividing is digging up clumps to replant or share. Do not divide hostas in winter—they’re dormant and vulnerable to frost damage. Save division for early spring (March–April) when new growth signals it’s safe.
Will cutting hostas attract slugs or pests?
Yes, but only if you leave cut leaves piled near the plant! Slugs love damp, decaying matter. To deter them, remove all debris from the garden, mulch around the base with dry leaves or gravel, and consider organic slug baits like diatomaceous earth if pests are persistent.
What if I miss the winter cutting window—can I do it in spring?
If you skip winter prep, wait until early spring (as soon as the ground thaws) to trim back dead foliage. Hostas are resilient, and removing old leaves then won’t harm them—it just gives them a head start on fresh growth. Just avoid cutting into the crown until you see new shoots emerging.
Wrapping up and next steps
Cutting your hostas for winter is a simple yet rewarding task that ensures healthier, more vibrant plants next spring.
By following the right techniques—like using sharp tools, avoiding over-pruning, and timing your cuts properly—you’ll protect your hostas while keeping your garden looking neat. Now that you’re ready, grab those shears and give your hostas the care they deserve! 🌱✂️
For even more gardening tips, check out our guide on winterizing perennials to keep your entire landscape thriving!