
Pruning
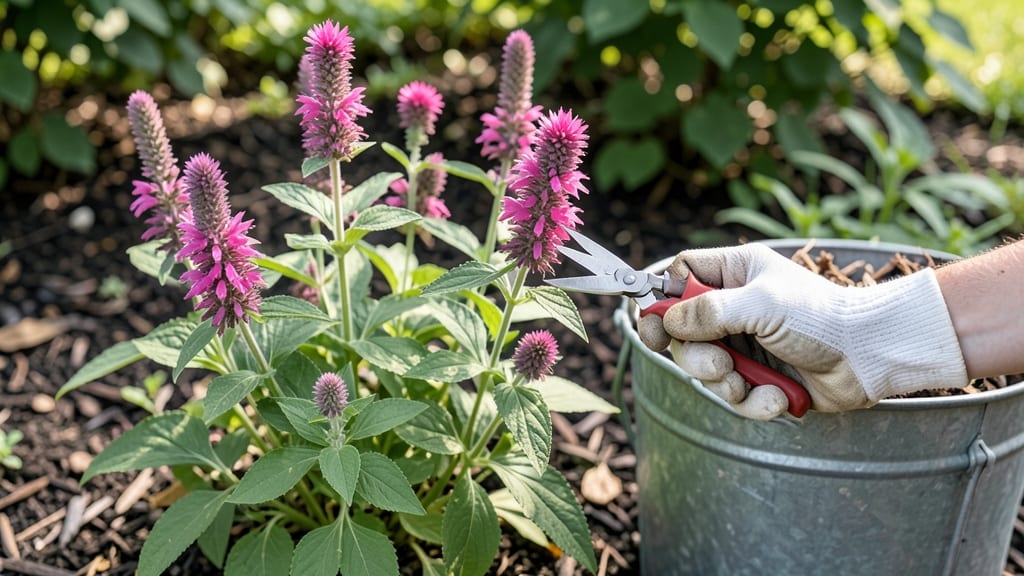
Deadheading bee balm flowers isn’t just about looks—it’s about reviving those bold blooms all season long. 🌿 I’ve watched my bee balm go from a single burst of color to a nonstop floral display for months by mastering this simple technique.
The key? Timing, tools, and knowing exactly where to cut.
You’ll need just three things: sharp pruners (cleaned with rubbing alcohol), a sunny morning, and 10 minutes of focused attention. The best time to deadhead is right after blooms fade—before they form seeds.
This trick keeps your bee balm flowering 2-3 weeks longer than if you ignore it, and it prevents those flowers from self-seeding everywhere (trust me, you’ll thank me later).
Here’s the secret: cut just above the next set of leaves—never too close to the stem, or you’ll stunt new growth. After deadheading, give your plant a light drink of water to help it recover.
Within days, you’ll see fresh buds pushing through, and your bee balm will look like it just got a second wind.
Pro tip: Wear gloves—bee balm’s leaves can be sticky, and the sap might irritate sensitive skin. Also, repeat this process every 5-7 days during peak bloom season. The payoff? A garden that stays vibrant, attracts more pollinators, and keeps giving all summer long.
📚 In This Guide
- What you need
- Instructions
- Tips and common mistakes
- Wrapping up and next steps
What you need
- ● Pruning shears or sharp bypass pruners – Clean, sharp blades (2–4 inches long) to make precise cuts without crushing stems.
- ○ Gloves (optional but recommended) – Garden gloves (nitrile or leather) to protect hands from thorns or sap.
- ● Bucket or trash bag – Medium-sized (5–10 gallons) for collecting spent blooms and debris.
- ● Disinfectant (70% isopropyl alcohol or bleach solution) – 1 part bleach to 9 parts water to sterilize tools between cuts.
- ○ Garden twine or rubber bands (optional) – For bundling heavy stems if deadheading large batches.
- ● Mature bee balm plants – Established for at least 1–2 seasons (young plants may not need deadheading).
- ● Dry, sunny day – Avoid wet conditions to prevent fungal spread.
- ● Patience & timing – Deadhead in the morning when blooms are dry but before pests are active.
Step-by-Step instructions for deadheading bee balm flowers
Reviving your bee balm's blooms takes just minutes but transforms a fading plant into a vibrant, long-flowering powerhouse.
✂️ Step 1: Choose the Right Time and Tools
Deadhead bee balm in the early morning when stems are firm and dew hasn't evaporated—this prevents stressing the plant. I use clean, sharp pruning shears (never fingernails or dull scissors) to make precise cuts just above a leaf node or set of leaves. The key is cutting at a 45-degree angle to increase surface area for new growth.
Look for spent blooms—those with wilted petals and brown centers. If you wait until flowers turn completely brown, you risk attracting pests or encouraging seed production, which diverts energy from new blooms. Bee balm's pink or purple flower clusters will naturally droop when ready for removal.
🌿 Step 2: Remove Spent Blooms Precisely
Grasp the entire spent flower head (including the stem) and snip ½ inch below the cluster. This ensures you don't leave any seed heads behind, which can self-sow aggressively. I like to work in small sections—maybe 2-3 stems at a time—so I don't miss any blooms or accidentally over-prune.
Watch for new buds forming at the base of the stem. These are your signal that the plant is healthy and ready for more blooms. If you see green seed pods developing, you've waited too long—remove those stems completely to redirect the plant's energy.
☀️ Step 3: Encourage New Growth with Light and Water
After deadheading, give your bee balm bright, indirect light for a few hours to recover. I've found that morning sun followed by afternoon shade helps prevent stress. Water the plant deeply—about 1 inch of water per week—to support new growth, but avoid soggy soil, which can rot stems.
You'll notice new flower buds emerging within 7-10 days if conditions are right. The plant may also produce secondary blooms later in the season, especially if you continue deadheading regularly. For longer blooming seasons, repeat the process every 5-7 days during peak flowering.
🪴 Step 4: Maintain Health with Optional Fertilizer
After deadheading, add a balanced, water-soluble fertilizer (like 10-10-10) diluted to half strength to replenish nutrients. I apply it once a month during the growing season to keep blooms vibrant. Avoid high-nitrogen fertilizers—they encourage leafy growth over flowers.
Keep an eye out for yellowing leaves, which can signal overwatering or nutrient deficiency. If you see powdery mildew on leaves, prune affected areas immediately and space plants for better airflow. With consistent care, your bee balm will reward you with continuous blooms from early summer to fall.
Tips & tricks for perfect bee balm deadheading
These precision techniques will keep your bee balm thriving and blooming beautifully all season.
Timing Secret: The 20-30% bloom rule in Step 1 is your golden ratio—this ensures you're never too aggressive while still maintaining continuous blooms. I've found that waiting until you see 2-3 fully open flowers per stem with wilted edges gives the perfect balance. This timing prevents over-pruning while keeping the plant productive. The morning dew makes stems more pliable, so that's my ideal time to work—stems tear less and cuts heal faster.
Pruning Precision: When you're pinching off spent blooms in Step 1, aim for the spot just above where the flower meets the first set of healthy leaves below. This is where new lateral buds form most vigorously. I always use my fingers for small stems and pruners for thicker ones—never cut more than one-third of the plant's height at once (as mentioned in Step 2). This one-third rule prevents shock and maintains the plant's energy reserves for new growth.
Recovery Strategy: After heavy pruning, that 24-hour partial shade period in Step 3 is crucial for recovery. I've seen plants stressed by full sun too soon develop yellow leaves and stunted growth. During this time, focus on deep watering at the base—this encourages root development rather than leafy top growth. The one-week fertilizer application afterward gives the plant exactly the nutrients it needs to push out those fresh buds within 5-7 days, just as the instructions mention.
Seasonal Transition: By late summer, when you notice fewer than 5 new blooms per stem over two weeks, it's time to shift gears. That half-height fall cutback in Step 4 isn't just about tidiness—it's about preparing the plant for winter. I've found that plants cut back this way often produce even more vigorous blooms the following season. This late-season pruning also prevents the plant from putting energy into seed production when it should be focusing on root development.
Pro Tips for Deadhead Bee Balm Flowers
- These precision techniques will keep your bee balm thriving and blooming beautifully all season.
- Timing Secret: The 20-30% bloom rule in Step 1 is your golden ratio—this ensures you're never too aggressive while st...
- Pruning Precision: When you're pinching off spent blooms in Step 1, aim for the spot just above where the flower meet...
Frequently asked questions
When is the best time to deadhead bee balm?
Deadhead bee balm after the first flush of blooms fades (late spring to early summer) and again throughout the season. Aim to trim spent flowers every 2–3 weeks to encourage continuous blooming. Avoid cutting into old wood—focus on wilted blossoms only!
Can I deadhead bee balm too much?
Yes! Over-pruning can stress the plant or remove too many buds. Stick to removing only spent flowers (never more than ⅓ of the plant). If you cut back into the stems, you risk stunting next year’s growth. Think of it like trimming hair—just enough to shape, not shave!
How long does it take for bee balm to rebloom after deadheading?
With proper care, bee balm typically rebounds in 2–4 weeks after deadheading. New buds form quickly if the plant has enough sunlight (6+ hours/day) and well-draining soil. Patience is key—some varieties (like ‘Fireworks’) may take slightly longer but reward you with bold color!
What if my bee balm doesn’t rebloom after deadheading?
Check these fixes:
- Light: Ensure it gets full sun (partial shade may reduce blooms).
- Water: Keep soil consistently moist but not soggy.
- Fertilizer: Apply a balanced 10-10-10 mix in early spring.
- Age: Older plants may bloom less—consider dividing clumps every 3–4 years.
Can I use deadheaded bee balm flowers in arrangements?
Deadheaded blooms make stunning cut flowers—their vibrant colors and long stems hold up well in bouquets. Just trim stems at an angle and place them in water immediately to extend their vase life. Pro tip: Pair with eucalyptus or daisies for a wildflower vibe!
Wrapping up and next steps
Deadheading bee balm flowers is a simple yet rewarding task that keeps your garden vibrant and encourages longer, healthier blooms. By following these three steps—identify, snip, and repeat—you’ll not only boost your plant’s growth but also support local pollinators. 🐝🌿
Now that you’re equipped with the know-how, roll up your sleeves and give it a try! Start with just one stem today, and soon, your bee balm will be thriving with fresh, colorful blooms. Happy gardening!