
Landscaping
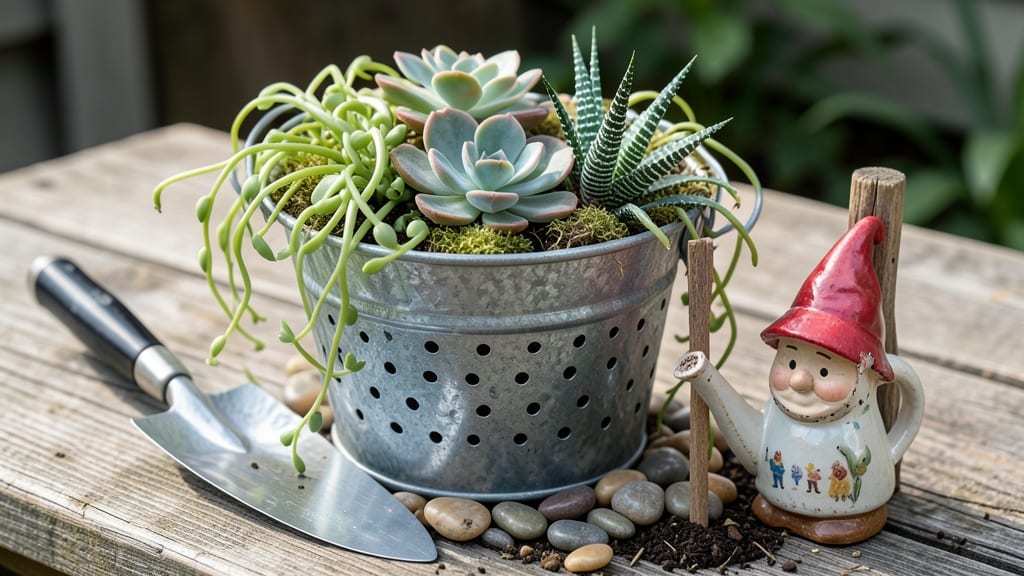
That empty 5-gallon bucket could be your garden's newest star—how to decorate a planter is easier than you think! 🌱 I transformed mine from plain plastic to rustic-chic in under an hour—no fancy tools, just paint, twine, and a little creativity. The best part?
It hides drainage holes perfectly while adding charm to any patio or balcony. Start with a clean bucket and your chosen paint color. Rustic reds, sage greens, or even a two-tone look work beautifully. Add texture with stencils or freehand brushstrokes for that handmade feel.
Twine-wrapped handles elevate it from "planter" to "statement piece"—just knot it loosely so you can still lift it easily. Your finished bucket will hold plants like trailing petunias or herbs while doubling as decor.
The paint protects the plastic from sun damage, and the twine adds grip for those hot summer days. Plus, it’s lightweight enough to move around as your garden evolves. Works for any theme—rustic farmhouse, modern minimalist, or even tropical vibes with bright colors.
The key is balancing aesthetics with plant health: keep drainage holes clear and avoid sealing the entire bucket. Now go give that bucket a makeover!
📚 In This Guide
- What you need
- Instructions
- Tips and common mistakes
- Wrapping up and next steps
What you need
- ● 5-gallon bucket: Clean, food-grade plastic (e.g., white or green) – 1 unit.
- ● Drill: With 1/4-inch or 3/8-inch drill bit for drainage holes.
- ● Sandpaper: Medium-grit (80-120) to smooth edges – 1 sheet.
- ● Paint: Acrylic or outdoor-rated paint (e.g., chalk paint, latex) – 1-2 cans (depending on coverage).
- ● Paintbrush or roller: For even application.
- ○ Clear sealant (optional but recommended): Outdoor varnish or polyurethane to protect your design.
- ● Twine, rope, or burlap: For rustic handles or accents – 1-2 yards.
- ● Hot glue gun + glue sticks: To secure twine or decorative elements.
- ● Drainage material: Gravel, pebbles, or broken pottery – 1-2 cups.
- ● Potting soil: Lightweight, well-draining mix – 3-4 gallons.
- ● Plants: Succulents, herbs, or small flowers (e.g., petunias, basil).
- ● Stencils or stenciling tape for intricate designs.
- ● Chalkboard paint + chalk for a functional touch.
- ● Metal rings, beads, or charms to embellish the twine.
- ● Spray paint for a metallic or ombré effect.
- ● LED string lights for a whimsical nighttime glow.
Step-by-Step instructions for decorating a 5-Gallon bucket planter
Transform a plain bucket into a charming planter with just a few supplies and simple techniques.
🪴 Step 1: Clean and Sand the Bucket
Start by washing the bucket thoroughly with soap and water to remove any dirt or residue. Rinse it well and let it dry completely. This ensures your paint or twine will adhere properly. Once dry, use medium-grit sandpaper to rough up the surface slightly—this helps the paint grip better and prevents peeling later on.
Pay extra attention to the edges and corners where dust and grime tend to accumulate. Wipe away any sanding dust with a damp cloth afterward. A clean, smooth surface is key for a professional-looking finish. If you're using a plastic bucket, skip sanding and clean with rubbing alcohol instead to remove any oils or fingerprints.
🎨 Step 2: Apply Paint or Stain for Color
Choose a paint or stain that suits your style—chalk paint, acrylic, or even a simple spray paint works well. For a rustic look, I like to use matt chalk paint because it covers evenly and has a soft, vintage finish. Apply a thin, even coat with a brush or roller, letting the first layer dry completely before adding a second if needed.
If you're going for a distressed look, lightly sand the dried paint with fine-grit sandpaper after it's fully dry. This creates texture and gives that weathered, shabby-chic vibe. For a more modern look, keep the paint smooth and clean. Let the paint cure for at least 24 hours before adding any decorative elements.
🧶 Step 3: Add Twine or Rope for Rustic Texture
Once your paint is fully dry, wrap jute twine or thick rope around the bucket to add a rustic touch. Start at the top rim and wrap tightly, securing it with a knot or hot glue gun if needed. For a more structured look, space the twine evenly around the bucket. If you're using a lid, wrap twine around it too for a cohesive finish.
For extra charm, tie a bow or loop at the top of the handle or rim. This not only looks decorative but also gives you a place to hang the bucket if needed. If you're using a plastic bucket, you can skip the paint and just wrap twine around it for a simpler, no-fuss look.
✂️ Step 4: Add Finishing Touches
Now it's time to personalize your planter. You can add stencils, decals, or even hand-painted designs for extra flair. If you're using stencils, apply them before the final coat of paint dries. For a natural look, consider adding pebbles, moss, or small succulents around the base to blend it into your garden or patio.
Don’t forget to drill drainage holes at the bottom if your bucket doesn’t already have them. This is crucial for plant health—waterlogged roots will kill your plants quickly. Once everything is in place, fill the bucket with soil and plant your chosen greenery. Your decorated planter is now ready to add charm to any space!
Tips & tricks for perfectly decorated 5-Gallon bucket planters
Here's what I learned the hard way after decorating buckets for years—these little details make all the difference between cute and crafty.
Surface Prep Secret: Don't skip the sanding in Step 1! Even if your bucket looks clean, sanding creates microscopic grooves that make paint and twine adhere like glue. For plastic buckets, that rubbing alcohol step is non-negotiable—oils and fingerprints will make your paint look patchy. I've ruined three painted buckets by skipping this, and trust me, you don't want to peel paint off later!
Paint Application Technique: When applying paint in Step 2, work in thin layers rather than trying to cover everything at once. Thick coats create drips and uneven drying. For that perfect distressed look, use a fine-grit sandpaper (220-grit) after your paint dries completely—just rub gently where you want texture. The 24-hour cure time is crucial; rushing this step means your twine won't stick properly later.
Twine Wrapping Pro Tip: For Step 3, measure your twine before wrapping—cut it about 12 inches longer than you think you'll need. This gives you extra length to work with when tying knots and creates a more polished look. If you're using a lid, wrap the twine in the same direction as the main bucket for visual harmony. And here's a bonus: soak your twine in warm water for 5 minutes before wrapping to make it more pliable and easier to work with.
Drainage Don't: Never skip the drainage holes in Step 4! I've seen too many beautiful buckets where plants died because water pooled at the bottom. If your bucket doesn't have holes, use a drill bit slightly larger than your plants' root balls. For extra style, paint the drainage holes to match your bucket's color scheme—they'll still work perfectly while looking intentional.
Pro Tips for Decorate A 5 Gallon Bucket Planter
- Here's what I learned the hard way after decorating buckets for years—these little details make all the difference be...
- Surface Prep Secret: Don't skip the sanding in Step 1! Even if your bucket looks clean, sanding creates microscopic g...
- Paint Application Technique: When applying paint in Step 2, work in thin layers rather than trying to cover everythin...
Frequently asked questions
Got questions about transforming your 5-gallon bucket planter?
You’re not alone! Here are answers to the most common ones to help you create a stunning, functional planter with ease.
What’s the best paint to use for outdoor bucket planters?
Use acrylic or chalkboard paint for durability and weather resistance. Avoid latex paint—it peels faster. For a rustic look, try stain or milk paint. Always seal with a waterproof outdoor varnish or polyurethane to protect your design from rain and sun. Pro tip: Test paint on a scrap piece first to ensure adhesion!
How long does it take for paint to dry before adding plants?
Let paint cure for 24–48 hours in dry, shaded conditions before planting. If you’re in humid weather, wait 72 hours to prevent smudging or peeling. Patience pays off—rushed planting can ruin your hard work! Use this time to prep soil and choose your plants.
Can I decorate a bucket planter without paint? What are my alternatives?
Try these no-paint options:
- Twine & Stencils: Wrap twine around the bucket and stencil designs for a farmhouse vibe.
- Contact Paper: Use patterned contact paper for a bold, temporary look (great for renters!).
- Natural Materials: Glue on moss, bark, or seashells for an organic feel.
- Rope or Burlap: Wrap the bucket and secure with hot glue for a textured, earthy finish.
For extra flair, add chalkboard labels or LED string lights!
How do I keep pests away from my decorated bucket planter?
Prevent pests with these tricks:
- Drainage Holes: Ensure your bucket has holes to avoid soggy soil (a pest magnet).
- Natural Repellents: Plant marigolds, basil, or lavender nearby.
- Copper Tape: Wrap it around the rim to deter slugs and snails.
- Regular Checks: Inspect leaves weekly for eggs or chew marks.
If pests strike, spray with neem oil or insecticidal soap—safe for plants and your pretty paint job!
What plants thrive in 5-gallon bucket planters?
Opt for compact or trailing plants that won’t outgrow the space:
| Plant Type | Examples |
|---|---|
| Herbs | Basil, thyme, rosemary, parsley |
| Vegetables | Cherry tomatoes, peppers, lettuce, radishes |
| Flowers | Petunias, geraniums, nasturtiums, marigolds |
| Trailing | Strawberries, ivy, or creeping jenny |
For long-term success, choose plants with similar watering needs and rotate them seasonally. Avoid heavy feeders like corn—they’ll need bigger containers!
Wrapping up and next steps
Decorating a 5-gallon bucket planter is a fun, budget-friendly way to add rustic charm to your garden—no fancy tools or skills required! With a little creativity, paint, and twine, you can transform a simple bucket into a stunning planter that reflects your style.
Whether you’re growing herbs, flowers, or veggies, your new planter will be the talk of the neighborhood! 🌿✨
Ready to take the next step? Grab your supplies, pick a design, and let your green thumb shine. Happy planting—and don’t forget to share your masterpiece with fellow gardeners! 📸💚