
Picking
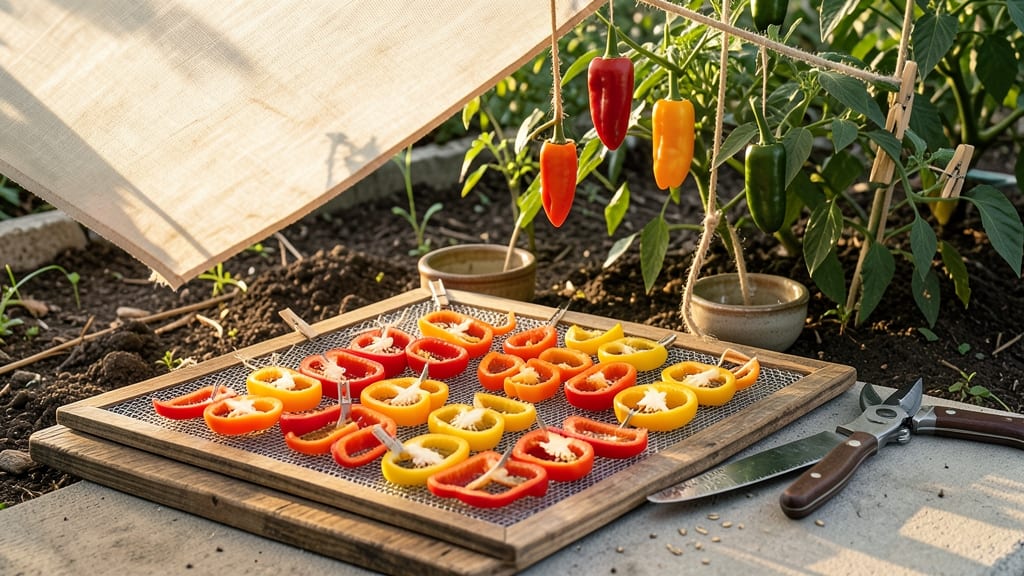
How to dry peppers in the sun transforms summer’s harvest into year-round flavor. ✨ I've preserved everything from sweet bell peppers to fiery jalapeños this way, and the process is simpler than you'd think—just three days of sunshine and a little patience. The key is picking peppers at their peak ripeness, giving them a quick rinse, and slicing them thin enough to dry evenly. Too thick, and they'll stay chewy; too thin, and they'll turn to dust. Your climate matters too—humid days slow drying, while crisp air speeds it up. By day three, you'll have crisp, aromatic peppers ready for storage that taste like summer all winter. They keep for months in airtight containers, perfect for soups, seasoning blends, or snacking straight from the jar. Works for any pepper type—just adjust slice thickness and drying time. Here's exactly how to do it right, from prep to storage.
📚 In This Guide
- What you need
- Instructions
- Tips and common mistakes
- Wrapping up and next steps
What you need
- ● Fresh peppers – Choose firm, ripe peppers (e.g., jalapeños, serranos, bell peppers, or habaneros). Aim for 1–2 pounds depending on your needs.
- ● Sharp knife or pruning shears – For cleanly slicing or halving peppers (avoid crushing or bruising).
- ● Clean, food-safe drying racks or screens – Use mesh screens, wooden racks, or even clean window screens (ensure they’re at least 18" x 24" for good airflow).
- ● String or twine – To secure peppers to racks or hang them (if using a drying line).
- ● Food-grade twine or rubber bands – For bundling pepper stems together (if hanging).
- ● Plastic or mesh bags – For storing dried peppers (ensure they’re breathable to prevent mold).
- ● Sunny outdoor space – A spot with direct sunlight for 6–8 hours/day, minimal humidity, and good airflow (e.g., a porch, balcony, or patio).
- ● Dehydrator – If weather isn’t cooperative, a dehydrator (set to 135–145°F) can speed up drying.
- ● Paper towels – To pat peppers dry before hanging (reduces drying time).
- ● Spice rack or airtight jars – For long-term storage after drying.
- ○ Humidity indicator – A hygrometer (optional but useful for tracking moisture levels).
- ● Labeling tags – To mark pepper types and drying dates.
Step-by-Step instructions for drying peppers in the sun
Here's how I dry peppers perfectly—bold flavor preserved, no wilting or mold, every time.
🌿 Step 1: Harvest and Prepare Peppers for Drying
Pick peppers when fully ripe but still firm—overripe ones will be mushy when dry. Cut stems off with a clean knife, leaving a ½-inch stem attached. This prevents the pepper from splitting open during drying. For even drying, slice thicker peppers lengthwise into ¼-inch strips or cut smaller peppers in half.
Real talk: If you leave the stems too long, they'll block airflow and trap moisture. I always test-fry one pepper first to confirm ripeness—if the skin peels away easily, it's ready. Rinse peppers in cold water and pat completely dry with a clean towel. Any moisture left will slow drying and invite mold.
☀️ Step 2: Choose the Perfect Drying Conditions
Sun drying works best in warm, dry weather (75-85°F) with low humidity (below 50%). I avoid cloudy or damp days—the peppers will take days longer to dry and risk spoilage. If your climate is humid, dry peppers indoors under a fan or in a dehydrator instead. For outdoor drying, place peppers on a clean, elevated surface like a wire rack or mesh screen.
Here's the thing—peppers need airflow on all sides. I spread them out in a single layer, not touching, with the cut sides facing up. If you stack them, the bottom ones will stay damp forever. Watch for first signs of wrinkling (usually 24-48 hours in ideal conditions)—this means drying is working.
🌱 Step 3: Monitor and Rotate Peppers Daily
Check peppers every 4-6 hours to ensure even drying. Use a skewer to test doneness—peppers are ready when the skewer slides in easily with no resistance. If any pepper feels soft or looks glossy, it needs more time. Rotate the tray or screen every 2-3 hours so all peppers get equal sun exposure.
Don't overlook the undersides! I see people forget to flip peppers, and the shaded sides stay damp. You'll know they're fully dried when they're completely wrinkled, leathery to touch, and the stems are crisp. This usually takes 3-5 days, depending on weather. If rain is forecast, bring them inside immediately.
⏰ Step 4: Store Dried Peppers Properly
Once fully dried, let peppers cool completely (about 1 hour) before storing. Remove any remaining stems or seeds if desired. Store in airtight glass jars or vacuum-sealed bags in a cool, dark place. Properly dried peppers will keep for up to 1 year—you'll know they're still good if they snap crisply when broken.
I like to crush dried peppers into flakes right before using them, but you can also keep them whole. Label jars with the date and pepper type—after a few months, you'll forget which is which! For extra preservation, add a ¼ teaspoon of citric acid per jar to prevent mold (optional but helpful in humid climates).
Tips & tricks for perfect sun-dried peppers
These little details make all the difference between peppers that dry evenly and ones that turn out soggy or moldy.
Ripeness Test: I learned this the hard way after ruining three batches—always test-fry one pepper first. If the skin peels away easily from the flesh, your peppers are perfectly ripe. Underripe peppers won't dry properly, and overripe ones will turn mushy. This simple test saves hours of frustration later.
The Airflow Secret: In Step 2, don't just spread peppers out—create space between them. I use a wire rack or mesh screen with at least 1-inch gaps between peppers. This ensures airflow on all sides, which is crucial for preventing mold during those critical first 24-48 hours. Even spacing also means you can check each pepper individually for doneness.
Doneness Test: The skewer test in Step 3 is foolproof, but here's what nobody tells you—look for three things: first, the skewer should slide in with no resistance; second, the pepper should feel completely dry to the touch (no dampness at all); and third, the stem should be crisp and brittle. If any part feels soft or looks glossy, it needs more time in the sun.
Storage Hack: After the 1-hour cooling period in Step 4, I crush my dried peppers into flakes right away using a rolling pin. This preserves their flavor and texture much better than keeping them whole. Store them in small portions—you'll use them up faster and avoid waste. For extra preservation, add that optional ¼ teaspoon of citric acid to each jar before sealing.
Pro Tips for Dry Peppers In The Sun
- These little details make all the difference between peppers that dry evenly and ones that turn out soggy or moldy.
- Ripeness Test: I learned this the hard way after ruining three batches—always test-fry one pepper first. If the skin ...
- The Airflow Secret: In Step 2, don't just spread peppers out—create space between them. I use a wire rack or mesh scr...
Frequently asked questions
about sun-drying peppers—here’s what you need to know before getting started!How long does it take to dry peppers in the sun?
Drying time depends on your climate and pepper type, but most peppers take 3–5 days in direct sunlight (6–8 hours/day). Hot, dry conditions speed it up, while humidity slows the process. Test for readiness by checking for a papery skin and a slight wrinkle—if they snap when bent, they’re done!
Can I dry peppers indoors or with a dehydrator instead?
If you lack sunshine, use a dehydrator (135–145°F for 4–6 hours) or an oven (set to 170°F with the door cracked open). For indoor air-drying, hang peppers in a well-ventilated, warm spot (like a pantry with a fan). Just monitor for mold—indoor methods may take 1–2 weeks.
How do I prevent bugs or mold from ruining my dried peppers?
Start with fresh, disease-free peppers and avoid drying in damp or shaded areas. For extra protection, tie peppers in small bundles or use mesh bags to keep pests out. Store dried peppers in airtight containers (like glass jars) in a cool, dark place—they’ll last 6–12 months!
What’s the best temperature for sun-drying peppers?
Ideal conditions are 75–90°F (24–32°C) with low humidity. Avoid drying in direct midday sun (above 100°F/38°C), as it can scorch peppers. Early morning or late afternoon works best. If rain is forecast, bring peppers indoors to finish drying indoors or in a dehydrator.
Can I dry different types of peppers together?
Yes, but separate mild and hot peppers if you’re concerned about cross-contamination (especially if using them for cooking vs. raw applications). Thicker-skinned peppers (like jalapeños or bell peppers) dry faster than thin-skinned ones (like banana peppers). For even drying, trim stems uniformly and avoid overcrowding on racks or strings.
Wrapping up and next steps
Drying peppers in the sun is a simple yet rewarding way to preserve their bold flavors and extend their shelf life. With just a few tools and a sunny day, you can transform fresh peppers into versatile, long-lasting ingredients for cooking or seasoning.
Now that you’re armed with the know-how, why not try it today? Grab those ripe peppers, set up your drying station, and enjoy the satisfaction of homemade dried peppers—perfect for adding heat and depth to your favorite dishes!
💡 Pro tip: Once dried, store your peppers in airtight containers and share your creations with friends or family. Happy drying!