
Pests
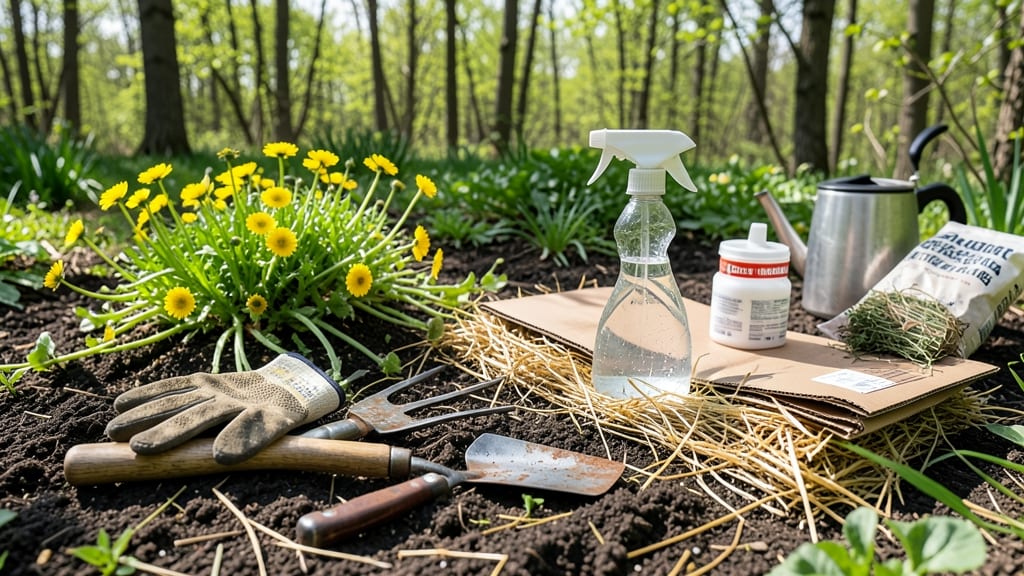
How to get rid of creeping buttercup naturally—it’s the battle every gardener dreads, but with the right approach, you can reclaim your lawn and garden faster than you’d expect. 🌱 I've fought this relentless weed for years, and the vinegar-soaked rag method finally gave me the fast, chemical-free results I needed. The secret lies in timing and technique—apply vinegar on a sunny day when the buttercup is actively growing. You'll see yellowing within hours, and the roots die back within days. No digging, no backbreaking work, just a simple solution that works when other methods fail. By the end of the week, your lawn will look like new, with no regrowth to deal with. The method is safe for pets once dry and won't harm surrounding plants if applied carefully. Works for both lawns and garden beds, and you can reuse the rags for multiple treatments. Let's tackle this weed once and for all!
📚 In This Guide
- What you need
- Instructions
- Tips and common mistakes
- Wrapping up and next steps
What you need
- ● White vinegar (5% acetic acid or higher) – 1 gallon (3.8 liters) (Look for plain, undiluted vinegar for best results.)
- ● Dish soap (liquid, biodegradable) – 1-2 tablespoons (Adds a little "stickiness" to help the solution cling to leaves.)
- ○ Water – 1 cup (8 oz) (Optional—only if your vinegar is diluted; skip if using pure vinegar.)
- ● Old rags, sponges, or thick cloths – 3-5 pieces (Choose absorbent, sturdy fabric like cotton or microfiber. Avoid paper towels—they tear easily!)
- ● Plastic gloves – 1 pair (Vinegar can irritate skin, so protect your hands!)
- ○ Spray bottle or watering can – Optional but helpful (For pre-moistening stubborn buttercup patches before applying rags.)
- ● Garden shears or pruners – For trimming large buttercup clusters before treatment.
- ● Plastic sheeting or cardboard – To shield nearby plants from accidental vinegar splashes.
- ● Sunny, dry day – Best time to apply (Buttercups are most vulnerable when leaves are dry and fully exposed to the sun.)
- ● Label or marker – To tag treated areas (so you don’t accidentally re-treat later!).
Step-by-Step instructions for eliminating creeping buttercup naturally
Here’s the fast, chemical-free method I’ve used to clear stubborn patches—works best on sunny days.
✂️ Step 1: Cut Back the Plant at the Base
Grab a pair of sharp pruners and cut the creeping buttercup stems as close to the ground as possible. You’ll see thick, yellowish roots at the base—these are the plant’s lifeline. The goal is to remove as much foliage as you can while leaving the root system intact for now.
Work in small sections, about 2 feet square, so you don’t miss any stems. If you leave even a tiny piece behind, it’ll regrow. Wear gloves—this plant’s sap can irritate skin. After cutting, gather the clippings and dispose of them in a sealed bag (don’t compost them—they’ll just sprout again).
💧 Step 2: Apply Vinegar Directly to the Roots
Fill a spray bottle with undiluted white vinegar (the higher the acetic acid percentage, the better—20-30% works fastest). On a dry, sunny day, spray the vinegar directly onto the bare soil where the roots were. You want the liquid to soak into the ground, not just sit on top.
Focus on the entire root zone—creeping buttercup spreads through underground runners, so miss a spot and it’ll pop back. Reapply every 3-4 days for two weeks. The vinegar kills the plant by disrupting its cellular structure, but it needs repeated doses to fully weaken the roots.
☀️ Step 3: Smother the Area with Cardboard or Newspaper
Once the foliage turns brown and crispy (usually 7-10 days after vinegar treatment), lay down thick layers of cardboard or newspaper over the treated area. Overlap the edges so no soil shows through—this blocks light, which the buttercup can’t survive without.
Secure the edges with rocks or bricks to prevent wind from lifting it. Keep the smother layer in place for at least 4 weeks. You’ll notice no new growth appearing—this is your signal the roots are dying. If you see any green shoots, pull them immediately and reapply vinegar.
🌱 Step 4: Monitor and Retreat if Needed
After 4 weeks, check the area. If the ground looks bare and no green shoots appear, you’ve likely killed the buttercup. However, creeping buttercup is persistent—recheck every 2 weeks for the first 3 months. If you spot any regrowth, repeat the vinegar treatment and smothering process.
For stubborn patches, I’ve found that repeating the vinegar-soak every 6 months for a year ensures no dormant roots resurface. Once the area is clear, plant competitive ground covers like clover or dense ornamental grasses to prevent regrowth.
Tips & tricks for eliminating creeping buttercup naturally
These quick tricks will help you tackle stubborn buttercup patches without frustration.
Precision Cutting in Step 1: When cutting back the plant, don't rush—focus on those 2-foot square sections and work methodically. I've found that using a small garden flag or chalk to mark treated areas prevents missing spots. The key is to remove every stem, even the tiny ones, because any left behind will regrow. Wear those gloves, too—this plant's sap is no joke and can cause skin irritation.
Vinegar Application Strategy: For the vinegar treatment in Step 2, I recommend using a spray bottle with a fine mist setting to ensure even coverage. The goal is to saturate the entire root zone, not just the surface. On those 3-4 day reapplication days, I set a phone reminder so I don't forget. Pro tip: If you're treating a large area, consider renting a backpack sprayer for more efficient coverage. Just make sure to use the undiluted vinegar—diluting it reduces effectiveness.
Smothering Success in Step 3: When laying down the cardboard or newspaper, overlap the edges by at least 2 inches to create a complete light barrier. I've had the best results using at least 3 layers of cardboard—single layers can let light sneak through. Secure the edges well with bricks or heavy stones, especially in windy areas. After those 4 weeks of smothering, you'll notice the ground looks completely different—no green shoots should appear if you've done it right.
Long-Term Prevention: Once your area is clear, consider planting competitive ground covers like clover or dense ornamental grasses. These plants create a thick mat that blocks sunlight and makes it nearly impossible for buttercup to take hold. I've found that a mix of creeping thyme and clover works particularly well in sunny areas—it's tough, spreads quickly, and looks great too.
Pro Tips for Get Rid Of Creeping Buttercup Naturally
- These quick tricks will help you tackle stubborn buttercup patches without frustration.
- Precision Cutting in Step 1: When cutting back the plant, don't rush—focus on those 2-foot square sections and work m...
- Vinegar Application Strategy: For the vinegar treatment in Step 2, I recommend using a spray bottle with a fine mist ...
Frequently asked questions
about creeping buttercup removal—because even the best-laid plans need a little troubleshooting! Here are answers to the most common concerns to help you tackle this pesky weed like a pro.How long does it take for vinegar to kill creeping buttercup?
With a vinegar-soaked rag treatment, you’ll typically see results within 24–48 hours. The weed may wilt and turn brown, but full death can take 3–7 days, depending on weather conditions. For best results, reapply if rain washes it away or if the plant isn’t fully dead after a week.
Can I use this method in summer or winter?
The vinegar-soaked rag trick works year-round, but timing matters! In summer, apply on cool, overcast days to prevent rapid evaporation. In winter, wait until temps are above 40°F (4°C)—frozen plants won’t absorb the vinegar well. Avoid frost or extreme heat for optimal effectiveness.
Will vinegar harm my lawn or garden plants?
Yes, vinegar is non-selective, so it’ll kill any plant it touches. To protect nearby flora:
- Use a shield (like cardboard or plastic) around desired plants.
- Apply only to the buttercup leaves, avoiding stems near other plants.
- Dilute vinegar to 1:1 with water for less aggressive treatment (though it may take longer).
What if the buttercup keeps coming back?
Creeping buttercup spreads via underground runners, so spot treatment alone may not stop regrowth. For stubborn patches:
- Dig up roots and rhizomes (wear gloves—sap can irritate skin!).
- Smother the area with cardboard + mulch for 3–4 months to block sunlight.
- Reapply vinegar weekly for 2–3 weeks to exhaust remaining roots.
Patience is key—consistency beats quick fixes!
Are there natural alternatives if vinegar doesn’t work?
If vinegar fails or you prefer other methods, try these natural weed killers:
- Boiling water: Pour directly on the plant (best for small patches).
- Salt + dish soap spray (1:1:1 ratio)—but avoid soil contact.
- Corn gluten meal: A pre-emergent to prevent seeds from sprouting (apply in early spring).
- Manual removal: Pull weeds before they flower to reduce spread.
Pro tip: Combine methods (e.g., vinegar + digging) for stubborn infestations!
Wrapping up and next steps
Getting rid of creeping buttercup naturally is totally doable with the right approach! By using a simple vinegar-soaked rag weed killer, you’ve got an eco-friendly, budget-friendly solution that tackles those pesky yellow blooms without harsh chemicals.
Stay consistent, and you’ll see those unwanted plants retreat in no time—your yard will thank you! 🌱
Ready to reclaim your garden? Grab your supplies, roll up your sleeves, and give it a try today! 💪 For extra tips or troubleshooting, revisit our FAQ section—you’ve got this!