
Size
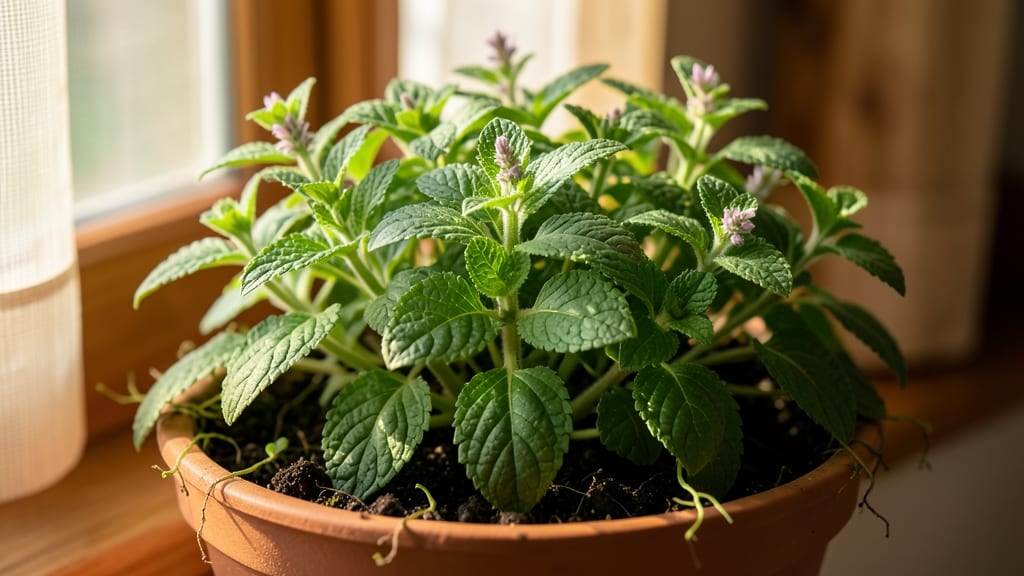
That first whiff of how to grow the chocolate mint plant—like a candy bar growing in your garden—is worth every ounce of containment effort. 🌱 It’s the one herb that smells like dessert but grows like a weed (which, honestly, is half the fun).
The trick isn’t just growing it—it’s keeping it from taking over your yard while still getting those lush, fragrant leaves.
Chocolate mint thrives in partial shade to full sun and moist, well-draining soil—basically, anywhere with consistent water. Start with cuttings (easier than seeds) and plant them in containers or buried pots to stop that aggressive spread.
Prune regularly to encourage bushiness, and you’ll have a fragrant, productive plant without the invasive chaos.
By summer, you’ll be snipping leaves for teas, cocktails, or desserts, all while keeping it neatly contained. The key? Root barriers or heavy-duty containers—because once it escapes, good luck getting it out. This plant is forgiving but not subtle.
Perfect for patios, windowsills, or even hanging baskets—just be prepared for its sweet, intoxicating scent to lure you into over-harvesting. (We’ve all been there.) Let’s get growing!
📚 In This Guide
- What you need
- Instructions
- Tips and common mistakes
- Wrapping up and next steps
What you need
- ● Chocolate mint plant: Start with a healthy cutting (4–6 inches long with leaves), seeds, or a nursery-grown plant.
- ● Well-draining potting mix: Use a blend of peat moss, perlite, and compost (or a pre-mixed herb/vegetable mix). 1–2 gallons per pot is ideal.
- ● Containers: Pots with drainage holes (6–12 inches wide) or a garden bed with 6+ hours of sunlight.
- ● Watering can or spray bottle: For gentle hydration—avoid soggy soil!
- ○ Fertilizer (optional but helpful): A balanced liquid fertilizer (10-10-10) or organic compost tea. Dilute to ½ strength.
- ● Pruning shears or sharp scissors: For clean cuttings (sterilize with rubbing alcohol).
- ● Trowel: For transplanting or dividing roots.
- ○ Gloves (optional): Mint can be invasive—gloves help manage spread!
- ○ Mulch (optional): Straw or shredded leaves to retain moisture.
- ● Sunlight: Partial shade to full sun (morning sun + afternoon shade works best).
- ● Temperature: Thrives in USDA Zones 3–9; avoid frost if growing outdoors.
- ● Humidity: Prefers moderate to high humidity—mist leaves if air is dry.
Step-by-Step instructions for growing chocolate mint plants
Here's how I grow chocolate mint—thick, fragrant, and contained so it doesn't take over the garden.
🌱 Step 1: Select the Right Container and Soil Mix
Choose a 10-12 inch deep container with drainage holes—chocolate mint thrives when its roots have room to spread but are contained. I use a fabric grow bag because it prevents root circling while allowing excess moisture to evaporate. Fill the bottom third with orchid bark or coarse perlite for drainage, then add a mix of 50% potting soil and 50% coconut coir—this keeps the roots aerated and prevents compaction.
Moisten the mix until it feels like a damp sponge, not dripping. Chocolate mint prefers consistently moist (but not soggy) soil, so I always test by squeezing a handful—if water beads up, it's too wet. The right moisture level should feel slightly resistant when pressed but not dry.
🌿 Step 2: Plant and Position for Optimal Growth
Plant your chocolate mint 1 inch below the soil surface, spacing multiple stems 6 inches apart to encourage bushiness. If using a single cutting, bury it halfway to encourage root development. Gently firm the soil around the stems to eliminate air pockets, which can cause rot.
Place the container in partial shade to full sun—chocolate mint tolerates shade better than spearmint, but too little light makes the leaves lose their rich cocoa aroma. I position mine where it gets 4-6 hours of morning sun and afternoon shade, especially in hotter climates. Watch for leaves turning pale yellow—this signals too much direct sun.
💧 Step 3: Water and Fertilize for Maximum Flavor
Water deeply when the top inch of soil feels dry, but avoid letting the roots sit in water. Chocolate mint is drought-tolerant once established, but young plants need consistent moisture. I water in the morning so excess moisture evaporates by evening, reducing fungal risks. Use room-temperature water to avoid shocking the roots.
Feed every 4-6 weeks with a balanced liquid fertilizer (10-10-10) diluted to half-strength. The rich, chocolatey scent intensifies with proper feeding. I also add a handful of compost tea monthly to boost microbial activity—this makes the leaves even more fragrant and disease-resistant.
✂️ Step 4: Prune and Maintain for Lush Growth
Pinch back the tips of new growth when stems reach 4-6 inches tall to encourage bushier, denser foliage. Regular pruning also prevents the plant from becoming leggy, which happens when it stretches for light. I harvest leaves in the morning after the dew has dried—this preserves the essential oils that give chocolate mint its signature aroma.
Divide the plant every 2-3 years when it outgrows its container. Simply lift it, separate the root clumps, and replant. This rejuvenates the plant and gives you free cuttings to share. If you notice yellowing leaves at the base, it's time to divide—this is a sign the center is getting woody and less productive.
🌿 Step 5: Overwinter and Prevent Spread
Chocolate mint is hardy down to USDA Zone 5, but in colder climates, I bring containers indoors before the first frost. Place it near a bright window or under a grow light and reduce watering to every 10-14 days—the plant goes semi-dormant in winter. If you leave it outside, mulch heavily with straw or shredded leaves to insulate the roots.
To prevent chocolate mint from spreading aggressively, I always plant it in containers. If you do grow it in the ground, install a deep root barrier to contain the runners. Even with these precautions, I’ve found that harvesting regularly keeps the plant focused on leaf production rather than spreading.
Tips & tricks for perfect chocolate mint cultivation
Took me years to master these tricks—here's how I keep my chocolate mint thriving without it taking over the yard.
Container Selection: The 10-12 inch depth requirement in Step 1 is non-negotiable for root health, but I always choose containers with at least 12 inches in diameter too. This extra width prevents root competition and gives you more harvestable foliage. Fabric grow bags are my top pick because they allow excess moisture to evaporate while preventing root circling—something rigid plastic pots can't do.
Soil Moisture Secret: That damp sponge test in Step 1 is crucial, but here's the pro move: I add a handful of horticultural charcoal to my soil mix before planting. This improves drainage and prevents fungal issues while maintaining the moisture chocolate mint loves. Think of it as insurance against soggy roots.
Light Positioning: The 4-6 hours of morning sun in Step 2 is perfect, but I've found that positioning containers on the north side of patios or decks gives them natural afternoon shade protection. If you notice yellowing leaves, it's not just too much sun—sometimes it's a sign of nutrient deficiency from overwatering. Adjust your watering schedule first before assuming it's light exposure.
Pruning Payoff: When you pinch back those 4-6 inch stems in Step 4, you're not just shaping the plant—you're triggering bushier growth. I harvest leaves in the morning because that's when essential oils are most concentrated. Save those cuttings! Root them in water for free propagation—just change the water every 2-3 days to prevent bacterial growth.
Pro Tips for Grow Chocolate Mint Plant
- Took me years to master these tricks—here's how I keep my chocolate mint thriving without it taking over the yard.
- Container Selection: The 10-12 inch depth requirement in Step 1 is non-negotiable for root health, but I always choos...
- Soil Moisture Secret: That damp sponge test in Step 1 is crucial, but here's the pro move: I add a handful of horticu...
Frequently asked questions
Got questions about growing chocolate mint? You’re not alone! Here are answers to the most common concerns—so you can grow this fragrant, low-maintenance plant with confidence.
How fast does chocolate mint spread, and how do I control it?
Chocolate mint is aggressive—it can spread up to 3 feet per year! To control it, plant in containers or divide roots every 1–2 years. For in-ground growth, use root barriers or trim runners regularly. Pro tip: Harvest often to encourage bushier (and less invasive) growth!
When is the best time to plant chocolate mint?
Plant in early spring (after the last frost) or early fall for optimal root establishment. Avoid summer heatwaves—young plants struggle in extreme temperatures. If transplanting, do it on a cloudy day to reduce stress. Bonus: It’s hardy in zones 3–9, so timing depends more on your climate than the season!
Why does my chocolate mint smell like regular mint instead of chocolate?
True chocolate mint (Mentha × piperita 'Chocolate') has a caramel-like, cocoa scent. If yours smells bland, check:
- Light: Needs 4–6 hours of sun (too much shade = weak flavor).
- Soil: Poor drainage or nutrient deficiency dulls aroma. Use well-draining, rich soil.
- Variety: Some "chocolate mint" hybrids are mislabeled. Buy from reputable nurseries for authenticity.
What pests or diseases should I watch for, and how do I treat them?
Chocolate mint is mostly pest-free, but watch for:
- Aphids: Spray with soapy water or introduce ladybugs.
- Powdery mildew: Improve air circulation and avoid overhead watering.
- Root rot: Ensure well-draining soil—this plant hates soggy roots!
Prevention tip: Mulch with straw to deter weeds and retain moisture without suffocating roots.
Can I grow chocolate mint indoors, and what’s the best setup?
Yes! Place in a sunny window (south-facing) or under grow lights (12–14 hours/day). Use a 6–8" pot with drainage holes and moist, well-draining potting mix. Rotate the pot weekly for even growth. Warning: It may spread faster indoors—prune regularly to keep it contained!
What’s a good alternative if chocolate mint spreads too much?
Try these low-spreading mint varieties for similar flavor and fragrance:
- Peppermint 'Chocolate Chip' (milder spread, still chocolatey).
- Apple mint (sweet, compact, and fragrant).
- Pennyroyal (tiny leaves, strong aroma, but toxic to pets).
For containers, Mentha requienii (dwarf mint) is a great choice!
Wrapping up and next steps
Growing your own chocolate mint is simpler than you think—and the rewards are delicious! With the right sunlight, soil, and a little patience, you’ll soon enjoy a fragrant, fast-spreading plant perfect for teas, cocktails, or fresh garnishes. Don’t wait—start your patch today!
Ready to take the next step? Grab your seeds or cuttings, prep your garden space, and watch your chocolate mint thrive! 🌱🍫