
Size
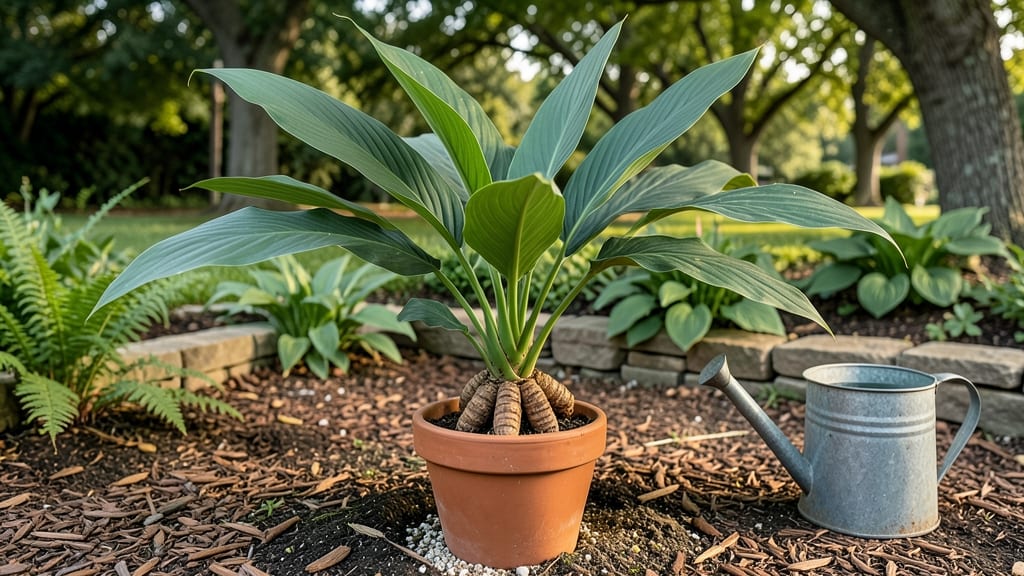
How to grow the curcuma ginger plant yields golden harvests in just six months. 🌱 I’ve grown turmeric through two Florida summers, and the secret isn’t fancy soil—it’s patience, warmth, and knowing exactly when to water. Most people rush the process, but turmeric rewards those who mimic its tropical jungle roots. Start with whole rhizomes (not powder) planted 2 inches deep in well-draining soil. They need 6+ hours of sunlight daily and consistent moisture—like a rainforest, not a desert. The first shoots appear in 2-3 weeks, but full harvest takes 6-8 months from planting. By harvest time, you’ll dig up bright orange rhizomes packed with anti-inflammatory compounds. The flavor? Nothing like store-bought. And yes, you can replant pieces—each rhizome grows into a new plant. Works best in zones 8-11, but containers let you grow it anywhere with a sunny spot. Here’s how to avoid the two biggest mistakes: overwatering and planting too deep.
📚 In This Guide
- What you need
- Instructions
- Tips and common mistakes
- Wrapping up and next steps
What you need
- ● Curcuma ginger rhizomes: 3–5 healthy, disease-free rhizomes (each with at least 2–3 "eyes" or buds). Pro tip: 💡 Buy organic or from a trusted nursery for best results!
- ● Well-draining potting mix: 5–10 gallons of a blend of 60% coconut coir/peat moss, 30% perlite or coarse sand, and 10% compost.
- ● Containers: 2–3 large pots (12–18 inches deep) with drainage holes or a raised bed (if planting outdoors).
- ● Watering can or hose: With a gentle spray nozzle for even moisture.
- ● Fertilizer: Balanced liquid fertilizer (10-10-10 or 20-20-20): 1 tbsp per gallon of water, applied every 4–6 weeks.
- ○ Organic compost tea: Optional but great for micronutrients!
- ● Mulch: 1–2 inches of straw or shredded leaves to retain moisture.
- ● Grow lights: LED full-spectrum bulbs (if indoors and lacking sunlight).
- ● pH test kit: To ensure soil pH is 6.0–7.0 (curcuma loves slightly acidic soil!).
- ● Rhizome knife: A sharp, sterilized knife for dividing rhizomes (if propagating).
- ● Humidity tray: A shallow tray with pebbles and water to boost humidity (great for indoor setups!).
- ● Insecticidal soap: For pest control (e.g., spider mites or aphids).
Step-by-Step instructions for growing curcuma ginger plant
Here's how to coax this tropical rhizome to thrive in your garden or containers.
🌱 Step 1: Select and Prepare Rhizomes
Choose firm, plump rhizomes from a specialty grower—store-bought turmeric won't regrow. Look for eyes (small buds) on the rhizome; each eye will sprout a new plant. Soak the rhizome in lukewarm water for 24 hours to soften the skin and encourage faster sprouting.
After soaking, let it dry for 1-2 hours at room temperature. This prevents rot when planting. I like to make small notches near the eyes with a sterilized knife—this signals where roots will emerge and helps prevent buried eyes from rotting underground.
🪴 Step 2: Plant in Well-Draining, Warm Soil
Curcuma needs rich, loose soil with a pH between 6.0-7.5. Mix 2 parts potting soil with 1 part perlite to improve drainage—this plant hates soggy roots. In containers, use pots at least 12 inches deep with drainage holes; rhizomes need room to spread horizontally.
Plant rhizomes 2-3 inches deep, with the eyes facing upward. Space them 6-8 inches apart in garden beds. Water lightly after planting, but don't soak—the rhizomes are sensitive to waterlogging. Place in a location with bright, indirect light (like under 50% shade cloth) for the first 2 weeks while roots establish.
☀️ Step 3: Provide Consistent Warmth and Moisture
Curcuma thrives in warmth—ideal temperatures are 75-85°F. If your climate dips below 60°F, grow it in containers and bring indoors or use a heat mat. Water when the top 2 inches of soil feel dry, but avoid letting the soil dry out completely—rhizomes need even moisture to grow.
Fertilize lightly every 4-6 weeks with a balanced organic fertilizer (like 5-5-5). Too much nitrogen makes leaves lush but weakens rhizome development. You'll know you're on track when long, lance-shaped leaves emerge—these are a sign the plant is happy and storing energy in its roots.
⏰ Step 4: Monitor Growth and Harvest in 6 Months
Curcuma grows slowly but steadily. By month 3, you should see 3-4 foot tall leaves with bright green, waxy foliage. This is when the rhizome starts bulking up underground. If grown in containers, rotate the pot weekly to prevent leaning toward light.
Harvest when leaves yellow and die back (usually 6-8 months after planting). Dig carefully with a fork to avoid damaging rhizomes. Cure them in direct sunlight for 2-3 weeks to deepen the color and improve flavor. Store in a cool, dry place—they'll keep for months if handled properly.
Tips & tricks for perfect curcuma ginger growth
Growing curcuma successfully comes down to these key details that make all the difference between a thriving plant and a struggling one.
Rhizome Selection: In Step 1, don't just grab any rhizome—look for ones with multiple eyes (those little buds) and firm, unblemished skin. I've found that rhizomes with 3-4 eyes produce the most vigorous plants. If you're unsure which end to plant, remember: the eyes should face upward, just like planting potatoes. The 24-hour soak isn't optional—it softens the tough skin and jumpstarts root development, which is why I always do this step even when I'm in a hurry.
Soil Preparation Strategy: When mixing your 2 parts potting soil to 1 part perlite in Step 2, don't skimp on the perlite. This isn't just about drainage—it creates air pockets that prevent the dreaded rhizome rot. I've had plants fail because I used too much regular soil. Also, if your soil tests outside the 6.0-7.5 pH range, amend it with lime to raise pH or sulfur to lower it. Curcuma is particular about this, and you'll see it in the plant's health.
Temperature Management: The 75-85°F range in Step 3 is non-negotiable for optimal growth. If you're in a cooler climate, don't just plant and hope—use a heat mat or grow lights to maintain warmth. I've seen plants in 60°F conditions struggle to establish, even with all other conditions perfect. Consider this your early warning system: if leaves start yellowing at the edges despite good watering, your plant is likely too cold.
Harvesting Timing: In Step 4, the 6-8 month window might seem long, but patience pays off. I've harvested too early and gotten tiny, underdeveloped rhizomes that weren't worth the effort. Watch for those yellowing leaves as your cue—they signal the plant is redirecting energy back into the rhizome. The 2-3 week curing period in direct sunlight isn't just about color; it develops those complex flavors we all love in fresh turmeric.
Pro Tips for Grow Curcuma Ginger Plant
- Growing curcuma successfully comes down to these key details that make all the difference between a thriving plant an...
- Rhizome Selection: In Step 1, don't just grab any rhizome—look for ones with multiple eyes (those little buds) and fi...
- Soil Preparation Strategy: When mixing your 2 parts potting soil to 1 part perlite in Step 2, don't skimp on the perl...
Frequently asked questions
Got questions about growing curcuma ginger?
Here are answers to the most common ones—so you can troubleshoot, time your harvest, and grow like a pro!
How long does it take for curcuma ginger to grow from a rhizome?
Curcuma ginger typically takes 6–9 months to mature from planting a rhizome, depending on climate and care. In tropical zones, you’ll see shoots in 2–3 months, while cooler regions may take longer. Patience pays off—harvest when leaves yellow and the rhizome feels firm!
Can I grow curcuma ginger in cold climates?
Curcuma ginger thrives in warmth (70–90°F), but you can grow it in cooler areas with a few tricks:
- Start indoors in pots (6+ weeks before last frost).
- Use a greenhouse or move pots indoors during winter.
- Choose a sunny windowsill or grow under grow lights.
Why are my curcuma ginger leaves turning yellow?
Yellow leaves usually mean overwatering, underwatering, or nutrient issues. Check these fixes:
- Watering: Soil should stay moist but not soggy. Water when the top 1–2 inches are dry.
- Drainage: Ensure pots have holes to prevent root rot.
- Nutrients: Feed with balanced fertilizer (10-10-10) every 4–6 weeks.
- Pests: Inspect for spider mites or aphids (spray with neem oil if needed).
Can I regrow curcuma ginger from store-bought rhizomes?
Yes! Buy organic, fresh turmeric rhizomes (the knobby root) from a grocery store or Asian market. Look for:
- Firm, unpeeled rhizomes (avoid pre-sliced or wilted ones).
- Sprouting eyes (small buds)—these are your best bet for regrowth!
When is the best time to harvest curcuma ginger?
Harvest when:
- The leaves turn yellow and wilt (signs the plant is redirecting energy to the rhizome).
- The rhizome feels firm and plump (dig up a small section to check).
- 6–9 months after planting (earlier harvests yield smaller rhizomes).
Wrapping up and next steps
Growing your own curcuma ginger (Curcuma longa) is a rewarding journey that connects you to nature’s healing power—right in your backyard! 🌱 With the right conditions, patience, and a few simple steps, you can harvest vibrant rhizomes packed with curcumin in just six months.
Whether you’re a beginner or a seasoned gardener, this tropical treasure thrives with warmth, moisture, and a little love.
Now that you’re armed with tips, troubleshooting advice, and a clear roadmap, it’s time to roll up your sleeves and get planting!
Start small—even a single rhizome can multiply—and watch your garden transform into a golden harvest. Happy growing, and may your curcuma bring you both beauty and wellness! 🌟
Next step: Mark your calendar for planting season (or extend it indoors if you live in a cooler climate) and prepare your growing space. Ready to dive in? Grab your supplies and let’s grow!