
Orchid Care
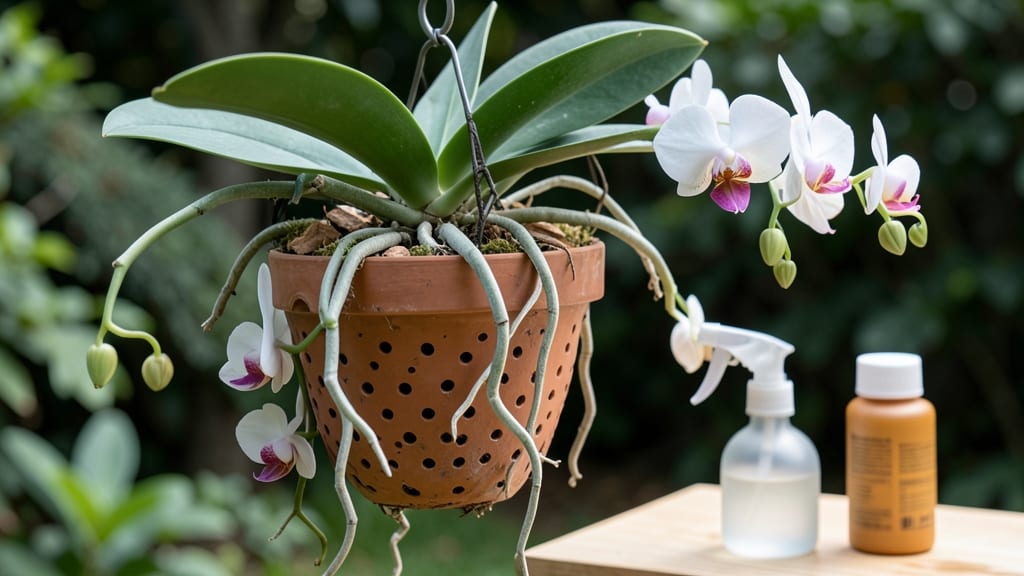
How to grow orchids upside down feels like cheating—no pots, no mess, just air and roots reaching for the sky. 🌱 I’ve watched my Phalaenopsis orchids thrive in this method for years, and the secret isn’t complicated: it’s all about airflow, humidity, and letting those roots breathe. Most people assume orchids need pots, but nature grows them on trees—so why not mimic that?
The setup is simpler than you’d think: you’ll need a sling or mounting board, a sturdy hook, and a few basic tools. No fancy equipment—just what orchids actually need to flourish.
The right light (bright but indirect) and humidity (60% or higher) make all the difference, and you’ll water differently too—soaking the roots occasionally instead of drowning them.
What you’ll end up with is a stronger, more resilient plant that blooms longer and resists rot. The roots stay healthy, the plant stays stable, and you skip the hassle of repotting. My upside-down orchids have outlasted potted ones by years—proof that sometimes, breaking the rules leads to better results.
Works for Phalaenopsis, Dendrobium, and even some Cattleyas, though each has its quirks. Beginners might worry about stability at first, but once you get the hang of it, you’ll wonder why you ever used pots. Let’s get those orchids growing the natural way!
📚 In This Guide
- What you need
- Instructions
- Tips and common mistakes
- Wrapping up and next steps
What you need
- ● Orchid plants: Choose epiphytic orchids like Phalaenopsis, Cattleya, or Oncidium (avoid terrestrial orchids—they need soil!). Start with 1-3 healthy plants to practice.
- ● Hanging planters or baskets: Plastic or woven baskets (3–6 inches in diameter, with drainage holes). Size depends on orchid size—smaller for mini varieties, larger for mature plants.
- ● Macramé hangers or orchid-specific pots (ensure they’re breathable and can hold moisture without drowning roots).
- ● Growing medium: 30–50% bark mix (e.g., fir or pine bark chunks, 1/4–1/2 inch in size) + 20–30% perlite or charcoal for aeration. Avoid dense soil!
- ● Spray bottle (8–16 oz): For gentle watering—avoid soaking to prevent rot.
- ● Support hooks or chains: To hang baskets at 6–12 inches above a tray (for drainage).
- ● Balanced orchid fertilizer: 20-20-20 or 10-10-10 (diluted to ½ strength). Use every 2–4 weeks during growing season.
- ○ Humidity tray (optional but helpful): Fill with pebbles and water to maintain 50–70% humidity around plants.
- ● Grow lights: LED or fluorescent (12–14 hours/day) if natural light is less than 6 hours/day.
- ● Rooting hormone gel: For propagating orchid keikis (baby plants) if you’re feeling adventurous!
- ● Thermometer/hygrometer: To monitor 60–80°F temps and humidity levels like a pro.
- ● Decorative moss or sphagnum: For extra humidity around the base of hanging orchids.
- ● Twist ties or orchid clips: To secure plants to supports if they need extra stability.
Step-by-Step instructions for growing orchids upside down
Here’s how to grow orchids without pots—no fancy setups, just clever hanging and consistent care.
🪴 Step 1: Choose the Right Hanging Setup
Start with a wooden orchid slab or slotted hanging basket—these let roots breathe while holding moisture. I like slabs because they mimic natural bark conditions, but baskets work too if you have limited space. Suspend it 6-12 inches above a tray to catch any runoff. This keeps roots hydrated without drowning them.
Make sure your setup has drainage holes if using a basket—orchid roots rot fast in soggy conditions. If you’re repurposing a container, drill holes along the bottom edge for airflow. Avoid plastic; it traps too much moisture and can suffocate roots.
🌱 Step 2: Mount or Plant Your Orchid
For mounting, attach the orchid to the slab or basket using orchid clips or fishing line—never wire, which can cut into the roots. Space plants 3-4 inches apart so roots don’t compete for moisture. If using a basket, fill it with orchid bark mix (the 2-3 inches of chunky bark from your supplies) and tuck the roots in gently.
Don’t bury the rhizome (the thick stem base)—it needs airflow. For Phalaenopsis orchids, the roots should dangle freely. Water lightly after mounting to help the plant settle. This step is critical: if the rhizome stays damp, it’ll rot before the roots establish.
☀️ Step 3: Master the Watering Routine
Upside-down orchids need weekly soaking—not just a quick spray. Place the entire setup under lukewarm water for 5-10 minutes until the bark or slab feels saturated. Let it drain completely before returning it to its spot. Overwatering is the #1 killer, so wait until the bark feels dry to the touch before repeating.
Mist the leaves 2-3 times a week with a spray bottle, but avoid soaking the rhizome. You’ll know it’s right when water runs out the bottom cleanly—no puddles left behind. In winter, cut back to every 10-14 days since orchids rest in cooler temps.
⏰ Step 4: Provide Ideal Light and Humidity
Place your orchid in bright, indirect light—think east or north-facing window or 4-6 feet from a south window. Direct sun burns leaves, while too little light means weak growth. You’ll spot perfect light when leaves stay medium green (no yellow or deep red). If leaves darken, move it farther away.
Humidity is key—aim for 50-70% if your home runs dry. Group orchids together or use a pebble tray with water nearby. A simple humidifier near the setup works too. Low humidity causes root tips to dry out, so keep an eye on that—healthy roots should look plump and silver-green, not shriveled.
🌿 Step 5: Fertilize and Encourage Blooms
Feed your orchid every 2-4 weeks with a balanced orchid fertilizer (diluted to half-strength). I use a 20-20-20 mix in spring and summer, switching to a 10-10-10 in fall to promote blooming. Always fertilize after watering—never on dry roots. Too much fertilizer burns roots, so stick to the schedule.
To trigger blooms, give your orchid a cool snap—move it to 55-65°F nights for 4-6 weeks. This mimics winter conditions and tells the plant it’s time to flower. Once buds form, resume normal care. Deadhead spent blooms by cutting the stem just above a node—this redirects energy to new growth.
Tips & tricks for growing orchids upside down
Here's what nobody tells you about keeping your orchids thriving in that upside-down setup—details that make all the difference.
The Setup Secret: When choosing between a wooden slab and hanging basket, I've found slabs work best for Phalaenopsis orchids because they better mimic their natural epiphytic growing conditions. For baskets, make sure the slits are 1/4-inch wide—this size lets roots breathe while still holding moisture. If you're repurposing a container, drill holes along the bottom edge in a staggered pattern to prevent root rot from poor drainage.
Root Care That Matters: In Step 2, when mounting your orchid, pay special attention to the roots—healthy orchid roots should be plump and silver-green, not shriveled. If you notice any mushy or black roots during mounting, trim them with sterilized scissors before attaching. This prevents disease from spreading to healthy roots once your orchid is settled in its new home.
Watering Wisdom: That 5-10 minute soaking in Step 3 is your golden window—don't rush it! The bark should feel completely saturated, but you'll know you've gone too far if water drips continuously for more than 30 seconds after removing from water. For winter care, reduce to every 10-14 days and always check moisture by squeezing a small piece of bark—if it springs back, it's dry enough.
Lighting Insight: The instructions mention bright indirect light, but here's the thing: orchids actually tell you when they're getting too much sun. If you see yellow patches on leaves, move it farther away immediately. For cloudy days, you can supplement with a grow light 12 inches away for 4-6 hours to maintain that medium green color we're aiming for.
Pro Tips for Grow Orchids Upside Down
- Here's what nobody tells you about keeping your orchids thriving in that upside-down setup—details that make all the ...
- The Setup Secret: When choosing between a wooden slab and hanging basket, I've found slabs work best for Phalaenopsis...
- Root Care That Matters: In Step 2, when mounting your orchid, pay special attention to the roots—healthy orchid roots...
Frequently asked questions
Got questions about growing orchids upside down? You’re not alone—this method takes some getting used to! Below, we’ve tackled the most common concerns to help you orchestrate success without the fuss of traditional pots.
Can any orchid be grown upside down?
While many orchids (like Phalaenopsis and Dendrobium) thrive upside down, others—such as Cattleya or Oncidium—prefer their roots to stay grounded. Always check your orchid’s species before flipping! Start with epiphytic orchids (naturally cling to trees) for the best results.
How long does it take for roots to adjust?
Patience is key! Most orchids take 2–4 weeks to adapt, with new root growth appearing in 4–8 weeks. If your orchid looks stressed (yellow leaves, wilting), give it extra humidity and avoid direct sunlight until it stabilizes. Think of it as a root vacation—they’ll thank you later!
Do I need to water differently?
Upside-down orchids rely on immersion or misting (2–3 times a week). Soak the roots for 5–10 minutes, then drain thoroughly. Avoid letting water pool in the crown—dampness here causes rot. A spray bottle or sink soak works best. Pro tip: Use room-temperature water to shock roots less!
What if my orchid won’t bloom?
Blooming hiccups often stem from light, temperature, or fertilizer imbalances. Upside-down orchids need bright, indirect light (like a north or east window) and a 10–15°F nighttime drop to trigger flowers. Try a balanced orchid fertilizer (diluted to half-strength) every 2–4 weeks. If it’s been 6+ months with no buds, adjust one factor at a time!
Can I switch back to a pot later?
Yes! If you miss the pot life, repot your orchid anytime—just use a well-draining mix (like bark or sphagnum moss). Gently tease the roots apart and trim any mushy or dead ones. Water lightly for a week to help it recover. Many growers rotate methods seasonally for variety!
Wrapping up and next steps
Growing orchids upside down is a rewarding way to nurture these stunning plants with minimal fuss—just patience, the right setup, and a little creativity! 🌿 By mastering humidity, airflow, and proper mounting, you’ll unlock a space-saving, visually striking method that even beginner growers can embrace.
Remember, consistency is key, and soon you’ll be basking in the beauty of thriving orchids that defy tradition.
Ready to take the next step? Start with one orchid and experiment with different mounting spots in your home. Track your progress, adjust as needed, and soon you’ll be sharing your upside-down orchid success story with fellow plant enthusiasts! 🌟