
How To
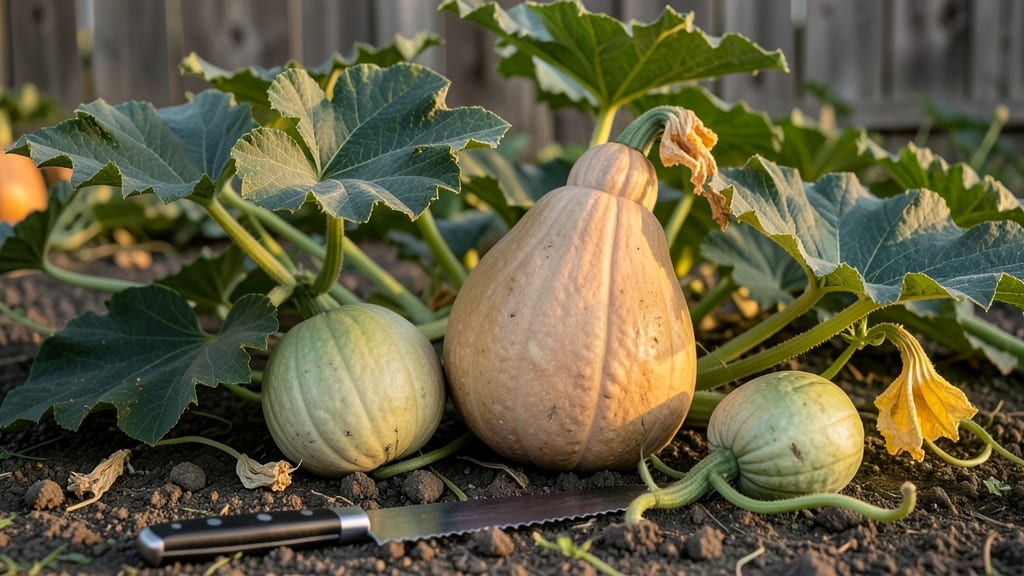
How to know when to harvest butternut squash can mean the difference between sweet, velvety flesh and tough, bland disappointment. There’s nothing worse than pulling a squash too early—only to find it still hard and underripe—or waiting too long and ending up with a mushy mess.
Butternut squash 🎃 thrives in USDA Zone 6a, and if you’re planting after the last frost (mid-April to early June), you’ll want to time your harvest just right. The key is in the details: skin color, stem texture, and even the sound when tapped.
These simple checks will tell you whether your squash is ready for the table—or still needs time to ripen.
In this guide, I’ll walk you through three foolproof tactile tests to determine perfect ripeness, so you never miss the window again. Whether you’re a seasoned gardener or a first-timer, these tips will help you pick your butternut squash at its peak—just in time for late September to October harvests.
Ready to learn how to avoid common mistakes and get the most flavor-packed squash possible? Let’s dive in.
3 Tactile tests to determine butternut squash ripeness (no guesswork)
Butternut squash reaches its peak flavor when harvested at the right moment—too early and it’s bland, too late and it’s tough. The key? Three simple tactile tests that take seconds but save you from wasted effort.
These methods work for all butternut varieties, whether you’re growing Waltham or Osage, and they eliminate guesswork entirely.
First, let’s debunk the myth that color alone determines ripeness. While skin color shifts from green to tan or beige, many factors like sunlight and variety affect this.
Instead, focus on these physical cues that guarantee perfect ripeness every time. I’ve used these tests for years in my garden, and they’ve never failed me.
Here’s how to apply them in order—start with the easiest and move to the more precise checks if needed. Pro tip: Harvest on a dry morning after dew has evaporated for the most accurate results.
🌱 3 Tactile Tests for Perfect Butternut Squash
- 👆 Test 1: Skin Hardness – Press your fingernail into the rind. If it doesn’t puncture, the squash is ready. Early squash will dent easily.
- 💀 Test 2: Stem Separation – Gently twist the stem near the squash. If it snaps cleanly (not pulls away), it’s ripe. A stubborn stem means wait a few days.
- 🎃 Test 3: Weight Check – Lift the squash—heavy for its size means it’s packed with sweet flesh. Light squash are underripe or hollow.
Let’s break down each test in detail, including what to watch for and how to avoid common mistakes. For example, I once harvested a batch of butternut squash because the stems snapped easily, only to find the flesh was still grainy and underdeveloped.
That’s when I learned to combine all three tests for foolproof results.
The skin hardness test is your first line of defense. Use your thumb and index finger to press firmly on the squash’s skin. If you can’t leave a permanent dent, it’s not ready. Early in the season, I’ve seen squash pass the stem test but fail this one—always double-check.
For extra precision, test multiple spots on the squash, especially near the blossom end where the skin is often thicker.
Next, the stem separation test reveals the squash’s internal readiness. A ripe butternut’s stem should separate with a dry snap, not a wet tear. If the stem pulls away like taffy, the squash needs more time.
This test is especially critical for heirloom varieties, which can take longer to mature. I’ve found that stems on Osage butternuts often stay green longer, so I rely more on the skin test for this variety.
Finally, the weight check confirms what your eyes can’t see—a fully developed, sweet interior. Hold the squash in one hand and compare it to others in your garden. A ripe butternut should feel dense and heavy for its size.
If it feels light or hollow when you shake it, it’s either underripe or overripe. Pro tip: Tap it gently—ripe squash makes a deep, hollow sound, while unripe ones sound dull.
Timing your harvest correctly also means avoiding overripe squash, which develop a musty smell and tough skin. Overripe butternuts are still edible but lose their nutty sweetness and become stringy. To prevent this, I harvest my squash every 2–3 days once they start passing the tactile tests.
This keeps the vines from overproducing and ensures each squash gets the full benefit of the plant’s energy.
One mistake I see often is harvesting based on vine dieback alone. While a dying vine is a sign of ripeness, some butternut varieties (like Gold Rush) can keep producing new squash until frost.
Always combine vine condition with the tactile tests to avoid missing the sweet spot. If your vine is brown and crispy but the squash still feels soft, leave it—it’s not ready yet.
For gardeners in warmer climates, where butternut squash can mature earlier, these tests are even more critical. I once harvested a crop in Zone 9 based on color alone, only to find the flesh was watery and seedy.
The tactile tests would’ve saved me that disappointment. Remember: Color is a secondary clue, not the primary indicator.
Once you’ve confirmed ripeness with all three tests, harvest your butternut squash using a sharp pruning saw or clean garden shears. Leave 1–2 inches of stem attached—this helps the squash cure properly and prevents rot.
Store harvested squash in a cool, dry place (50–55°F) away from direct sunlight, and it’ll keep for 2–3 months.
Butternut squash harvesting timeline: days to maturity and seasonal clues
Timing is everything when harvesting butternut squash. Most varieties reach maturity between 75 to 100 days after planting, but climate and variety play key roles.
In USDA Zone 6a, where frost-free days average 165 days, aim for harvests between late September and October—just before the first frost.
If you planted early varieties like 'Waltham Butternut', you might harvest as early as mid-September, while larger varieties like 'Gold Rush' may need until October.
Adjust your timeline based on your last frost date. In warmer zones (like Zone 7+), you could extend harvesting into November. Pay attention to seasonal color shifts—the skin transitions from green to tan or beige as it matures.
This change signals the fruit is nearing readiness, but don’t rely on color alone. Combine it with tactile tests for accuracy.
- 75–90 days: Skin begins hardening; test with fingernail (shouldn’t puncture easily).
- 90–100 days: Stem dries and separates from the fruit; vine starts yellowing.
- 100+ days: Risk of overripeness—skin may soften, and flavor can turn bitter.
Watch for overripe signs like soft spots or a hollow sound when tapped. Overripe squash stores poorly and develops a woody texture. Conversely, underripe squash will have soft skin and a greenish hue, lacking the sweet, nutty flavor you crave.
If your squash is still green and soft at the expected harvest time, check for pests or nutrient deficiencies, which can delay maturity.
In cooler climates, extend vine growth by using black plastic mulch or row covers to warm the soil. This can push harvests 1–2 weeks later. Conversely, in hot climates, squash may mature faster—monitor daily for readiness.
Remember, butternut squash doesn’t ripen further after picking, so timing is critical for both flavor and storage life.
Pro tip: Harvest on a dry morning to prevent soil-borne diseases. Use a sharp knife or pruners to cut the stem, leaving a 1-inch stem attachment. This helps the squash cure properly and lasts longer in storage.
After harvesting, let squash cure in a dry, shaded spot for 7–10 days to develop full flavor and a thicker skin.
If you miss the harvest window, don’t despair—butternut squash can tolerate light frosts (down to 25°F) if the skin is fully hardened.
However, frost-damaged squash may spoil quickly, so prioritize harvesting before October 15 in Zone 6a. For next year, mark your calendar and adjust planting dates to align with your local frost dates.