
Tools
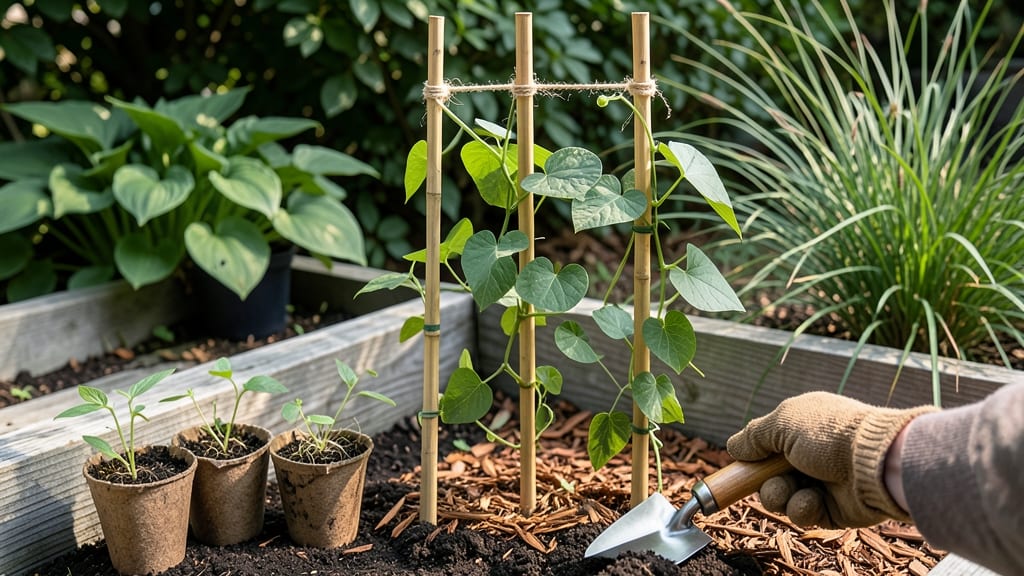
My first teepee trellis collapsed under 10 pounds of morning glories—until I learned the right way to build one. 🌿 The secret isn’t just tying sticks together; it’s creating a structure that sways with your plants, not against them.
With just a few basic supplies, you can transform a corner of your garden into a vertical paradise where beans, peas, and flowers climb toward the sun instead of sprawling across your soil.
Most people grab whatever stakes they have lying around, but the best teepees use 5-6 sturdy poles (bamboo works perfectly) tied at the top with flexible garden twine or even old pantyhose.
For climbing plants like pole beans, aim for a 6-foot height—tall enough to keep them off the ground but not so tall they topple. For lighter vines like nasturtiums, 4 feet is plenty.
The key is securing the base by staking the bottom poles into the ground at a 15-degree angle outward, then tying them together at the top with enough slack to let them lean slightly.
By the time your plants hit their second set of leaves, you’ll have a lush, self-supporting tower that saves space and keeps pests away from the soil. The best part? You can decorate with colorful ribbons or even weave in dried flowers for a rustic touch.
My second attempt—built with these simple adjustments—still stands strong three years later, now hosting sunflowers that reach for the sky without a single wobble.
Works for containers, small yards, or even balconies—just scale the materials to your space. Whether you’re growing food or flowers, this trellis turns wasted vertical space into a thriving garden feature that’s sturdy, stylish, and surprisingly simple to assemble. Let’s get those poles tied!
📚 In This Guide
- What you need
- Instructions
- Tips and common mistakes
- Wrapping up and next steps
What you need
- ● 4-6 sturdy bamboo poles (or wooden dowels, PVC pipes, or metal rods) – 8-10 feet long each, depending on desired height (e.g., 6 feet for compact designs, 10+ feet for tall vines).
- ○ 1-2 stakes or anchor poles – 2-3 feet long, for securing the base (optional but recommended for windy areas).
- ● Jute twine, zip ties, or garden wire – 10-15 feet, for binding the poles together.
- ● Garden twine or soft plant ties – 1-2 spools, for guiding vines upward.
- ● Scissors or wire cutters – for trimming twine/wire to size.
- ● Measuring tape – to ensure even spacing and height.
- ● Hammer or mallet – for driving stakes into the ground (if using).
- ○ Drill (optional) – for pre-drilling holes if using wooden dowels.
- ● Garden gloves – to keep your hands safe and clean!
- ● Decorative paint or stain – for a polished look (use outdoor-safe products).
- ● Metal brackets or corner connectors – for extra stability with wooden poles.
- ● Potted plants or small planters – to nestle at the base for a lush, integrated look.
Step-by-Step instructions for building a teepee trellis
Here's how I build a sturdy, long-lasting teepee trellis that supports even heavy vines like pole beans or morning glories.
🪴 Step 1: Gather and Prepare Your Materials
For a 4-foot tall teepee (perfect for most climbing plants), you'll need four 6-foot long bamboo poles (or sturdy wooden stakes). I like bamboo because it's lightweight yet strong enough for vines, and it won't rot as quickly as untreated wood. If using wooden stakes, choose 1-inch diameter ones for maximum stability.
You'll also need two 4-foot long pieces of twine or jute rope (about ¼-inch thick) and two 3-foot long stakes for anchoring. For extra durability, I add one 12-inch long metal stake at the center to reinforce the structure. Check that all poles are straight—any bends will make your teepee lopsided.
✂️ Step 2: Assemble the Base and Center Support
Drive the two 3-foot stakes into the ground about 18 inches apart, leaving 6 inches above the soil. This creates your base anchor points. Next, drive the 12-inch metal stake exactly halfway between them. This center stake will help distribute weight evenly when you attach the poles.
Take one bamboo pole and tie it securely to the metal stake at the center using one piece of twine. Wrap the twine around both the pole and stake three times before knotting tightly. Repeat with the other three poles, spacing them evenly around the metal stake. You'll end up with a star shape when viewed from above.
🌿 Step 3: Secure the Poles and Shape the Teepee
Now, take the second piece of twine and tie each pole to its neighboring pole about 6 inches from the top. This creates a triangular weave that locks the structure together. Gently spread the poles outward until they form a cone shape, with the tops 4 feet apart. The wider the base, the more stable your teepee will be.
To check stability, give the structure a gentle shake. If it wobbles, adjust the twine tension or drive the base stakes deeper. For extra reinforcement, tie the tops of the poles together with a final loop of twine—this prevents them from splaying apart under heavy vines. The finished teepee should look like an open, sturdy cone.
💧 Step 4: Plant and Train Your Climbing Plants
Once your teepee is assembled, plant your climbing plants 6 inches away from the base stakes. For vines like pole beans or cucumbers, I like to weave the stems through the twine as they grow, guiding them upward. This encourages stronger attachment and prevents the vines from snapping in wind.
Water the base thoroughly after planting, and mulch around the stakes to keep them stable. As the plants grow, gently loop new growth around the twine every 4-6 inches to distribute weight evenly. Avoid over-tightening the twine—you want the vines to have room to thicken naturally. Within 2-3 weeks, your plants will climb the entire structure.
☀️ Step 5: Maintain and Reinforce as Needed
Check your teepee weekly for loose twine or leaning poles. If the structure sags under heavy vines, add extra twine loops halfway up the poles to redistribute weight. For perennial plants like morning glories, I leave the teepee in place year-round, but for annuals, I remove it after harvest to reuse the materials next season.
If using bamboo, expect it to last 2-3 seasons before needing replacement. For longer durability, coat wooden stakes with outdoor sealant before planting. The key to a long-lasting teepee is proper tension—never let the twine go slack, and always tie knots tightly. With this setup, your climbing plants will thrive all season long.
Tips & tricks for building a sturdy teepee trellis
A few simple tricks will help you build a teepee trellis that stands up to even the heaviest vines. I've learned these the hard way—trust me, your plants will thank you.
Material Selection: For the four 6-foot bamboo poles, choose ones that are completely straight and have a diameter of at least ½-inch. I've found that bamboo with a slight taper (thicker at the base) provides better stability. If using wooden stakes, pre-drill holes near the top to make tying twine easier later. This small prep step prevents the twine from cutting into the wood and weakening the structure over time.
Knot-Tying Technique: When attaching the poles to the center stake in Step 2, use what I call the "three-wrap bowline" method. Wrap the twine around both the pole and stake three times before tying a square knot—this creates a secure anchor that won't slip under vine weight. For the top connections in Step 3, use a "figure-eight" knot instead of a simple loop. This knot holds tension better and won't loosen as the vines grow heavier.
Stability Check: After completing Step 3, perform the "wind test" before planting. Gently push the trellis from different angles to simulate wind pressure. If any pole moves more than 1 inch, adjust the twine tension or drive the base stakes deeper. I've seen trellises that looked perfect until loaded with vines—always test before planting. This 2-minute check can save you from rebuilding halfway through the season.
Plant Training: When weaving stems through the twine in Step 4, use the "spiral method" for aggressive climbers like pole beans. Instead of looping growth around the same twine repeatedly, move to a new twine section every 4-6 inches up the pole. This distributes weight more evenly and prevents the trellis from leaning. For delicate vines like morning glories, a simple loop every 6 inches works perfectly—just avoid over-tightening, which can restrict growth.
Pro Tips for Make A Teepee Trellis
- A few simple tricks will help you build a teepee trellis that stands up to even the heaviest vines. I've learned thes...
- Material Selection: For the four 6-foot bamboo poles, choose ones that are completely straight and have a diameter of...
- Knot-Tying Technique: When attaching the poles to the center stake in Step 2, use what I call the "three-wrap bowline...
Frequently asked questions
Got questions about building your teepee trellis?
You’re not alone! Here are answers to the most common concerns—from planning to troubleshooting—to help you create the perfect climbing structure for your garden.
What’s the best time of year to build a teepee trellis?
Spring or early fall are ideal! Building in spring lets plants climb as they grow, while fall gives roots time to establish before winter. Avoid extreme heat or frost—both can weaken materials or make assembly tricky. If you’re in a mild climate, any season works!
Can I use a teepee trellis for heavy vines like grapes or wisteria?
Yes, but with extra reinforcement! For heavy climbers, use thicker stakes (2–3 inches in diameter) and secure them with heavy-duty zip ties or metal bands. Space the stakes closer together (18–24 inches apart) and add horizontal supports (like lattice or wire) for extra stability. Think of it like a mini tower!
What if my teepee keeps leaning or collapsing?
Uneven ground or loose stakes are usually the culprits. Start by leveling the base with a shovel or gravel, then dig stakes deeper (at least 1–2 feet) and pound them firmly into the ground. For extra support, tie the stakes together at the top with a strong rope or wire, creating a tripod shape. A little tension goes a long way!
Do I need to remove the trellis every winter?
Not necessarily! If you’re in a frost-free zone, leave it up. In colder climates, disassemble and store stakes horizontally to prevent splitting. If you keep it up, secure the top tightly and cover with a breathable burlap sack to protect from snow or ice. Pro tip: Mark stakes with paint so you can reassemble them easily next spring!
Are there alternatives to wooden stakes for a teepee trellis?
Try PVC pipes (lightweight and durable), metal rebar (super sturdy), or even sturdy branches from pruned trees. For a rustic look, use bamboo poles or split logs. Just ensure whatever you choose is tall enough (6–10 feet) and can handle wind. Repurposing materials is a great eco-friendly hack!
Wrapping up and next steps
Building a teepee trellis is a rewarding project that adds both beauty and function to your garden or outdoor space!
With just a few materials and some simple steps, you’ve got a sturdy, eye-catching structure perfect for climbing plants like beans, peas, or even decorative vines. Don’t stop here—let your creativity bloom by experimenting with different plant pairings or even turning it into a cozy reading nook!
Ready to take the next step? Plant your vines, enjoy the growth, and watch your teepee trellis transform into a lush, living masterpiece! 🌿✨