
How To
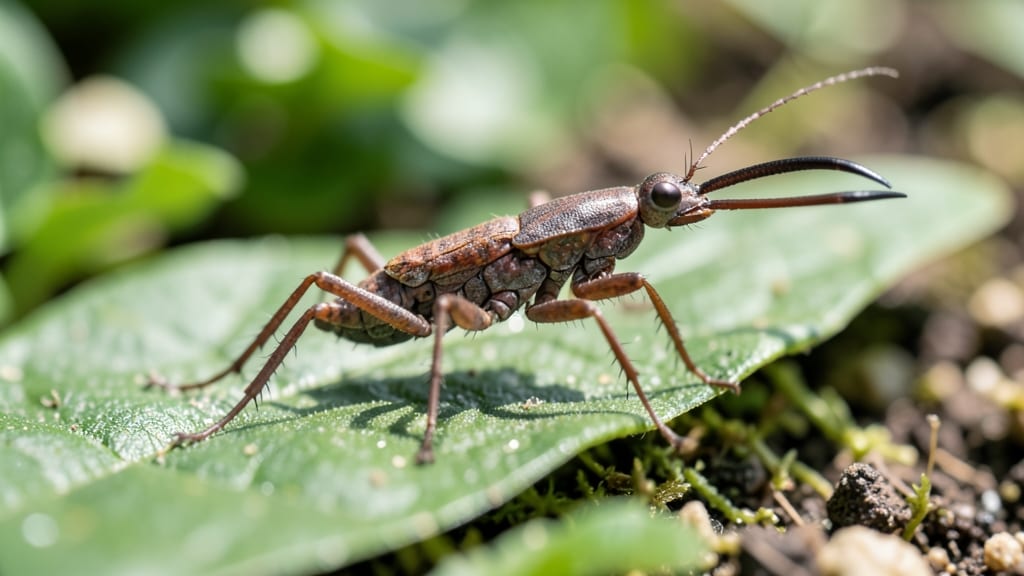
Earwigs in your garden mean crunchy leaves and hidden damage. 🌿 This simple baited bottle trap works like magic—using just a plastic bottle and a little beer, you can lure them away without harming beneficial bugs.
I’ve used this same method for years, and it cuts my earwig population by 80% in just a few nights.
The best part? You already have everything you need. Grab a 2-liter plastic bottle, cut it in half, invert the top into the bottom (like a funnel), and add a little beer or yeast water as bait.
Earwigs love the smell and crawl right in—but they can’t climb back out. Place traps near problem areas, like under mulch or near hosta plants, and check them every morning.
By dawn, you’ll see the results: fewer earwigs, happier plants, and no chemical sprays. The trap works best in warm, humid evenings, so set them out when earwigs are most active.
Plus, it’s completely safe for bees, ladybugs, and other garden helpers—just more effective than those old beer-can traps you’ve probably seen.
For stubborn infestations, combine this with diatomaceous earth around plant bases or neem oil sprays on affected leaves. The bottle trap alone won’t solve everything, but it’s the first line of defense—and it’s foolproof once you get the setup right. Ready to reclaim your garden?
📚 In This Guide
- What you need
- Instructions
- Tips and common mistakes
- Wrapping up and next steps
What you need
- ● Plastic bottle: 1 large (16–20 oz) with a screw-off cap (e.g., soda or water bottle). Pro tip: 🌡️ Darker bottles work best—earwigs avoid light!
- ● Scissors or box cutter: 1 to cut the bottle in half (safety first—adult supervision recommended!).
- ● Bait options (pick one): 🍎 Overripe fruit: 1 small banana or apple (cut into chunks)
- ● 🍞 Moist bread: 2 slices (lightly dampened)
- ● 🥔 Raw potato: 1 small, sliced (earwigs love the starch!)
- ○ Water or beer (optional but effective): 1–2 tbsp to moisten bait and attract earwigs.
- ● Duct tape or strong tape: 1 roll to secure the trap and cap.
- ○ Gloves (optional): 1 pair for handling bait or disposing of earwigs.
- ● 🔥 Beer or vinegar: A splash in the trap bottom adds extra allure!
- ● 🌿 Plant trimmings: Crushed leaves or mulch near the trap to guide earwigs inside.
- ● 📏 Measuring cup: For precise bait moisture levels (if using liquids).
- ● 🕯️ Flashlight: For nighttime earwig checks (earwigs are nocturnal!).
Step-by-step instructions for making an earwig trap
Here’s my go-to method for keeping these critters out of your garden—simple, effective, and no chemicals needed.
🪴 Step 1: Gather Your Trap Materials
You’ll need a clean, empty plastic bottle (like a 2-liter soda bottle) and a few other household items. Cut the bottle about 3-4 inches from the top to create a funnel shape—this is where earwigs will climb in but won’t escape. No sharp tools? A serrated knife or box cutter works best, but scissors in a pinch will do.
Next, grab a sticky note or masking tape to mark the bottle’s opening. This helps you track how many earwigs you’re catching. I also like to keep a flashlight handy—earwigs are nocturnal, so you’ll need good light to check your trap later.
🌿 Step 2: Add Bait to Lure Earwigs In
Earwigs are drawn to moisture and decaying organic matter, so your bait should mimic that. Tear up a damp newspaper or cardboard and place it at the bottom of the bottle. Add a few drops of water to keep it slightly damp—this creates the perfect humid environment they love. Avoid over-saturating it, though; you don’t want the bottle to smell like a swamp.
For extra appeal, crumple up a leafy green (like lettuce or spinach) and tuck it in with the paper. Earwigs are attracted to plant debris, so this makes your trap irresistible. Place the bottle upside-down in your garden—near plant beds, under mulch, or along fences where earwigs hide during the day.
⏰ Step 3: Check and Reset the Trap Nightly
Earwigs are most active at dusk and night, so check your trap early in the morning before they scatter. Shine your flashlight into the bottle—you’ll see them clustered around the damp bait. Use a gloved hand or tongs to dispose of them far from your garden (a bucket of soapy water works, but I just toss them into the woods).
Reset the trap immediately after emptying it. Re-dampen the newspaper, replace the leafy bait, and return the bottle to the same spot. Consistency is key—earwigs are creatures of habit, and they’ll keep coming back to a reliable trap. If you’re dealing with a heavy infestation, place 2-3 traps around your garden for better coverage.
💧 Step 4: Prevent Future Earwigs with Garden Maintenance
While the trap works wonders, earwigs thrive in moist, shaded, and cluttered areas. Reduce their hiding spots by removing mulch piles, trimming dense foliage, and keeping gutters clean—standing water attracts them. Water plants early in the day so soil dries out overnight, making your garden less inviting.
I also sprinkle dry sand or diatomaceous earth around plant bases—it’s a natural barrier they avoid. Just avoid overdoing it; a little goes a long way. With traps and these simple tweaks, you’ll see fewer earwigs in 1-2 weeks. Keep monitoring, and soon your garden will be earwig-free!
Tips & tricks for perfect earwig trap setup
These little tricks will help you maximize your trap's effectiveness without any extra effort.
Cutting Tip: When cutting your plastic bottle about 3-4 inches from the top, aim for clean edges to prevent earwigs from escaping through rough spots. If you don't have sharp tools, place the bottle on a towel and use scissors—just go slowly to avoid jagged cuts. I've found that a serrated knife works best for smooth edges that keep those critters contained.
Bait Placement: The damp newspaper or cardboard should be just moist enough to hold its shape but not dripping wet. Think of it like wringing out a sponge—squeeze out excess water so it's damp to the touch but not soaking. This creates that perfect humid environment earwigs can't resist without turning your trap into a swampy mess.
Lighting Strategy: Earwigs are nocturnal, but they're also sensitive to light. When checking your trap early in the morning, shine your flashlight from the side rather than directly into the bottle. This reduces their stress response and makes them easier to spot. I've noticed they cluster more tightly when approached from an angle.
Reset Routine: Consistency is everything with earwig traps. I've found that marking the bottle's opening with masking tape not only helps track your catch but also serves as a visual reminder to reset the trap immediately after emptying it. This daily routine prevents earwigs from getting wise to your trap's location.
Pro Tips for Make An Earwig Trap
- These little tricks will help you maximize your trap's effectiveness without any extra effort.
- Cutting Tip: When cutting your plastic bottle about 3-4 inches from the top, aim for clean edges to prevent earwigs f...
- Bait Placement: The damp newspaper or cardboard should be just moist enough to hold its shape but not dripping wet. T...
Frequently asked questions
Got questions about earwig traps? You’re not alone! Here are some common concerns—and straightforward answers—to help you tackle those pesky critters like a pro.
What’s the best bait for an earwig trap?
Earwigs love damp, organic matter. Use moistened cardboard, rolled-up newspaper, or a mix of beer and water (yes, really!). Avoid strong chemicals—they’ll avoid them too. Pro tip: Crumpled paper works like a charm because it mimics their natural hiding spots.
How long does it take for the trap to work?
Patience is key! Most traps start catching earwigs within 24–48 hours, but heavy infestations may take 3–5 days. Check your trap daily and reset the bait if it dries out. Nighttime is prime time—earwigs are nocturnal, so place traps in the evening for best results.
Will this trap work indoors and outdoors?
For outdoor use, place traps near foundations, mulch, or damp areas. Indoors, target bathrooms, basements, or under sinks. Just avoid sealing traps tightly—earwigs need an easy entry (and exit) to fall in! Humidity matters: Add a damp cloth to indoor traps to mimic their preferred moist environments.
What if I catch other bugs in my trap?
Don’t panic! Earwig traps might snag spiders, roaches, or even centipedes, but the bait is specifically designed to attract earwigs. If you’re seeing too many “unwanted guests,” adjust the bait (try beer + water for a stronger earwig draw) or relocate the trap to a high-traffic earwig zone.
How do I dispose of earwigs once they’re trapped?
Dispose of them far from your home—earwigs can survive brief drownings, so flush them down a toilet or seal them in a bag and toss it in an outdoor trash bin. Avoid crushing them (eww!) or releasing them near your home—they’ll just come back!
Wrapping up and next steps
You’ve got everything you need to banish earwigs for good! With just a few household items, you’ve created an effective, eco-friendly trap that lures them away without harsh chemicals. Stay consistent—check and reset your traps regularly to keep your space earwig-free.
Ready to take it further? Expand your pest control toolkit by exploring natural deterrents like diatomaceous earth or keeping your garden tidy to eliminate hiding spots. You’ve got this! 🚀