
How To
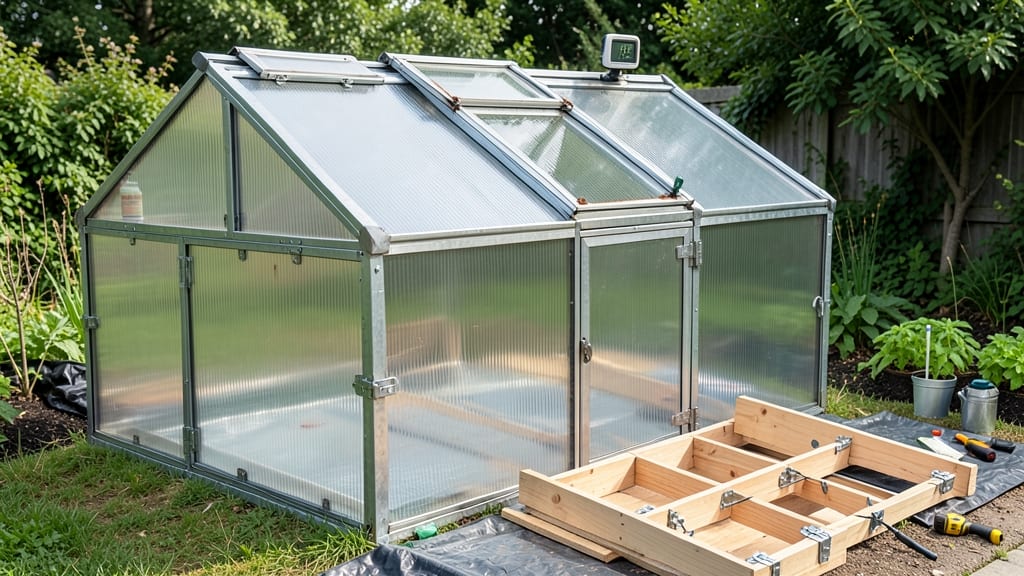
A how to make a DIY greenhouse just saved my gardening season after the first frost—now I grow tomatoes in January without heat tape. 🌱 The key is balancing sunlight, airflow, and temperature control. Most people overlook ventilation, which leads to moldy plants.
My design uses PVC pipes for structure, plastic sheeting for walls, and a simple hinge system for easy access. Even beginners can assemble this in a weekend. By summer, you'll harvest lush herbs, heat-loving peppers, and seedlings that outpace store-bought plants.
The greenhouse extends your growing window by 3-4 months on either side, turning a cold corner into prime real estate. Works for apartments, backyards, or even a sunny patio. Here's exactly how to start—no fancy tools needed.
📚 In This Guide
- What you need
- Instructions
- Tips and common mistakes
- Wrapping up and next steps
What you need
- ● Frame Materials: PVC pipes (½" or ¾" diameter) – at least 10-15 pieces (for hoop structures)
- ● OR Wooden 2x4s or metal pipes (½"–1" diameter) – cut to size
- ● Wooden stakes or rebar – 4–8 pieces (for anchoring)
- ● Covering: Plastic greenhouse sheeting (4–6 mil thickness) – enough to cover frame + 1–2 ft overlap
- ● OR Polycarbonate panels (4–6mm) – more durable but pricier
- ● Hardware: Zip ties or plastic cable ties – 50+ pieces
- ● Screws/nails + drill/driver – if using wood
- ● Hinges or PVC connectors – for doors/vents
- ● Extras for Functionality: Thermometer/hygrometer – 1–2 units
- ○ Shade cloth (30–50% coverage) – optional for hot climates
- ● Drip irrigation kit – for automated watering
- ● Location: Choose a spot with 6+ hours of sunlight and level ground. Avoid low areas where water pools.
- ● Size: Start small (4’x6’ or 6’x8’) if you’re a beginner—easy to expand later!
- ● Budget Hack: Salvage windows, old frames, or even clear plastic sheeting from hardware stores.
- ● Safety First: Wear gloves and goggles when cutting materials or handling tools.
Step-by-Step instructions for building a DIY greenhouse
Here's my battle-tested method for constructing a sturdy, low-cost greenhouse that extends your growing season—no special tools required.
🪴 Step 1: Select and Prepare Your Base Structure
For a 4-person greenhouse, I recommend a 6-foot by 8-foot footprint using 2x4 lumber for the frame. Start by marking the rectangle on level ground, then dig 4-inch-deep trenches along the perimeter to embed your base. This prevents wind rock and keeps the structure stable during storms.
Cut four 8-foot vertical posts and four 6-foot horizontal beams to form the rectangle. Assemble the frame using deck screws (not nails—they pull loose over time). Double-check the corners are square by measuring diagonally both ways; they should match within ¼ inch. I always brace the corners with temporary stakes while I work.
☀️ Step 2: Install the Roof and Glazing
For the roof, cut 2x4 rafters at a 5:12 pitch (rise of 5 inches for every 12 inches of run) to shed rain and snow. Space them 2 feet apart and secure them to the frame with 3-inch lag bolts. Cover the roof with corrugated polycarbonate panels—they're stronger than plastic and insulate better. Overlap the seams by 2 inches and seal with UV-resistant silicone caulk to prevent leaks.
For the walls, use clear 4mm greenhouse plastic stretched tightly over the frame and secured with J-channel trim. Start at the bottom and work upward to avoid sagging. Leave a 6-inch gap at the base to allow airflow while keeping pests out. I always test the plastic first by holding it up to a bright light—if you see wrinkles, it's too thick and will trap too much heat.
💧 Step 3: Add Ventilation and Climate Control
Ventilation is critical—without it, your greenhouse will overheat in summer and suffocate plants in winter. Install hinged roof vents (available at hardware stores) along the ridge, plus side vents near the base. I use pulleys and rope to make opening/closing them easy. Aim for at least 20% of the roof area in vent space for proper airflow.
For temperature regulation, add a thermostat-controlled exhaust fan (like those used in chicken coops) wired to a 100-watt bulb. The bulb heats the thermostat, triggering the fan when it gets too warm. In winter, I cover the vents with insulated baffles made from reflective bubble wrap—they trap heat without blocking light. Test the system by running it for 24 hours before planting.
✂️ Step 4: Finish With Shelving and Accessories
Install adjustable metal shelving along the walls to maximize vertical space. Use L-brackets to secure them to the frame—this keeps them from collapsing under heavy pots. I like slatted shelves because they allow airflow to container roots. Leave 18 inches of clearance at the base for floor plants and 12 inches between shelves for easy access.
Add drip irrigation tubing along the top edge of the shelves and run it to an external water source. Drill small holes every 12 inches and attach emitter nozzles to water evenly. For humidity control, hang shade cloth (30% shade) on a rolling track—this prevents fungal diseases while still letting light through. Finally, install door hinges and a latch on one end for easy access.
🌱 Step 5: Test and Condition the Space
Before planting, run the greenhouse through a 2-week conditioning phase. On day one, turn on all fans and vents, then monitor temperatures every hour. Note when the thermostat kicks in and adjust the fan speed accordingly. In cold weather, use black plastic mulch on the ground to absorb heat during the day and radiate it at night.
I also recommend sterilizing the space by spraying all surfaces with a 1:10 bleach-water solution (let it dry completely). This prevents damping-off disease in seedlings. After conditioning, plant fast-growing crops like radishes or lettuce as test subjects—they'll show you if your climate control is working. If they thrive, you're ready for heat-sensitive plants like tomatoes and peppers.
Tips & tricks for building your DIY greenhouse
These battle-tested strategies will help you avoid common pitfalls and create a greenhouse that truly extends your growing season.
Foundation Stability: In Step 1, when digging those 4-inch-deep trenches for your base, don't skip the compaction step. Use a hand tamper or rent a plate compactor to firmly pack the soil before setting your frame. I learned this the hard way—my first greenhouse shifted during a windstorm because the soil wasn't properly compacted. This simple step prevents wind rock and ensures your structure stays square.
Roof Pitch Precision: The 5:12 pitch in Step 2 might seem intimidating, but use this trick: mark a 5-inch rise every 12 inches along your rafters using a level and string line. For extra accuracy, I clamp a speed square to the top of each rafter and draw the line before cutting. This ensures consistent water runoff and prevents leaks that can ruin your plants from above.
Ventilation Optimization: When installing vents in Step 3, aim for that 20% coverage but position them strategically. Place roof vents along the ridge and side vents near the base to create a cross-ventilation pattern. I've found that adding a small solar-powered vent opener (available at garden centers) makes temperature regulation hands-off—no more forgetting to open vents on hot days when you're not around.
Material Selection: For the 4mm greenhouse plastic in Step 2, I recommend UV-stabilized plastic specifically designed for greenhouses. Regular plastic will yellow and degrade within a year, while greenhouse-grade plastic maintains clarity and strength for 2-3 seasons. The extra cost pays off in better light transmission and durability—trust me, you'll notice the difference when your plants thrive.
Pro Tips for Make Diy Greenhouse
- These battle-tested strategies will help you avoid common pitfalls and create a greenhouse that truly extends your gr...
- Foundation Stability: In Step 1, when digging those 4-inch-deep trenches for your base, don't skip the compaction ste...
- Roof Pitch Precision: The 5:12 pitch in Step 2 might seem intimidating, but use this trick: mark a 5-inch rise every ...
Frequently asked questions
Got questions?
Here are answers to the most common ones about building your DIY greenhouse—so you can grow with confidence!
What’s the best time of year to build a DIY greenhouse?
The best time is early spring or late summer—when temperatures are mild and you have time to assemble it before harsh weather hits. However, if you’re using sturdy materials (like polycarbonate panels), you can build year-round. Just avoid extreme heat or cold during construction!
Can I use a DIY greenhouse in winter?
Yes! A well-insulated greenhouse (with double-layered plastic or glass) can extend your growing season. Add thermal mass (like water barrels or bricks) to retain heat, and use row covers or small heat sources (like a safe greenhouse heater) for frost-prone areas. Cold-hardy crops like kale and spinach thrive in winter greenhouses!
What’s the cheapest way to make a DIY greenhouse?
Start with a hoop house made from PVC pipes, wire mesh, and clear plastic sheeting—costing as little as $50–$150. Skip glass (expensive) and opt for reflective bubble wrap on the inside to boost light. Repurpose materials like old windows, pallets, or even a repurposed shed for extra savings!
How do I keep pests out of my DIY greenhouse?
Prevent pests with fine mesh screening on vents and doors, and use beneficial insects (like ladybugs) for natural control. Avoid overcrowding plants, and remove weeds/debris regularly. For stubborn pests, try neem oil or insecticidal soap—safe for plants but deadly to bugs!
How do I control temperature in a DIY greenhouse?
Ventilation is key! Install adjustable vents (or roll-up sides) to let hot air escape. On sunny days, shade cloth (30–50% coverage) prevents overheating. At night, close vents and add thermal mass (like bricks) to slow heat loss. A simple thermometer helps monitor temps—aim for 60–85°F for most plants.
Can I grow vegetables year-round in a small DIY greenhouse?
Focus on fast-growing crops like lettuce, herbs, and radishes in cooler months, then switch to tomatoes, peppers, and cucumbers in warmer seasons. Use stacked growing (shelves or vertical planters) to maximize space. Just rotate crops to prevent soil depletion and add compost regularly for nutrients!
Wrapping up and next steps
Building your own DIY greenhouse is a rewarding project that unlocks year-round growing potential—no matter your budget or space! With just a few materials and some creativity, you’ve got everything you need to create a thriving mini-ecosystem for plants, herbs, or even delicate veggies. 🌱
Now that you’re armed with the know-how, take the next step: sketch your design, gather supplies, and start building!
Whether you’re a beginner or a seasoned gardener, your DIY greenhouse will pay off in fresh harvests, cost savings, and the pure joy of watching nature flourish right outside your door. Happy growing! 🌿