
Tools
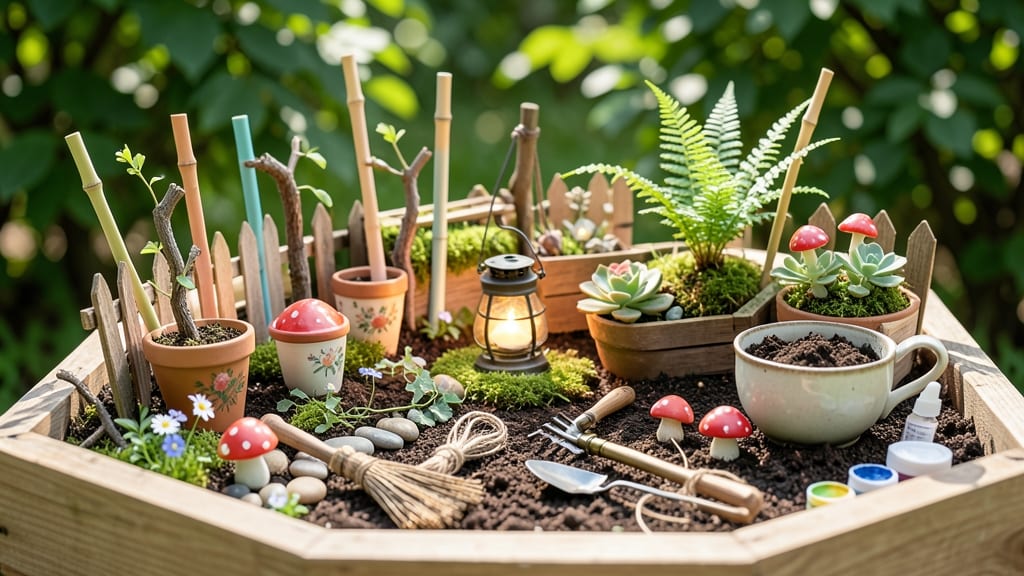
Your fairy garden just got a magical upgrade. ✨ Handmade stakes transform tiny landscapes into enchanting scenes, and the best part? They’re easier to craft than you’d think—no special skills required. Start with simple materials like wooden dowels, twigs, or even repurposed metal rods.
Paint them in soft pastels or weather them naturally for a rustic look. The key is matching stakes to your garden’s theme—whimsical toadstools, twisted branches, or delicate metal scrolls all work beautifully. You’ll end up with stakes that not only support plants but also tell a story.
Imagine a tiny bridge made of twigs or a fence woven from bark—every detail adds charm to your miniature world. Perfect for beginners, eco-conscious crafters, or anyone who loves adding personality to their garden. Let’s make something magical together!
📚 In This Guide
- What you need
- Instructions
- Tips and common mistakes
- Wrapping up and next steps
What you need
- ● Wooden stakes: ¼" to ½" diameter, 6"–12" long (quantity depends on your garden size—aim for 10–20 stakes for a small fairy garden). Use untreated cedar, pine, or birch for natural appeal.
- ● Metal stakes: Thin gauge wire (16–18 gauge), 6"–10" long (or repurpose old jewelry findings, coat hangers, or scrap metal for a rustic look).
- ● Decorative accents: Tiny charms (e.g., mini mushrooms, beads, or painted designs), twine, or faux vines for texture.
- ● Adhesive: Wood glue or a hot glue gun for securing decorations.
- ● Sandpaper: 120–220 grit to smooth edges (especially for wood).
- ○ Paint or sealant: Acrylic paint, wood stain, or non-toxic outdoor sealant (optional for weatherproofing).
- ● Drill or hammer: For pre-drilling holes (if attaching charms) or shaping metal stakes.
- ● Ruler/marker: To measure and mark designs.
- ● Safety gear: Gloves and goggles (if working with metal or power tools).
- ● Miniature fairy lights or LED tea lights for magical evening glows.
- ● Natural elements like dried moss, pebbles, or feathers for texture.
- ● Stencils or freehand designs for custom artwork.
Step-by-step instructions for crafting whimsical fairy garden stakes
Turn simple materials into charming garden markers that add magic to any fairy garden.
🪴 Step 1: Gather Your Materials and Tools
For wooden stakes, grab 4-6 thin branches (¼-½ inch diameter) or pre-cut wooden dowels (⅛-¼ inch thick). I like to use pine or birch branches—they’re lightweight and easy to carve. For metal stakes, copper wire (18-20 gauge) or aluminum rods (⅛ inch diameter) work beautifully. You’ll also need wood-burning tools (if carving wood), wire cutters, pliers, sandpaper (medium grit), and non-toxic paint or wood stain if decorating.
If you’re using natural branches, strip off any leaves or bark to create a clean surface. For wire stakes, bend or twist it into a 3-4 inch tall base before adding details. Keep everything within 4-6 inches tall—fairy stakes shouldn’t be too tall or they’ll look out of place in tiny gardens.
✂️ Step 2: Shape and Sand the Base
Start by trimming your stakes to 3-5 inches tall—this keeps them proportional for fairy gardens. If using wood, sand the edges smooth with medium-grit sandpaper until they feel silky under your fingers. For wire stakes, twist the bottom into a small spiral or coil to mimic roots or a tiny mushroom cap. This adds character and makes them look intentional, not just random sticks.
Here’s where it gets fun: if you’re carving wood, lightly sketch your design with a pencil first. I like to add tiny circles for mushrooms, X’s for doors, or zigzags for vines. Burn or paint these details last—it’s easier to see your lines before finalizing. For wire stakes, bend the top into a loop or hook to hang tiny signs or fairy accessories later.
🎨 Step 3: Decorate with Whimsical Details
Now’s the time to bring your stakes to life! If painting, use acrylic paints in bright colors like emerald green, sky blue, or soft pink. For a rustic look, stain the wood with walnut or coffee dye and add tiny dots for moss or freckles. Seal everything with non-toxic varnish to protect your work from rain. For wire stakes, wrap thin ribbon or yarn around the base to mimic vines or tiny ropes.
Pro tip: Use a toothpick or thin paintbrush to add fine details like tiny stars, hearts, or fairy faces. If you’re feeling ambitious, glue on miniature beads or charms (like tiny mushrooms or acorns) with craft glue. Let everything dry completely—this prevents smudges when you’re ready to plant.
🌿 Step 4: Plant and Position in Your Fairy Garden
Dig small holes in your fairy garden 1-2 inches deep and press the stakes gently into the soil. Space them 2-3 inches apart so they don’t crowd your fairy plants. If using wire stakes, bend the bottom slightly to anchor them without toppling. For a cohesive look, group stakes by height or color—tall stakes near the back, shorter ones in the front.
Here’s the thing—fairy stakes aren’t just markers. Use them to create pathways, mark tiny "doors," or label plants with painted letters. I like to pair them with miniature signs (cut from bark or wood) to add extra charm. Water your garden lightly after planting to settle the soil around the stakes.
💡 Step 5: Maintain and Get Creative
Check your stakes occasionally for loose paint or frayed wire. Touch up as needed with a small brush and matching paint. If using natural wood, the color may fade over time—just sand lightly and re-stain if desired. For extra durability, coat wooden stakes with clear outdoor sealant every few months.
Don’t stop at basic stakes! Try adding tiny hooks to hang fairy lanterns or carved notches to hold pebbles for "fairy steps." The key is to keep them light, playful, and in scale with your garden. Over time, you’ll develop your own signature style—maybe mushroom-shaped stakes or tiny ladders for fairy climbing. The possibilities are endless!
Tips & Tricks for perfect fairy garden stakes
These little details make all the difference between cute accents and magical garden markers.
Material Selection: For wooden stakes, fresh pine or birch branches work beautifully because they're lightweight and easy to carve. If you're using pre-cut dowels, look for ones that are ⅛-¼ inch thick—they'll be sturdy enough for planting but still delicate enough to feel whimsical. For metal stakes, copper wire is my favorite because it ages beautifully with a patina, but aluminum rods are more budget-friendly and just as durable.
Design Sketching: Before you start carving or painting, sketch your design on paper first. This helps you visualize the scale—remember, we're working with 3-5 inch stakes! I like to draw my designs twice the actual size so I can see details clearly. For wood, use a pencil to lightly sketch your patterns (like mushrooms or doors) before burning or painting. For wire stakes, sketch how you'll bend the top into hooks or loops before you start twisting.
Durability Tricks: To make your painted wooden stakes last longer, seal them with non-toxic varnish after decorating. This protects against rain and sun fading. For wire stakes, use pliers to create a tight spiral at the base—this mimics roots and gives them better stability in the soil. If you're adding any decorative elements like beads or charms, use craft glue sparingly and let everything dry completely before planting to prevent smudges.
Planting Technique: When planting, dig holes that are 1-2 inches deep—just enough to hold the stakes securely without wobbling. For wire stakes, bend the bottom slightly at a 45-degree angle to help anchor them. Space your stakes 2-3 inches apart to create a natural, uncrowded look. Group similar designs together for a cohesive fairy garden aesthetic—like all the mushroom stakes near the fairy door or all the vine designs along the pathway.
Pro Tips for Make Fairy Garden Stakes
- These little details make all the difference between cute accents and magical garden markers.
- Material Selection: For wooden stakes, fresh pine or birch branches work beautifully because they're lightweight and ...
- Design Sketching: Before you start carving or painting, sketch your design on paper first. This helps you visualize t...
Frequently asked questions
Got questions about crafting the perfect fairy garden stakes? You’re not alone! Here are some of the most common queries—and their handy answers—to help you create stakes that stand tall and magical.
What’s the best material for fairy garden stakes—wood or metal?
Both work wonderfully, but it depends on your vision! Wood (like cedar or birch) adds rustic charm and pairs beautifully with natural themes. It’s lightweight, easy to paint or stain, and blends seamlessly into forest-inspired gardens. Metal (copper, iron, or aluminum) offers durability and a sleek, modern look. It’s ideal for stakes that need to last longer or resist moisture. Choose based on your design aesthetic and maintenance preferences!
When is the best time to make and install fairy garden stakes?
The best time to craft and install stakes is during spring or early fall, when temperatures are mild and your fairy garden can thrive. Avoid extreme heat or frost, as wood may warp or metal could corrode if exposed to moisture. If you’re creating stakes as a seasonal project, plan ahead: dry materials (like wood) take time to age and weather naturally, while metal stakes can be prepped year-round for instant use.
Can I use stakes for purposes other than fairy gardens?
Fairy garden stakes are versatile little wonders. Use them to:
- Mark plants in your vegetable or herb garden (add a tiny flag or label!).
- Create whimsical borders for flower beds or terrariums.
- Design miniatures for dollhouses or model train sets.
- Add charm to holiday displays (think tiny "Noel" stakes for Christmas!).
How do I prevent my wooden stakes from rotting or warping?
To keep your wooden stakes sturdy and long-lasting:
- Seal them first: Apply a non-toxic wood sealant or outdoor varnish before painting or staining.
- Choose the right wood: Cedar and redwood are naturally resistant to rot and insects.
- Avoid direct soil contact: Elevate stakes with small rocks or pebbles to improve airflow.
- Store properly: Keep extra stakes in a dry, shaded area if not using them immediately.
What are some creative ways to decorate my stakes beyond paint?
Skip the paintbrush and try these unique decorating ideas:
- Nature wraps: Use twine, moss, or thin vines to create textured stakes.
- Stencils or decals: Apply vinyl decals or hand-cut stencils for intricate designs.
- Glitter or resin: Add a touch of sparkle with non-toxic glitter or a thin resin coat (seal with a clear varnish).
- Carved details: Lightly etch patterns with a craft knife or wood-burning tool.
- Mixed media: Glue on tiny beads, buttons, or even recycled bottle caps for a boho look.
Wrapping up and next steps
Creating your own fairy garden stakes is a rewarding way to add charm and functionality to your magical mini-world! Whether you choose rustic wooden stakes or sleek metal designs, the key is to let your creativity shine—every detail matters.
With just a few tools and materials, you’ve got everything you need to craft stakes that bring your fairy garden to life.
Now that you’re inspired, why not take the next step? Grab your supplies and start building! Share your creations with fellow gardeners or even turn it into a fun DIY project with friends. Your fairy garden is waiting—what will you design next? ✨