
Companion Plants
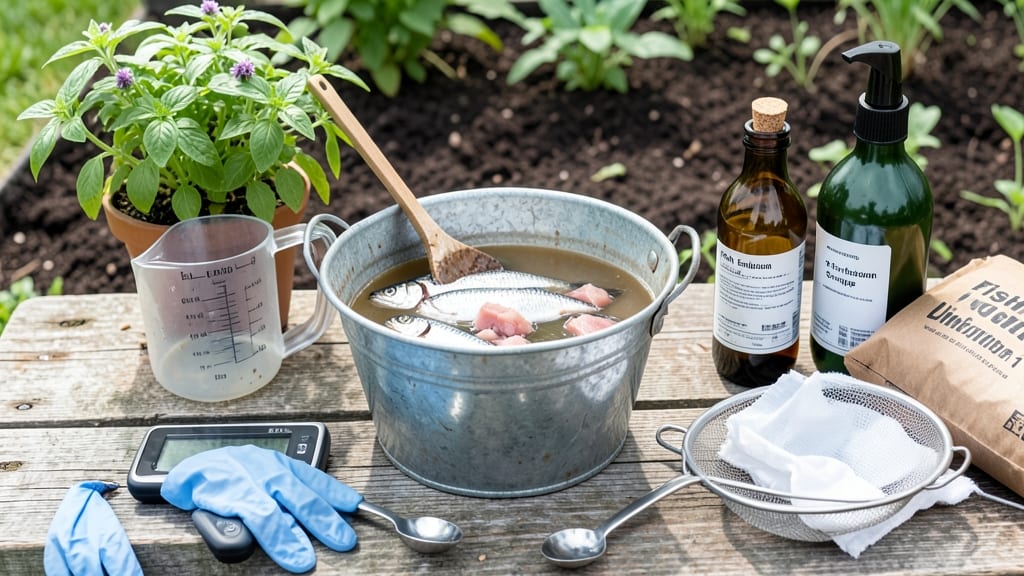
Making fish emulsion at home turns kitchen scraps into garden gold. 🌱 The rich, stinky liquid feeds plants with nitrogen, phosphorus, and potassium—exactly what store-bought fertilizers promise but cost far more for.
Start with 3-5 pounds of clean fish scraps (heads, bones, trimmings) and 10 gallons of water in a sealed container. Let it ferment for 4-6 weeks, stirring occasionally. The smell gets stronger before it gets better—think of it as compost tea for hungry roots.
You'll end up with a dark, nutrient-packed liquid that smells like the ocean but works like magic in the garden. Dilute it 1:10 with water before applying to avoid burning plants. Perfect for tomatoes, peppers, and leafy greens that crave extra protein.
Works best in warm weather when microbes work fastest, but even winter batches break down eventually. Just be patient—great fertilizer takes time. Ready to turn trash into treasure?
📚 In This Guide
- What you need
- Instructions
- Tips and common mistakes
- Wrapping up and next steps
What you need
- ● Fresh or frozen fish scraps: 1–2 lbs (preferably oily fish like salmon, mackerel, or sardines for extra nutrients). Avoid fish with high mercury content (e.g., shark, swordfish).
- ● Water: 1 gallon (filtered or rainwater preferred).
- ● Non-metal container: A 1–2 gallon bucket (glass, food-grade plastic, or ceramic). Avoid aluminum or copper.
- ● Breathable cover: A lid with small holes (or cheesecloth) to allow airflow while keeping pests out.
- ● Wooden stick or spoon: For stirring (metal can react with the mixture).
- ● Strainer or cheesecloth: To filter the emulsion later.
- ○ Gloves (optional but recommended): Fish scraps can be smelly and messy!
- ● Epsom salt (magnesium sulfate): 1 tbsp (boosts plant growth and chlorophyll production).
- ● Molasses or sugar: 1 tsp (feeds beneficial microbes during fermentation).
- ● Wood ash (from untreated wood): 1 tbsp (adds potassium and raises pH slightly).
- ● Probiotic or compost tea: ½ cup (speeds up fermentation and balances microbes).
- ● Spray bottle: For diluting and applying the final emulsion.
Step-by-step instructions for brewing nutrient-rich fish emulsion
Here’s how I turn scraps into a potent, organic fertilizer—no fancy equipment needed.
🐟 Step 1: Gather and Prep Your Fish Scraps
Start with 4 pounds of fish scraps—heads, bones, and trimmings work best. Rinse them thoroughly under cold water to remove blood, scales, and any residue. This prevents foul odors and bacterial buildup during fermentation. Chop larger pieces into ½-inch chunks for faster breakdown.
Place the scraps in a 5-gallon bucket or non-reactive container (stainless steel or food-grade plastic). Avoid metal containers—they can react with the acids forming during fermentation. If using a bucket, poke holes in the lid for ventilation while keeping pests out.
💧 Step 2: Add Water and Ferment for 2-3 Weeks
Cover the fish scraps with enough water to submerge them completely. Stir daily to distribute oxygen and prevent anaerobic pockets that cause rot. You’ll know it’s working when the mixture turns brown and emits a strong, fishy (but not putrid) smell after 3-5 days.
Keep the bucket in a warm, shaded spot—a garage or basement works well. Temperatures between 65-75°F speed up fermentation without risking bacterial growth. Stir again after 7 days to check for mold (discard if present) or to adjust water levels if evaporation occurs.
⏰ Step 3: Strain and Dilute for Plant Use
After 2-3 weeks, when the mixture liquefies and smells like a deep-sea tang (not rotten), strain it through a fine mesh bag or cheesecloth. Squeeze out every drop—the leftover solids can compost or go back into the garden as a top-dressing.
Dilute the liquid 1:10 with water (1 part emulsion to 10 parts water) before applying. Undiluted fish emulsion burns roots—think of it as a super-concentrated nutrient shot. For foliar sprays, use a 1:20 dilution to avoid leaf damage.
🌱 Step 4: Apply to Plants for Maximum Uptake
Use the diluted emulsion as a soil drench or foliar feed. Water the soil first to prevent salt buildup, then apply ½ cup per gallon of soil around the base of plants. Repeat every 4-6 weeks during growing seasons for flowering plants or every 2 weeks for heavy feeders like tomatoes and peppers.
For foliar sprays, apply in the early morning or late afternoon to avoid sunburn on treated leaves. You’ll see results within 2-3 weeks: deeper green foliage, stronger stems, and more abundant blooms. Store unused emulsion in a sealed container in the fridge for up to 3 months.
✂️ Step 5: Troubleshoot and Store for Future Use
If your emulsion smells sour or moldy, discard it immediately—this indicates bacterial contamination. To prevent this, always use clean water and containers. For long-term storage, freeze the strained liquid in 1-gallon batches; thaw only what you need for the season.
Here’s the thing—this fertilizer is not a one-time wonder. The scraps you’d normally toss become a goldmine of nitrogen, phosphorus, and micronutrients. I’ve used it to revive struggling houseplants and boost garden beds, and the difference is noticeable within weeks.
Tips & tricks for perfect homemade fish emulsion
Turning fish scraps into nutrient gold takes patience—but these tricks ensure you get the most potent fertilizer possible without the headaches.
Fermentation Environment: The 65-75°F temperature range is your sweet spot for safe, efficient fermentation. If your space runs cooler (like a basement in winter), consider placing the bucket near a sunny window or using a small heating pad on low—just keep it away from direct sunlight to prevent overheating. I’ve found that maintaining this temperature range not only speeds up the process but also minimizes the risk of mold or foul odors.
Stirring Strategy: Daily stirring isn’t just about mixing—it’s your oxygen delivery system. Use a clean wooden spoon or non-reactive utensil to break up any scum forming on the surface and ensure all scraps stay submerged. After that 7-day mark, check for mold by looking for fuzzy spots or a musty smell. If you spot anything suspicious, toss it immediately—better to start over than risk contaminating your batch.
Straining Efficiency: When you reach the 2-3 week mark and it’s time to strain, don’t rush this step. Use a fine mesh bag or cheesecloth, but double it up for extra insurance against tiny particles slipping through. Press the solids gently but firmly to extract every last drop of nutrient-rich liquid. Those leftover solids might look unappealing, but they’re still valuable—compost them or bury them directly in your garden beds for a slow-release nutrient boost.
Dilution Precision: The 1:10 dilution ratio is non-negotiable for soil applications, but remember that this is a concentrated powerhouse. Always water your plants first to prevent salt buildup in the root zone. For foliar sprays, that 1:20 dilution gives you the perfect balance between nutrient delivery and plant safety. I’ve learned the hard way that skipping this step leads to crispy leaf edges—your plants will thank you for the extra care!
Pro Tips for Make Fish Emulsion For Plants
- Turning fish scraps into nutrient gold takes patience—but these tricks ensure you get the most potent fertilizer poss...
- Fermentation Environment: The 65-75°F temperature range is your sweet spot for safe, efficient fermentation. If your ...
- Stirring Strategy: Daily stirring isn’t just about mixing—it’s your oxygen delivery system. Use a clean wooden spoon ...
Frequently asked questions
Got questions about making fish emulsion for your plants?
You’re not alone! Here are answers to the most common queries to help you DIY like a pro.
Can I use any type of fish to make emulsion?
While most fish work, oily fish like salmon, sardines, or mackerel are ideal—they’re nutrient-dense and break down well. Avoid farmed fish with unknown additives or fish with high mercury levels (like swordfish or shark). Stick to wild-caught or sustainably sourced options for the best results!
How long does homemade fish emulsion last?
Store your emulsion in an airtight container in a cool, dark place (like a fridge or cellar). With proper fermentation, it’ll stay potent for 6–12 months. If it smells rotten or overly sour, toss it—mold or bad bacteria can harm your plants. Pro tip: Label your jar with the date!
Is fish emulsion safe for all plants?
Fish emulsion is a balanced fertilizer (rich in nitrogen, phosphorus, and potassium), but some plants—like acid-loving varieties (blueberries, azaleas)—thrive on it. However, avoid overusing it on succulents or cacti, which prefer low-nitrogen feeds. Always dilute (1–2 tbsp per gallon) and monitor your plants’ response!
Is it cheaper than buying store-bought?
Yes! Homemade fish emulsion costs pennies per gallon compared to $10–$20 for commercial versions. For example, a 5-pound bag of fish scraps (often free from seafood markets) makes 2–3 gallons of emulsion. Bonus: You’ll know exactly what’s in it—no synthetic additives!
What if my emulsion smells terrible?
A slightly fishy or fermented odor is normal! But if it’s putrid, moldy, or attracts flies, your batch may have gone bad. Fix it by:
- Adding 1 tbsp apple cider vinegar or lemon juice to balance pH.
- Straining out any visible mold (discard the solids).
- Starting fresh if the smell persists—safety first!
Can I use fish emulsion on vegetables I’ll eat?
Yes, but only if you follow food-safe practices:
- Use organic, pesticide-free fish (no farm-raised with antibiotics).
- Avoid spraying directly on edible parts (like lettuce leaves)—apply to soil instead.
- Wait 2–3 weeks before harvesting after application.
Wrapping up and next steps
Making your own fish emulsion fertilizer is a rewarding way to boost your garden’s health naturally—no fancy tools or expensive ingredients required! With just a few simple steps, you’ve unlocked a nutrient-packed liquid gold for your plants. 🌱✨
Now that you’re ready to brew, start small—test a batch on a few plants first to see how they respond. Once you’ve mastered the recipe, experiment with companion plant pairings or even adjusting ratios for specific needs. Happy gardening!