
Planting
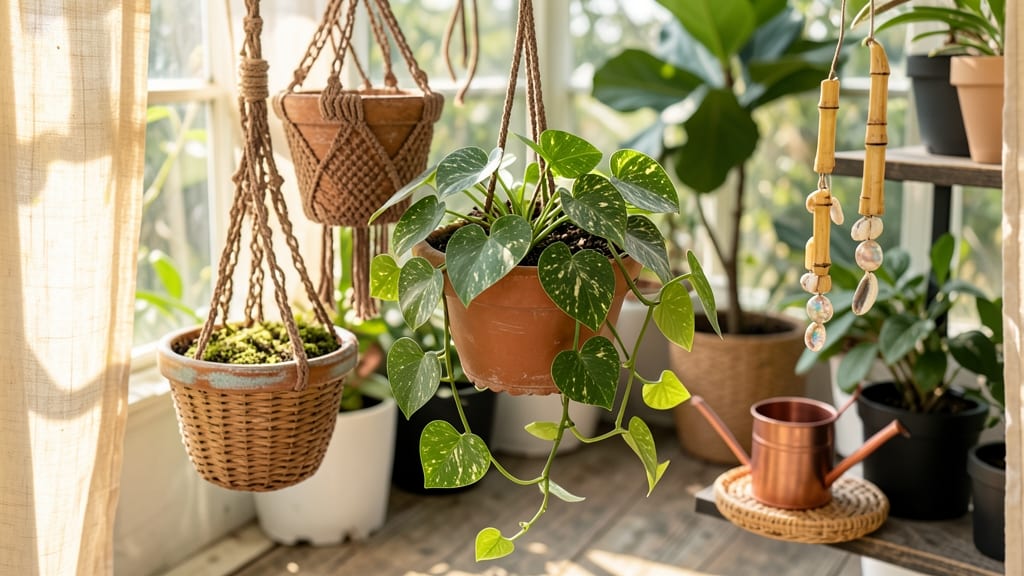
Your walls could soon host a thriving vertical garden. 🌿 Making a hanging plant holder is simpler than you think—just a few knots, some wood, and a little creativity. I’ve crafted mine from reclaimed materials, and they’ve transformed my patio into a lush, green haven without breaking the bank.
This project uses basic macramé knots and a sturdy wooden slat, perfect for lightweight plants like succulents, ferns, or trailing vines. The best part? It’s customizable—add tiers, mix materials, or hang it indoors for a boho-chic touch.
All you need is a few supplies, an hour of your time, and a little patience for the knots.
By the end, you’ll have a durable, stylish holder that elevates your space while keeping plants happy. The knots hold strong, the wood resists warping, and your greenery will thrive in its new home. Plus, it’s a great way to upcycle old containers or wood scraps.
Whether you’re a beginner or a seasoned crafter, this design adapts to any skill level. Hang it on a balcony, porch, or even indoors near a sunny window—your plants (and neighbors) will thank you. Let’s get started!
📚 In This Guide
- What you need
- Instructions
- Tips and common mistakes
- Wrapping up and next steps
What you need
- ● 3–4 wooden slats (12–18" long, 1–2" wide, and ½" thick—cedar or pine work great!)
- ● 3/8"–¼" thick macramé cord (10–15 feet, natural or colored jute, cotton, or hemp)
- ● Drill (with a 1/8" bit for cord holes)
- ● Measuring tape or ruler
- ● Scissors (for trimming cord)
- ○ Wood glue (optional, for extra slat stability)
- ● Sandpaper (medium-grit, to smooth edges)
- ● Decorative beads (wooden, ceramic, or glass for flair)
- ● Spray paint (for a painted slat look—let dry fully!)
- ● Hook or S-hook (if your ceiling/rail doesn’t have one)
- ● Plant pot (1–2" smaller than your slat width for snug fit)
Step-by-Step instructions for crafting a macramé hanging plant holder
Here's the straightforward method I use to create sturdy, stylish plant hangers that last for years.
🪴 Step 1: Gather Materials and Measure Your Slat
You'll need a 3-foot length of ¼-inch thick cotton rope, a wooden slat (6-12 inches long), and a metal ring or hook for hanging. First, measure your slat and mark the center point—this is where your plant will sit. I like to use a 12-inch slat for medium-sized plants, as it provides stability without being too bulky.
Cut your rope into four equal lengths (about 36 inches each for a 12-inch slat). This ensures symmetry and balance in your final design. If you're making multiple hangers, keep the rope lengths consistent for a cohesive look. Double-check your measurements before cutting—once the rope is snipped, you can't undo it.
🎨 Step 2: Create the Base Knots for Stability
Start by tying a square knot around the slat, positioning it at the marked center point. Use two of your rope lengths to form an "X" under the slat, then tie them tightly. This knot will hold the weight of your plant, so pull the ropes snug but not so tight that they cut into the wood.
Next, tie another square knot 4-6 inches above the first knot, using the same two ropes. This creates a second anchor point for your plant's pot. Space these knots evenly—if they're too close together, the hanger will feel top-heavy, and if they're too far apart, the pot may slide forward. Test the balance by holding the slat horizontally before moving on.
🪢 Step 3: Add the Hanging Loop and Decorative Knots
Attach your metal ring or hook to the top of the slat using the remaining two rope lengths. Tie a lark's head knot around the ring, then secure it with a double half-hitch to ensure it won’t slip. This loop is where you’ll hang your finished planter, so make it sturdy—give it an extra tug to confirm it won’t come undone.
Now, add decorative knots along the sides of the slat. Use the remaining rope to create spiral knots or flat knots between the base knots and the hanging loop. These knots add texture and prevent the rope from unraveling. Space them evenly—about 2 inches apart—for a polished look. If you're new to macramé, practice a few knots on scrap rope first to get the hang of it.
✂️ Step 4: Trim and Finish for a Clean Look
Once all your knots are tied, trim any excess rope ends to ¼ inch above the knots. Use sharp scissors to avoid fraying the fibers. A clean finish makes your hanger look intentional and professional. If you notice any loose strands, tuck them neatly into the nearest knot.
Give your hanger a final inspection. Hold it up and check for balance—if one side feels heavier, adjust the knots or redistribute the rope. Once satisfied, hang it in a spot with indirect light (direct sun can dry out the rope over time). Your macramé plant holder is now ready to hold a thriving green friend!
🌿 Step 5: Customize and Care for Longevity
To personalize your hanger, add beads or charms between the knots for extra flair. Avoid heavy decorations, as they can weigh down the rope. For maintenance, occasionally mist the rope with water to keep it soft and prevent cracking. If your hanger starts to sag, tighten the knots gently or add a few extra decorative knots to reinforce the structure.
Here’s the thing—macramé hangers improve with age. The more you use them, the more character they develop. Over time, the knots may loosen slightly, but a quick retighten keeps them functional. With proper care, your handmade hanger will last for years, holding everything from trailing pothos to delicate air plants.
Tips & tricks for perfect hanging plant holders
Here's what nobody tells you about making macramé plant hangers that actually hold up over time.
Rope Selection Matters: That ¼-inch thick cotton rope isn't just a suggestion—it's the sweet spot for durability. Thinner ropes (like ⅛-inch) can fray under plant weight, while thicker ropes (like ½-inch) become bulky and hard to work with. I've tested all three, and ¼-inch gives you that perfect balance between strength and workability. If you can't find cotton, jute works too, but it's stiffer and less forgiving for beginners.
Knot Tightness is Critical: In Step 2, when you're tying those square knots, pull them snug but don't cinch them like you're trying to strangle the rope. The knots should hold the slat firmly without cutting into the wood. I learned this the hard way—too tight, and your knots will dig into the slat over time, creating stress points that can weaken the structure. Test each knot by gently tugging while holding the slat horizontally.
Balance is Everything: The spacing between your base knots (4-6 inches apart) creates the perfect weight distribution. Too close together, and your hanger will feel top-heavy with any plant pot. Too far apart, and your pot will slide forward. Pro tip: After tying both base knots, hold the slat horizontally with your non-dominant hand—if it feels unstable, adjust the rope lengths slightly. This simple check saves you from having to redo knots later.
Decorative Knots Serve a Purpose: Those spiral or flat knots you add in Step 3 aren't just for looks—they're structural reinforcements. They prevent the rope from unraveling at the knots and add extra strength to the sides. Space them consistently (about 2 inches apart) to create a rhythm that's both functional and visually appealing. If you're nervous about your knot-tying skills, practice a few on scrap rope first—it makes all the difference.
Pro Tips for Make Hanging Plant Holder
- Here's what nobody tells you about making macramé plant hangers that actually hold up over time.
- Rope Selection Matters: That ¼-inch thick cotton rope isn't just a suggestion—it's the sweet spot for durability. Thi...
- Knot Tightness is Critical: In Step 2, when you're tying those square knots, pull them snug but don't cinch them like...
Frequently asked questions
Got questions about crafting your own hanging plant holder? We’ve got answers! Whether you’re a beginner or just want to troubleshoot, here’s what you need to know:
What’s the easiest hanging plant holder design for beginners?
Start with a simple macramé knot design—like the square knot or half-hitch knot—or a wooden slat with pre-drilled holes. These require minimal tools and patience over skill. For extra stability, add a rope loop at the top for hanging.
How do I measure the right size for my plant?
Measure your plant’s pot diameter and add 2–4 inches for stability. For example, a 6-inch pot needs a holder 8–10 inches wide. If using macramé, leave 1–2 inches of slack in the knots to accommodate growth. Pro tip: Use a measuring tape and sketch a rough outline before cutting materials!
Can I use materials other than rope and wood?
Try:
- Jute or hemp rope (cheap and eco-friendly)
- Recycled fabric strips (for a boho look)
- Metal chains or leather straps (modern/industrial vibe)
- Bamboo or rattan slats (lightweight and sturdy)
Just ensure your alternative material can support the plant’s weight when fully grown.
Why is my macramé plant holder sagging or uneven?
Sagging usually means uneven tension or weak knots. Fix it by:
- Re-tightening knots with a wooden dowel or your fingers.
- Adding a second rope layer for support.
- Using a stiffer material (like sisal rope) if flexibility is the issue.
For wooden slat holders, check if the hanging hook is secure or if the slat needs additional bracing.
How do I protect my hanging plant holder from rain or moisture?
If outdoors, seal natural materials like wood with non-toxic varnish or linseed oil. For macramé, avoid leaving it soaked—opt for water-resistant rope (e.g., polypropylene) or store it indoors during heavy rain. Pro tip: Place under a covered porch or use a clear umbrella for extra protection!
Wrapping up and next steps
Creating your own hanging plant holder is a rewarding way to add a personal touch to your space while bringing nature indoors! Whether you chose the boho-chic macramé style or the rustic wooden slat design, you now have a functional and stylish piece to showcase your favorite greens. 🌿✨
Ready to take it further? Experiment with colors, textures, or even combine materials to make it uniquely yours. Happy crafting—and may your plants thrive in their new home! 🌱💚