
Companion Plants
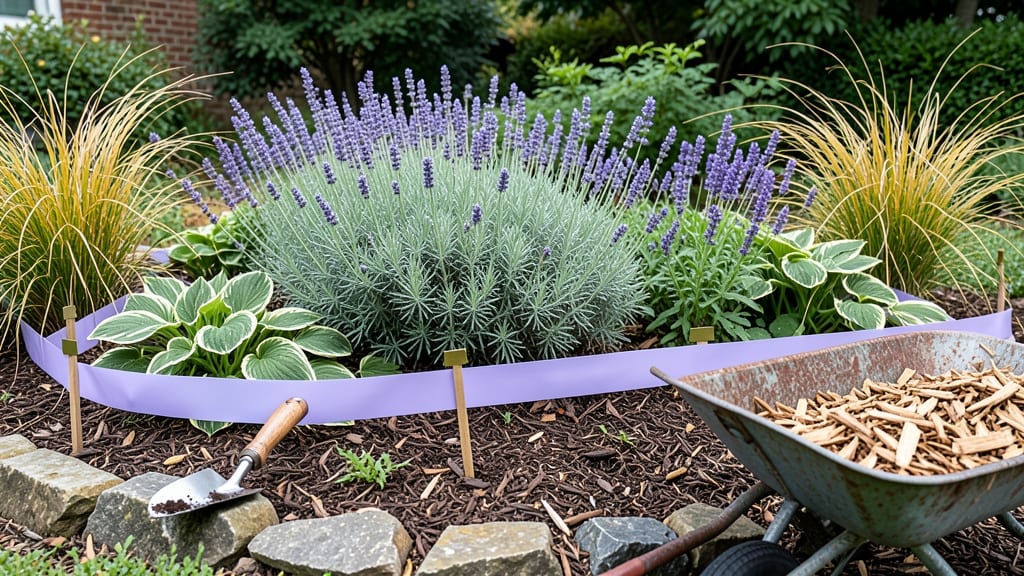
How to arrange plants isn’t just about looks—it’s about creating a garden that thrives. 🌿 I learned this the hard way when my tomato plants shaded my lettuce into oblivion, but the right pairings can boost growth, deter pests, and make your space pop with color. The secret lies in matching sunlight needs, growth habits, and companion benefits.
Start by grouping plants with similar water and sunlight requirements together. Tall plants like sunflowers or hollyhocks go at the back, medium-height shrubs in the middle, and low-growing flowers or herbs up front.
Add pest-repelling pairs like marigolds near tomatoes or basil near peppers—they'll work together to keep your garden healthy and productive.
You'll end up with a garden that's not just beautiful but functional too. The right arrangement means less competition for nutrients, better air circulation to prevent disease, and a layout that's easy to maintain.
Plus, the visual impact? A well-planned garden feels like a living work of art that changes with the seasons.
Whether you're working with containers, borders, or a full vegetable plot, these principles adapt easily. The key is observing how your plants interact—what thrives together and what doesn't—and making adjustments as you go. Your garden will thank you with stronger growth and fewer headaches.
📚 In This Guide
- What you need
- Instructions
- Tips and common mistakes
- Wrapping up and next steps
What you need
- ● Plants: Choose 3–5 healthy, disease-free plants (mix of annuals, perennials, or vegetables, depending on your goal). Tip: Research companion pairings (e.g., basil + tomatoes, marigolds + herbs) for best results!
- ● Garden soil or potting mix: 1–2 bags (or enough to fill your garden beds/containers). Opt for well-draining, nutrient-rich soil (e.g., Miracle-Gro Garden Soil or FoxFarm Ocean Forest).
- ● Containers or garden bed space: Containers: 5–10 gallon pots (with drainage holes) or raised beds (at least 6–12 inches deep).
- ● Garden beds: Clear the area of weeds, rocks, or debris (use a hula hoe or garden rake for prep).
- ● Watering can or hose with a gentle spray nozzle: 1–2 gallons capacity (or a drip irrigation kit for efficiency).
- ● Gloves: 1 pair (gardening gloves to protect hands from thorns or soil).
- ● Pruners or shears: 1 pair (sterilized, sharp pruners for trimming or transplanting).
- ● Measuring tape or ruler: 1 (to ensure proper spacing—check plant tags for recommendations!).
- ○ Mulch (optional but helpful): Straw, wood chips, or shredded leaves (1–2 inches thick to retain moisture and suppress weeds).
- ● Compost or fertilizer: Organic options like fish emulsion or worm castings to boost growth.
- ● Plant labels: Wooden stakes or plant markers to track varieties (especially useful for companion pairings!).
- ● Support structures: Trellises, cages, or stakes for vining plants (e.g., cucumbers, beans, or morning glories).
- ● Soil pH tester: To check and adjust soil acidity (companion plants often thrive in specific pH ranges!).
- ● Plant food or liquid fertilizer: For a nutrient boost (e.g., seaweed extract or balanced NPK fertilizer).
- ● Decorative elements: Rocks, pebbles, or solar-powered lights to enhance aesthetics (if arranging for visual appeal!).
Instructions: designing a plant layout that thrives together
Here's how I create harmonious plant pairings that boost growth, deter pests, and maximize space—no guesswork involved.
🌱 Step 1: Group Plants by Sunlight and Water Needs
Start by categorizing your plants into three groups: full sun lovers (6+ hours daily), partial shade plants (3-6 hours), and shade dwellers (less than 3 hours). I draw a simple sketch of my garden bed, marking north-south orientation to track sun exposure throughout the day. This prevents competition where thirsty sun-lovers crowd out moisture-sensitive shade plants.
For example, pair tomatoes with basil in the sunniest spot—they share similar water needs and basil actually improves tomato flavor. Meanwhile, place lettuce and spinach near the north side of the bed where they won't bolt from afternoon heat. Use a small flag or stake to mark each zone before planting.
🌿 Step 2: Arrange by Height and Growth Habit
Tall plants like sunflowers or corn go in the north or center of the bed to avoid shading shorter companions. I arrange them in a way that their mature height creates natural windbreaks for delicate plants like strawberries or peppers placed at their base. Dwarf varieties or sprawlers (such as cucumbers or zucchini) belong along the edges or trellised vertically to free up ground space.
Here's my trick: I sketch a vertical profile of the bed, drawing each plant's mature height. This reveals potential shading conflicts before they happen. For instance, pole beans trellised behind radishes lets both thrive—beans provide shade for radishes during peak sun, while radishes mature quickly before beans fully leaf out.
💧 Step 3: Pair Beneficial Companions for Pest Control
strategic pairings reduce pests naturally. I plant marigolds around the perimeter of my veggie beds—their strong scent repels nematodes and aphids. Nearby, nasturtiums act as trap crops, luring pests away from cucumbers and squash. For roses, I interplant garlic and thyme to deter beetles and fungal diseases.
Another key move: I place onion family plants (onions, garlic, chives) near carrots and tomatoes—their pungent aroma confuses carrot flies and deters tomato hornworms. Avoid planting beans near onions, though; they compete for nitrogen and stunt each other's growth. Keep a small notebook handy to track which pairings work best in your microclimate.
✂️ Step 4: Leave Space for Airflow and Maintenance
Crowding invites disease, so I follow the "rule of three" for spacing: leave at least 3 inches between small herbs, 6-12 inches between medium plants (like peppers or bush beans), and 18-24 inches for large plants (tomatoes, cabbage). I use a telescoping measuring tape to mark planting spots in a grid pattern before digging.
For sprawlers like melons or squash, I allocate 3-4 square feet per plant and train them along trellises or fences. This keeps vines off the ground, reducing rot and making harvests easier. I also leave 12-inch walkways between beds for tools and pruners—trust me, you'll thank yourself later when you're not kneeling in mud to deadhead flowers.
☀️ Step 5: Rotate and Adjust Annually
Every spring, I reassess my layout based on last year's performance. If potatoes struggled with blight in one spot, I rotate them to a new bed and replace them with beans, which add nitrogen to the soil. I also note which pairings thrived—like carrots and leeks growing side by side—and repeat those combos.
For perennial plants (like asparagus or rhubarb), I dedicate a permanent corner of the garden where they won't be disturbed. Annuals get the flexible spots, allowing me to experiment with new pairings each season. A quick photo of the previous year's layout helps me remember what worked—and what didn't.
Tips & tricks for perfect plant arrangement
Here's what nobody tells you about creating harmonious garden layouts that actually work.
Sunlight Mapping: Use a simple garden compass app to track your bed's sun exposure throughout the day. I mark my sketch with arrows showing sun paths at different times—this helps me visualize how shadows shift. For example, a tomato plant might get 6 hours of sun in summer but only 4 in winter, so I place it near the north edge of the bed to maximize winter light. This prevents wasted space from misjudged sun exposure.
Height Strategy: When arranging your vertical profile, include mature heights for all plants—don't just guess. I keep a reference chart of mature heights for all my plants (like 6 feet for sunflowers vs. 1 foot for radishes) and draw them to scale. This reveals potential shading conflicts before you plant. For instance, placing pole beans behind radishes works because radishes mature in 30 days while beans take 60 days to leaf out.
Pest Prevention: Marigolds are my secret weapon for pest control—I plant them in a checkerboard pattern around the perimeter of my beds. Their strong scent repels nematodes and aphids while also attracting beneficial insects like ladybugs. For tomato beds, I add basil in the center; the basil's fragrance confuses tomato hornworms while improving tomato flavor. This creates a natural pest barrier without chemicals.
Spacing Hack: Use pool noodles as temporary spacers when planting! Cut them to your desired spacing measurements (like 12 inches for peppers) and insert them between plants at planting time. They're flexible, visible, and disappear when you're ready to harvest. I also mark my walkways with small landscape flags to avoid trampling plants—this keeps my paths clear for maintenance.
Pro Tips for Arrange Plants
- Here's what nobody tells you about creating harmonious garden layouts that actually work.
- Sunlight Mapping: Use a simple garden compass app to track your bed's sun exposure throughout the day.
- Height Strategy: When arranging your vertical profile, include mature heights for all plants—don't just guess.
Frequently asked questions
Got questions about arranging plants like a pro? Here are some of the most common ones—plus quick, practical answers to help you create the perfect garden harmony!
What are the best companion plants for beginners?
Start with easy pairings like basil and tomatoes (basil repels pests and boosts flavor), marigolds and peppers (marigolds deter nematodes), or carrots and onions (onions deter carrot flies). These combos are forgiving, productive, and low-maintenance—perfect for building confidence!
When is the best time to arrange or rearrange plants in my garden?
The ideal time is early spring or late fall, when the soil is workable but not frozen. Avoid rearranging during peak heat or drought—plants stress easily when uprooted. If you must move plants mid-season, do it on a cloudy day and water thoroughly before and after to minimize shock.
Can I arrange plants in containers if I don’t have a traditional garden?
Containers are a fantastic alternative. Use large pots (at least 5 gallons for veggies) with drainage holes, and pair plants with similar water/sun needs. Try strawberries with borage (borage deters pests) or lettuce with radishes (radishes loosen soil for lettuce roots). Just ensure containers get enough sunlight!
How do I troubleshoot if my companion plants aren’t thriving together?
Start by checking for overcrowding (plants need space to breathe!) or competing nutrients (some pairs, like corn and potatoes, actually hate each other). Look for pests (e.g., aphids on basil) or diseases (yellowing leaves = possible fungal issues). If needed, separate aggressive plants (like mint) or adjust spacing. When in doubt, research your specific pair!
Do companion plants work in shady gardens?
Yes! Shady spots can still thrive with the right combos. Try hostas with ferns (both love shade and deter slugs), lettuce and spinach together (they share space well), or caladiums and impatiens (bright, pest-resistant pairings). Just avoid pairing plants with opposite water needs—e.g., moisture-loving ferns next to drought-tolerant sedum.
Wrapping up and next steps
Arranging plants thoughtfully can transform your garden into a lush, productive paradise—where companionship between species boosts growth, deters pests, and even enhances flavors! 🌱 From the classic trio of tomatoes, basil, and marigolds to unexpected allies like carrots and rosemary, the key is understanding each plant’s needs and benefits.
Start small, experiment with pairings, and don’t forget to observe how your garden evolves.
Ready to level up your green space? Grab a notebook, sketch your layout, and pick 2-3 new companion plants to test this season. Happy gardening—your future harvest (and happy pollinators!) will thank you. 🌿✨