
How To
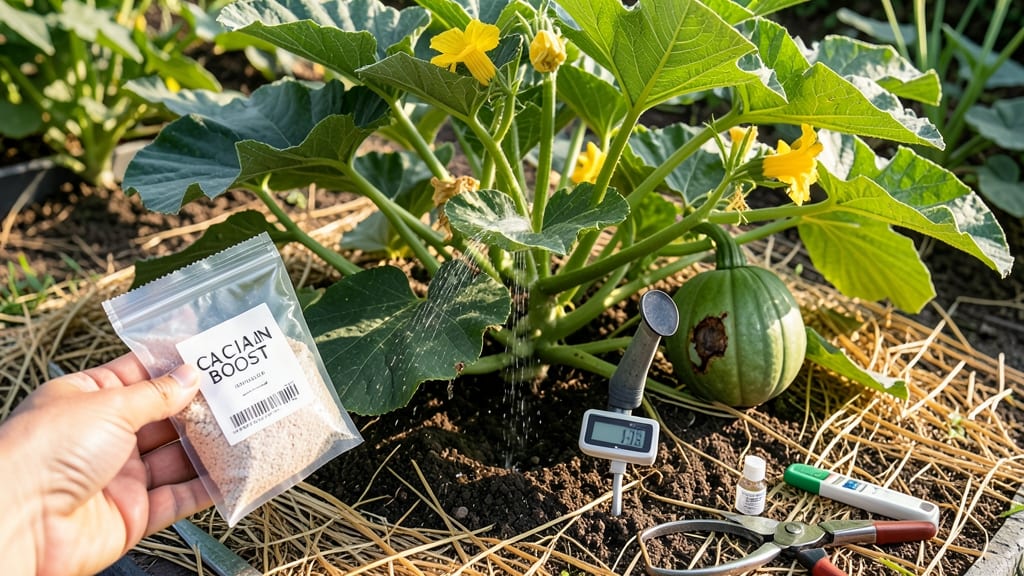
How to fix that ugly blossom end rot on squash—it’s the most frustrating squash problem until you know the calcium cure that works in 7-10 days. 🌱 I’ve saved dozens of plants using these exact steps after wasting three harvests on guesswork.
The real culprit isn’t just calcium—it’s inconsistent watering that makes roots struggle to deliver what the fruit needs. Most gardeners fix one thing (like spraying calcium) while ignoring the moisture swings that keep the problem coming back. The solution starts with daily water checks and a simple soil boost.
You’ll see new growth within 3-5 days of fixing the watering schedule, and those black spots won’t return. The best part? No fancy sprays—just Epsom salt or crushed eggshells mixed into the soil where the roots can access it.
I’ve even used this on zucchini and cucumbers with the same fast results.
Works in containers or in-ground beds, and the fix scales whether you’ve got one plant or a full row. The key is catching it early—once those spots spread, the fruit’s done. Let’s turn those sad squash into harvest-worthy gems before your next watering day.
Root Causes of Blossom End Rot
Blossom end rot isn’t just a random squash mishap—it’s a cry for help from your plants, signaling that something’s off with their nutrition or environment. Understanding the real culprits behind this unsightly condition is the first step to preventing it.
Let’s break down the science behind why your squash develops those dark, sunken patches at the blossom end.
---
Blossom end rot is primarily caused by a lack of calcium in the plant’s growing tissues, even when soil calcium levels might seem adequate. Here’s why this happens:
- Calcium Transport Issues: Calcium moves through the plant via the transpiration stream (water evaporation from leaves). If water uptake is inconsistent—like during hot, dry spells or rapid growth phases—calcium can’t reach the fast-growing fruit tips.
This leaves the blossom end (the youngest, most active tissue) starved of what it needs to develop properly.
- pH Imbalance: Soil with a pH below 6.0 (too acidic) locks calcium into unavailable forms. Even if calcium is present, your squash can’t access it. Test your soil—ideal pH for squash is 6.0–6.8.
- Competition for Nutrients: If nitrogen or potassium levels are too high, the plant prioritizes those over calcium, leaving the blossom end vulnerable. Think of it like a restaurant where the chef over-orders steak (nitrogen) but forgets to plate the salad (calcium).
---
Water isn’t just H₂O—it’s the delivery system for calcium. Inconsistent watering throws a wrench in the works:
- Fluctuating Moisture: When soil dries out and then gets overwatered, roots struggle to absorb nutrients efficiently. This creates a calcium deficit in the fruit. Imagine a straw sucking up milk—if you squeeze and release it repeatedly, the flow gets messy, and some spots miss out.
- Drought Stress: Prolonged dry spells cause the plant to shut down transpiration, halting calcium movement. Even if you later water heavily, the damage to the blossom end is already done.
- Poor Drainage: Waterlogged soil oxygenates roots, reducing their ability to absorb calcium. Squash roots need well-draining soil to function optimally.
--- Extreme conditions disrupt the plant’s ability to manage calcium:
- High Temperatures: Heat speeds up growth but slows calcium uptake. The blossom end grows faster than calcium can arrive, leading to rot. This is why rot often appears during summer heatwaves.
- Humidity Shifts: Rapid changes in humidity can cause stomatal closure (tiny leaf pores that regulate water loss). When stomata close, calcium transport grinds to a halt.
--- Sometimes, the issue isn’t what’s missing but what’s blocking calcium from reaching the plant:
- Compacted or Poor Soil: Roots in dense, clay-heavy soil can’t spread or absorb nutrients efficiently. Amend soil with compost or organic matter to improve structure.
- Root Damage: Injured roots (from transplant shock, pests, or rough handling) reduce the plant’s ability to uptake calcium. Always harden off seedlings and avoid disturbing roots when transplanting.
- Salt Buildup: Over-fertilization or poor-quality water can cause salt accumulation in the soil, which interferes with calcium absorption. Flush soil with rainwater or distilled water if salts are suspected.
--- Squash that grow too quickly (thanks to ideal conditions) can’t keep up with their calcium needs:
- Overfeeding Nitrogen: Lush, rapid growth from high-nitrogen fertilizers diverts energy away from calcium uptake. Use a balanced fertilizer (e.g., 10-10-10) or switch to calcium-rich amendments like crushed eggshells or oyster shell.
- Crowded Plants: When squash vines are overcrowded, they compete for nutrients, leaving some fruits calcium-deficient. Prune excess vines and give plants 3–4 feet of space.
--- Calcium availability depends on soil chemistry, not just quantity:
- Low pH (Acidic Soil): Calcium binds to soil particles and becomes unavailable. Aim for a pH of 6.0–6.8—test your soil and amend with lime if needed.
- High Sodium or Magnesium: These minerals can outcompete calcium for absorption sites in roots. Use chelated calcium or gypsum to improve uptake.
--- Is your squash suffering from blossom end rot?
Ask yourself: - Have I watered inconsistently (drought followed by heavy watering)? - Is my soil too acidic (pH < 6.0) or compacted? - Did I over-fertilize with nitrogen recently? - Are my plants stressed by heat or humidity swings? - Did I transplant seedlings roughly, damaging roots?
If you answered yes to any of these, you’ve likely identified the culprit. The good news? Once you address the root cause (pun intended), new growth should stay rot-free!
Quick Fixes for Blossom End Rot
Blossom end rot on squash might look like a lost cause, but with the right approach, you can save your plants—and even prevent future outbreaks. The key is addressing the root cause (literally!) while giving your squash the care it needs to bounce back.
Below are practical, step-by-step solutions tailored to the most common triggers, plus prevention tips to keep your garden thriving.
---
If your squash is showing dark, sunken spots at the blossom end, it’s screaming for calcium. Since squash can’t absorb calcium directly from the soil, you’ll need to deliver it in a plant-friendly way.
#### 🍳 Step 1: Apply Calcium-Rich Amendments Use one (or a mix) of these methods immediately to boost calcium levels: - Crushed eggshells: Rinse and dry eggshells, then grind them into a fine powder.
Sprinkle 1–2 tablespoons around the base of the plant and lightly water in. Pro tip: 💡 Bake shells at 200°F (93°C) for 10 minutes to sterilize before grinding. - Lime or gypsum: Work 1–2 tablespoons of powdered gypsum (calcium sulfate) or ½ cup of crushed limestone into the top 2 inches of soil per plant.
Avoid lime if your soil is already alkaline (test with a pH kit). - Calcium nitrate solution: Mix 1 tablespoon of calcium nitrate in a gallon of water and apply as a foliar spray or soil drench. Repeat every 2 weeks.
#### 👨🍳 Step 2: Water Smartly Calcium uptake struggles when soil moisture fluctuates. Keep soil consistently damp (not soggy) by: - Watering deeply 1–2 times per week (early morning is best). - Using drip irrigation or soaker hoses to avoid wetting leaves (which spreads disease). - Mulching with straw or shredded leaves to retain moisture and regulate temperature.
#### 🥘 Step 3: Harvest Affected Fruit (But Save the Plant!) - Remove rotten squash to prevent fungal spread. - Leave healthy fruit on the vine—it’ll continue growing and may recover if calcium levels improve. - Pro tip: ✨ If the rot is minor (small spots), you can trim the affected area with a sterilized knife and use the squash in cooked dishes (peel first).
---
Extreme heat or drought can lock out calcium, even if it’s in the soil. Here’s how to cool things down and stabilize moisture:
#### 🎯 Step 1: Provide Shade & Cool Relief - Use shade cloth (30–50%) if temps exceed 90°F (32°C). - Water deeply in the evening to lower soil temperature. - Avoid overhead watering during peak sun—it stresses plants and promotes rot.
#### 💡 Step 2: Adjust Your Watering Routine - Morning watering (before 10 AM) gives roots time to absorb moisture. - Check soil moisture with your finger—if the top 1–2 inches are dry, it’s time to water. - Pro tip: 🔥 For container-grown squash, water when the soil feels like a wrung-out sponge (not bone-dry).
---
Compacted, nutrient-poor, or acidic soil blocks calcium absorption. Revive your garden beds with these tweaks:
#### ⏰ Step 1: Loosen the Soil - Gently fork the top 6 inches of soil around the plant’s base to improve aeration. - Add compost (1–2 inches) and mix lightly into the topsoil.
#### 🌱 Step 2: Balance Soil pH - Test your soil (home kits cost $10 and work well). Aim for pH 6.0–7.0 for squash. - If too acidic, add pelletized lime (follow package rates). - If too alkaline, mix in sulfur or peat moss.
#### 📊 Step 3: Feed with Organic Matter - Side-dress with well-aged compost or worm castings every 3–4 weeks. - Avoid high-nitrogen fertilizers (like blood meal)—they encourage leafy growth at the expense of fruit health.
---
Once you’ve fixed the current issue, lock in long-term success with these habits: - Plant squash in well-draining soil—raise beds if your yard holds water. - Rotate crops: Don’t plant squash (or other cucurbits) in the same spot yearly. - Use calcium-rich fertilizers like kelp meal or bone meal at planting time. - Monitor weather: Cover young plants with frost cloth if nights dip below 50°F (10°C). - Choose resistant varieties: Try ‘Early Prolific Straightneck’ or ‘Caserta’—they tolerate stress better.
--- Remember: Blossom end rot is 100% preventable with consistent care. Start with calcium, stabilize watering, and tweak your soil—your squash will thank you with plump, blemish-free fruit in no time! 🎉
Frequently asked questions
Can I still eat squash with blossom end rot?
Yes, but only if the rot is minor! For small spots, simply trim away the affected area with a sterilized knife and use the squash in cooked dishes (peel first). Avoid eating any fruit with large, sunken black patches—they may harbor bacteria. Always cook thoroughly to ensure safety.
How quickly will my squash recover after treatment?
You should see improvement within 3-5 days of consistent watering and calcium treatment. New growth will appear rot-free in 7-10 days if you maintain steady moisture and proper soil conditions. The key is catching it early—once rot spreads beyond 10% of the fruit, recovery becomes unlikely.
Will crushed eggshells really help with blossom end rot?
Eggshells are a fantastic calcium source when properly prepared. First rinse and bake them at 200°F (93°C) for 10 minutes to sterilize, then grind into a fine powder. Sprinkle 1-2 tablespoons around the plant base and water in. The calcium becomes available over 2-4 weeks, so start early in the season for best results.
Can I use Epsom salt instead of calcium supplements?
Epsom salt (magnesium sulfate) won't fix blossom end rot—it actually contains no calcium! For true calcium boost, use gypsum (calcium sulfate) or crushed limestone instead. Epsom salt can help with magnesium deficiency (yellowing leaves), but it won't prevent rot. Always test soil first to identify the exact nutrient deficiency.
Why does blossom end rot keep coming back even after treatment?
Recurring rot usually means inconsistent watering or underlying soil issues. Check for these common culprits: soil pH below 6.0, compacted roots, or fluctuating moisture (dry spells followed by heavy watering). Test your soil and consider adding organic matter to improve structure. Mulching helps maintain steady moisture levels.