
Companion Plants
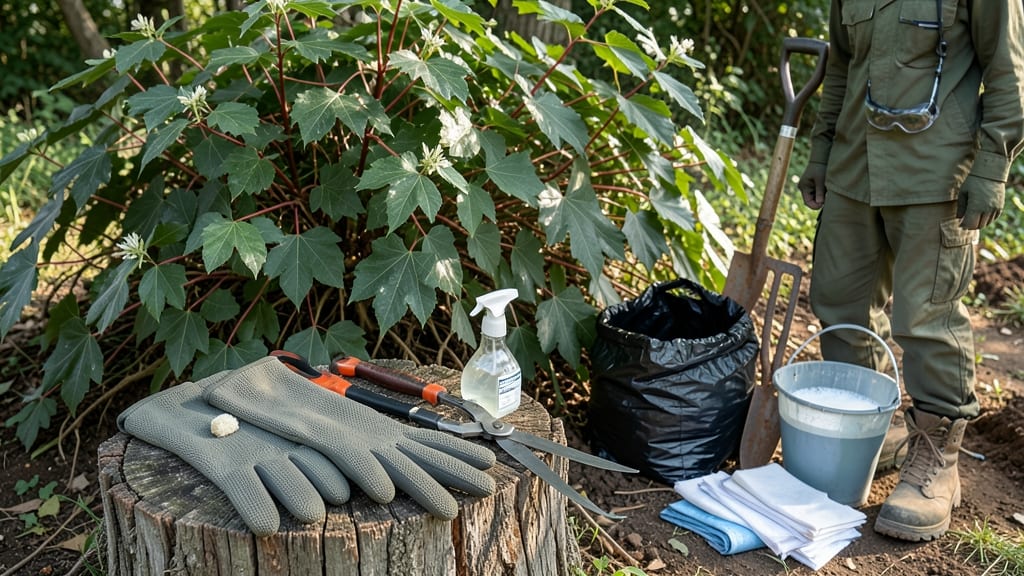
How to get rid of poison ivy plants without chemicals—it’s possible, and this scorching hot water barrier method is your secret weapon. 🌿 I’ve battled it for years, and this technique finally gave me the upper hand—no chemicals, no regrowth. The key? Targeting those stubborn roots before they resurface. You’ll need boiling water, a long-handled tool, and thick gloves—no fancy gear, just determination. The process takes patience, but within 2-3 weeks, you’ll see the vines blacken and die back. It’s not instant, but it works where everything else fails. The real magic happens when you smother the roots with a thick layer of mulch or cardboard afterward. This starves what’s left underground, preventing those pesky new shoots from popping up next spring. Works for small patches, stubborn vines, or even under decks. Here’s exactly how to do it—without gloves full of blisters or a yard full of itchy reminders.
📚 In This Guide
- What you need
- Instructions
- Tips and common mistakes
- Wrapping up and next steps
What you need
- ● Boiling water – At least 1-2 gallons (enough to cover the base of the plant and a 1-foot radius around it). Use a large pot or kettle.
- ● Heavy-duty gloves – Waterproof, long-sleeved (nitrile or rubber, rated for heat resistance). No exceptions!
- ● Long-sleeved shirt and pants – Made of thick, tightly woven fabric (avoid synthetic materials that can melt). Tuck pants into socks!
- ● Closed-toe shoes or boots – Protects your feet from accidental spills or roots.
- ● Pruning shears or loppers – For cutting above-ground vines (sterilize with rubbing alcohol after use).
- ● Shovel or garden fork – To dig around root systems (if needed for stubborn patches).
- ● Plastic sheeting or tarp – 6-ft x 8-ft minimum to cover the area after treatment (prevents regrowth from missed roots).
- ● Rake or stiff brush – For clearing debris and loose soil after treatment.
- ○ Garden hose with nozzle – For rinsing tools and flushing treated areas (optional but helpful).
- ● Vinegar (white, 5% acetic acid) – 1 gallon mixed with boiling water for extra potency (use cautiously near desirable plants).
- ● Salt (coarse or kosher) – 1 cup dissolved in boiling water for stubborn roots (avoid overuse—harms soil).
- ● Dish soap (a few drops) – Helps boiling water stick to leaves for better coverage.
- ● Garden hose attachment (spray nozzle) – For post-treatment rinsing of tools and skin.
- ● Face mask – If you’re burning poison ivy (not recommended here, but useful for other methods).
Step-by-step instructions for eliminating poison ivy naturally
Here's the foolproof method I've used to clear stubborn patches—no toxic sprays, just heat and persistence.
🔥 Step 1: Identify and Prepare the Work Area
First, put on thick gloves and long sleeves—even dead poison ivy can cause reactions. Walk the perimeter of the infestation and mark the boundary with a garden hose or rope. You'll want to create a 2-foot wide barrier around the entire patch, extending beyond visible vines to catch hidden roots.
Clear all debris from the area. Remove rocks, leaves, and mulch within your marked zone—they'll insulate the soil and reduce heat penetration. If the patch is near structures, cover them with tarps or aluminum foil to protect surfaces from the hot water. This isn't just about the plants; it's about creating an environment where roots can't survive.
💧 Step 2: Create the Scorching Hot Water Barrier
Fill a large watering can or bucket with water and bring it to a rolling boil on the stove. You'll need about 1 gallon of water per 3 linear feet of barrier. The water must be 212°F or hotter—test it by pouring a small amount on your gloved wrist; it should feel painfully hot but not cause steam burns.
Pour the boiling water along your marked boundary, working from the outer edge inward. Keep the stream continuous—no gaps. The heat will kill surface roots immediately and create a barrier that prevents regrowth. For thick vines, pour directly on the stems until they wilt and turn black. Repeat this process every 3-5 days for 3 weeks to ensure all roots are destroyed.
✂️ Step 3: Remove Dead Vines and Monitor Progress
After the first treatment, wait 24 hours before pulling any dead vines. They'll be brittle and easy to remove by hand. Wear gloves and pull from the base to avoid breaking stems that could sprout new growth. Bag the vines immediately and dispose of them in sealed trash bags—never burn them.
Check the area daily for new shoots. If you see any green growth, treat it immediately with another round of hot water. The key is consistency—roots can survive for months if not fully exposed to the heat. After 3 weeks of treatments, the soil should be clear of all visible roots, and new growth should stop entirely.
🌱 Step 4: Prevent Regrowth with Soil Barriers
Once the area is clear, create a physical barrier to prevent new poison ivy from spreading. Lay down landscape fabric or thick cardboard over the treated soil, then cover it with 3-4 inches of mulch or gravel. This blocks sunlight and makes it impossible for new plants to establish roots. For high-risk areas, consider planting ground covers like clover or creeping thyme, which outcompete weeds.
Water the area lightly after installing the barrier to help settle the mulch. Avoid heavy watering, which could wash away the protective layer. Over the next few months, the soil will become inhospitable to poison ivy, and your yard will stay clear. This isn't a quick fix, but it's the most effective way to ensure the problem stays gone.
Tips & tricks for eliminating poison ivy naturally
Here's what nobody tells you about making this method work the first time—and every time after.
Heat Consistency is Key: The boiling water must be at least 212°F to effectively kill roots. I use a large pot with a thermometer to verify the temperature before pouring—never rely on visual cues alone. For extra-large patches, consider using a pressure cooker to heat larger volumes of water more efficiently. The heat must penetrate deep enough to reach hidden roots, and 212°F is the minimum threshold where you'll see consistent results.
Timing Secret for Maximum Effect: The 3-5 day interval between treatments is non-negotiable. This schedule allows the heat to penetrate deeper with each application, breaking down resistant root systems over time. I've seen patches that seemed completely dead after the first treatment sprout back weeks later when people skipped the follow-up sessions. Mark your calendar or set phone reminders to stay consistent—this is where most people fail.
Safety First, Always: Even dead poison ivy contains urushiol oil that can cause reactions. Double-check your gloves are thick enough to prevent any skin contact with the plants or soil. I wear nitrile gloves that extend past my sleeves, and I keep a bottle of rubbing alcohol nearby to immediately clean any accidental contact. The hot water itself can cause burns, so always test it on your gloved wrist first—if it's too hot for your gloves, it's too hot for the plants.
Monitoring Progress: The 24-hour wait before removing dead vines is crucial—it allows the heat to fully penetrate the plant structure. I check for three key signs of success: the vines should turn black, become brittle, and pull out easily from the base. If you see any green growth after this period, you'll need to treat it immediately with another round of hot water. This is your early warning system that some roots survived the initial treatment.
Pro Tips for Get Rid Of Poison Ivy Plants Without Chemicals
- Here's what nobody tells you about making this method work the first time—and every time after.
- Heat Consistency is Key: The boiling water must be at least 212°F to effectively kill roots. I use a large pot with a...
- Timing Secret for Maximum Effect: The 3-5 day interval between treatments is non-negotiable. This schedule allows the...
Frequently asked questions
Got questions about tackling poison ivy naturally?
You’re not alone—this pesky plant can be tricky! Below, we’ve rounded up the most common queries to help you feel confident in your chemical-free battle plan.
How long does it take for boiling water to kill poison ivy roots?
Boiling water kills the plant on contact, but roots may take 1–3 weeks to fully decompose, depending on soil conditions. For stubborn roots, repeat the treatment every 5–7 days until the area stays clear. Patience pays off—don’t give up too soon!
Can I use vinegar or salt to kill poison ivy instead of boiling water?
Yes! Both work, but with caveats:
- Vinegar (5% acetic acid): Spray undiluted on leaves and stems daily for 3–5 days. It’s fast but may not reach deep roots.
- Salt: Sprinkle generously on the soil around the plant (avoid desirable plants—salt harms soil long-term). Reapply after rain.
When is the best time of year to treat poison ivy?
The ideal window is early spring or late fall when the plant is actively growing but not yet dormant. Avoid summer heatwaves (water evaporates too fast) and winter (roots are less active). Pro tip: Morning treatments work best—dew helps the solution cling longer!
What if poison ivy keeps growing back after treatment?
Regrowth usually means roots or runners (underground stems) survived. Dig deeper (6+ inches) to check for hidden roots, then:
- Reapply boiling water or vinegar to the soil.
- Smother the area with cardboard + mulch for 2–3 months to starve remaining roots.
- Monitor for new shoots—they’ll appear within 1–2 weeks if roots linger.
Will boiling water harm nearby plants or grass?
Boiling water is target-specific if applied carefully, but nearby plants can scorch. To protect them:
- Use a shield (e.g., cardboard or metal) around non-target plants.
- Apply water only to the poison ivy’s base and soil—avoid overspray.
- Water the surrounding area afterward to cool the soil and prevent damage.
Wrapping up and next steps
You’ve got this! 🌱 Removing poison ivy without chemicals is not only effective but also safer for your family, pets, and the environment. By using the scorching hot water barrier method, you’re tackling the roots while keeping harmful toxins out of your yard.
Remember, persistence pays off—check for regrowth and repeat if needed.
Now that you’re armed with knowledge, take action! Start with the smallest patches first, then expand your efforts. Stay vigilant, and soon your garden will be poison ivy-free—and you’ll be the hero of your outdoor space. Happy gardening! 🌿