
Container Gardens
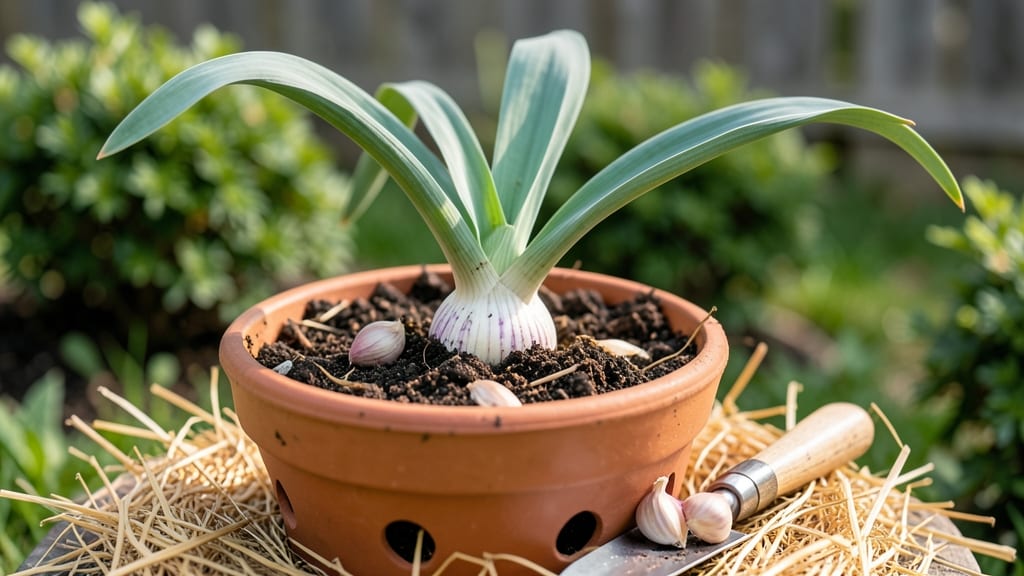
How to grow garlic from cloves in containers transformed my tiny balcony into a fragrant, productive space—no garden required. The pungent aroma of fresh garlic doesn’t need a yard, just a few pots, the right soil, and patience. My first batch surprised me with plump bulbs that rivaled store-bought, and the process is simpler than most assume.
You’ll need 5-gallon containers, well-draining soil, and individual garlic cloves (hardneck varieties work best). Plant them 2 inches deep, 4-6 inches apart, in fall for a summer harvest—or spring for a smaller but still rewarding crop.
The key is mimicking garlic’s natural growing conditions: cool temperatures, consistent moisture, and plenty of sunlight.
By mid-summer, you’ll see those familiar garlic scapes curling above the soil—harvest them for flavorful cooking or let them stay for bigger bulbs. The bulbs themselves cure in a dry, airy spot, ready for storage or immediate use.
No more buying limp garlic from the store when you can grow your own.
This method works year-round in mild climates, and even in cold zones, you can overwinter pots. Troubleshoot mold by improving airflow, and watch for aphids—just a spray of soapy water keeps them away. My neighbors now ask for cloves every year, and I never run out.
📚 In This Guide
- What you need
- Instructions
- Tips and common mistakes
- Wrapping up and next steps
What you need
- ● Garlic cloves: 6–12 large, firm cloves (from organic, untreated garlic if possible). Avoid supermarket garlic treated to prevent sprouting.
- ● Containers: At least 2–3 containers (6–8 inches deep, with drainage holes). Options include: Ceramic or plastic pots (10–12 inches in diameter for 6 cloves).
- ● Fabric grow bags (for better airflow and root growth).
- ● Wooden barrels or raised beds (if you have space for deeper planting).
- ● Potting mix: 2–3 gallons of well-draining, nutrient-rich soil (mix equal parts potting soil, compost, and perlite or sand).
- ● Drainage material: Small pebbles, gravel, or broken pottery pieces (1–2 inches layer at the bottom of each container).
- ● Watering can or spray bottle: With a gentle nozzle to avoid displacing soil.
- ● Organic fertilizer: Balanced fertilizer (5-5-5 or 10-10-10) or compost tea for feeding.
- ● Mulch (straw or shredded leaves) to retain moisture and regulate temperature.
- ● Plant labels or markers to track varieties (e.g., "Hardneck" or "Softneck").
- ● Garden twine or stakes to support taller varieties (like hardneck garlic).
- ● pH test kit (ideal soil pH: 6.0–7.0 for garlic).
- ● Row covers or frost blankets (if growing in colder climates).
Step-by-Step instructions for growing garlic from cloves in containers
Here's how to transform a single clove into a thriving, space-efficient garlic harvest using proven container techniques.
Select and Prepare Your Garlic Cloves
Choose hardneck garlic varieties for superior flavor and bulb formation. Break apart a whole bulb, ensuring each clove retains its papery skin—this protects against rot during planting. Discard any soft, shriveled, or sprouted cloves; you want only firm, plump specimens with a papery outer layer intact.
Soak the selected cloves in lukewarm water for 12 hours to soften the outer skin and encourage faster rooting. This step is especially important for container growing, where drainage and moisture balance are critical. After soaking, let them air-dry for 1-2 hours to prevent fungal issues once planted.
Choose Containers and Soil for Optimal Growth
Use deep containers (at least 8 inches deep) with drainage holes to accommodate the 6-8 inch root system garlic develops. Terra cotta pots work best—they wick away excess moisture, preventing the rot that often plagues container-grown garlic. Fill each pot with a well-draining potting mix amended with compost for fertility.
Plant one clove per container (or 3-4 cloves per 12-inch pot) with the pointy end facing upward—this ensures proper bulb formation. Space cloves 2 inches apart in larger pots, pressing them 2 inches deep into the soil. The goal is firm but not compacted soil, allowing roots to establish without resistance.
☀️ Step 3: Position for Light and Temperature Control
Garlic thrives in full sun (6+ hours daily), but containers dry out faster than in-ground beds. Place pots where they receive morning sun and afternoon shade during summer to prevent moisture loss. In cooler climates, full sun year-round is ideal, while warmer zones benefit from afternoon shade in peak heat.
Maintain soil temperatures between 60-70°F—garlic roots are sensitive to extremes. If planting in fall (ideal for most regions), wait until soil cools to 50°F before setting cloves. In spring, plant as soon as soil is workable. Mulch with 1-2 inches of straw to regulate temperature and retain moisture.
💧 Step 4: Water and Fertilize for Bulb Development
Water deeply once a week, ensuring the top 2 inches of soil stay moist but never soggy. Containers dry out quickly, so check soil moisture by sticking your finger 1 inch deep—water when dry. Overwatering in containers leads to root rot, while underwatering causes bulbs to split or remain small.
Fertilize once in early spring with a balanced organic fertilizer (10-10-10) to encourage leaf growth. Avoid high-nitrogen fertilizers after mid-spring—they promote foliage at the expense of bulb size. Instead, side-dress with compost in late spring to support root development without burning tender shoots.
⏰ Step 5: Harvest and Store for Long-Term Use
Harvest when lower leaves yellow and brown, typically 8-10 months after planting (longer for hardneck varieties). Gently loosen soil around the bulb with a fork, then lift carefully—never pull by the stems, which can damage the bulb. Cure harvested garlic in a dry, shaded, well-ventilated area for 2-3 weeks before braiding or storing.
For year-round harvests, stagger planting: fall-planted cloves mature in summer, while spring-planted cloves (in mild climates) produce smaller bulbs by fall. Store cured garlic in a cool, dark place (50-60°F) with good airflow to prevent spoilage—properly stored, it keeps for 6-12 months.
Tips & tricks for perfect container-grown garlic
Container gardening for garlic can be tricky, but these proven strategies will help you avoid common pitfalls and maximize your harvest.
Clove Selection Matters: When choosing cloves in Step 1, prioritize those from hardneck varieties—they produce larger bulbs and more flavorful cloves. Look for cloves with intact papery skins that feel firm to the touch. I've found that larger cloves (about 1.5 inches long) often yield bigger bulbs, but even medium-sized cloves will produce harvestable garlic if given proper care. The 12-hour soak is non-negotiable—it softens the skin and jumpstarts root growth, which is especially crucial in containers where space is limited.
Container Depth is Critical: Never skimp on container depth in Step 2. That 6-8 inch root system needs room to grow, and shallow pots will result in stunted bulbs. I've seen gardeners use everything from old buckets to repurposed wooden crates, but terra cotta remains my top recommendation. The material's porosity helps prevent the moisture retention issues that lead to root rot. If you're using a large container with multiple cloves, space them exactly 2 inches apart—crowding leads to competition for nutrients and smaller harvests.
Temperature Management for Bulb Formation: The 60-70°F soil temperature range in Step 3 is your sweet spot for bulb development, but achieving this in containers requires attention. I've learned the hard way that cold frames or insulated planters help maintain these temperatures in spring and fall. For winter planting, use a heat mat underneath containers to keep roots warm. The 50°F minimum for fall planting is firm—colder soil can cause cloves to rot before sprouting. Mulching with 1-2 inches of straw acts like a thermal blanket, helping regulate both temperature and moisture.
Watering Strategy Prevents Common Failures: The once-weekly watering guideline in Step 4 is a starting point, but container garlic often needs more frequent attention. I check soil moisture every 3-4 days by inserting my finger 1 inch deep—this is where the real action happens for root development. Containers dry out faster than garden beds, and the top 2 inches staying moist is essential. Overwatering is the silent killer of container garlic, leading to that dreaded root rot. If you notice leaves yellowing or wilting between waterings, your container may need larger drainage holes or a different soil mix.
Pro Tips for Grow Garlic From Cloves In Containers
- Container gardening for garlic can be tricky, but these proven strategies will help you avoid common pitfalls and maximize your harvest.
- Clove Selection Matters: When choosing cloves in Step 1, prioritize those from hardneck varieties—they produce larger bulbs and more flavorful cloves.
- Container Depth is Critical: Never skimp on container depth in Step 2.
Frequently asked questions
Can I grow garlic in containers year-round?
Garlic thrives best in cool seasons (fall or early spring), but with the right container and care, you can grow it in summer—just expect slower growth. Use a deep pot (12+ inches) with well-draining soil, keep it shaded during peak heat, and water consistently. For best results, plant in fall (6–8 weeks before frost) or early spring (as soon as soil is workable).
How long does it take for garlic to grow in containers?
Garlic grows in stages: sprouts appear in 2–4 weeks, leaves mature in 8–12 weeks, and bulbs are ready to harvest in 8–10 months (hardneck varieties) or 6–8 months (softneck). Patience pays off—harvest too early, and you’ll get small cloves! Watch for brown lower leaves (a sign bulbs are nearly ready).
What if my garlic cloves rot or mold in the container?
Rot or mold usually means too much water or poor drainage. Fix it by:
- Ensuring your container has drainage holes (or use a cache pot).
- Watering only when the top 1–2 inches of soil are dry.
- Using a lightweight potting mix (avoid garden soil).
- Planting cloves pointy-end up (never sideways!).
Can I grow other vegetables alongside garlic in the same container?
Garlic is a low-maintenance companion for shallow-rooted plants like:
- Lettuce or spinach (harvest before garlic bulbs form).
- Small chives or green onions (they love similar care!).
- Radishes (plant in early spring, harvest before garlic leaves mature).
What do I do with leftover garlic cloves that won’t grow?
Not all cloves sprout—here’s what to do:
- Check for viability: A good clove feels firm, plump, and has a papery skin. Shriveled or soft cloves won’t grow.
- Save for next year: Store healthy but unused cloves in a cool, dark, dry place (like a mesh bag in the fridge) for up to 6 months.
- Use them in cooking! Even if they won’t sprout, they’re perfect for soups, roasts, or garlic butter.
Wrapping up and next steps
Growing garlic from cloves in containers is a rewarding journey that proves you don’t need a sprawling garden to cultivate flavor-packed bulbs! With just a few cloves, some well-draining soil, and a sunny spot, you can enjoy fresh garlic year after year—even in small spaces.
Whether you’re a beginner or a seasoned gardener, this method is simple, cost-effective, and perfect for urban or balcony setups.
Now that you’re armed with the know-how, why not take the next step? Start small with a single container, experiment with varieties, or even share your harvest with friends. Your kitchen—and taste buds—will thank you! 🌱✨