
How To
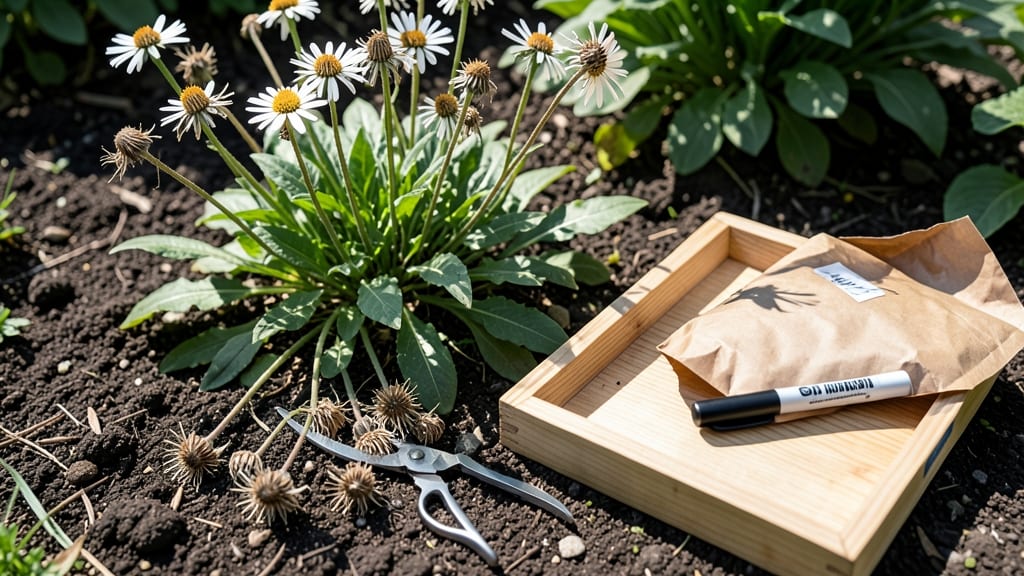
Harvesting Shasta Daisy 🌼 seeds is one of the easiest ways to save money and grow your garden naturally—without spending a dime on new plants! These cheerful blooms don’t just brighten up your yard; they also pack a secret superpower: the ability to regrow from seeds you collect yourself.
Timing is everything when it comes to harvesting these seeds. If you wait too long, the seed heads might scatter, but harvest too early, and you’ll end up with seeds that won’t sprout.
I’ll show you exactly when to look for those perfect, dry seed heads and how to tell if they’re ready for collection.
Once you’ve got them, drying and storing the seeds properly is the key to keeping them viable for years. No fancy equipment needed—just a few simple steps to ensure your seeds stay fresh until planting season rolls around again.
Whether you’re a seasoned gardener or just starting out, this guide will walk you through every step, from spotting mature seed heads to storing them like a pro. Let’s get those Shasta Daisy seeds ready for next year’s garden!
When and how to identify mature Shasta daisy seed heads for harvesting
Harvesting Shasta daisy seeds at the right time ensures high germination rates and healthy new plants. The key is waiting until the flower heads have fully matured but haven’t yet scattered their seeds naturally.
This usually happens in late summer to early fall, around August or September, depending on your climate.
Start by looking for brown, papery seed heads that have replaced the vibrant white petals. These heads should feel dry and crispy to the touch, almost like brittle paper. If you shake them gently, you’ll hear the seeds rattling inside—this is your first sign that they’re ready for harvest.
Another telltale sign is the leaves beginning to yellow and die back. This natural process signals the plant is redirecting energy toward seed production. Avoid harvesting if the heads are still green or partially dry, as the seeds won’t be fully developed or viable.
Gather your harvesting tools before you begin: a pair of sharp pruning shears, gardening gloves to protect your hands, and brown paper bags for collecting the seeds. These tools will make the process efficient and reduce the risk of seed loss or contamination.
Step-by-Step Guide to Harvesting Shasta Daisy Seeds
- Step 1: Identify mature seed heads that are fully brown and crispy to the touch.
- Step 2: Use pruning shears to cut the seed heads from the stem, leaving about 1-2 inches of stem attached.
- Step 3: Place each seed head in a brown paper bag to prevent seeds from scattering.
- Step 4: Label each bag with the harvest date and variety name if applicable.
- Step 5: Hang the bags in a dry, well-ventilated area to complete the drying process.
When harvesting, focus on healthy seed heads from the strongest plants in your garden. Avoid heads that show signs of pests, disease, or mold, as these can compromise the quality of your seeds. If you notice any discoloration or unusual spots, discard those heads immediately to prevent contamination.
Timing is crucial—if you harvest too early, the seeds won’t be fully developed, and if you wait too long, they may scatter or be blown away by wind.
Aim to harvest on a dry, calm day to minimize the risk of seeds dispersing prematurely. This also makes the collection process much smoother and more efficient.
Once you’ve collected your seed heads, the next step is to dry them properly before storing. This ensures the seeds remain viable and ready for planting next season. Proper drying also helps prevent mold and rot, which can ruin your entire harvest if not handled correctly.
After harvesting, take a moment to inspect your garden for any remaining seed heads you may have missed. Even a few overlooked heads can produce a new generation of daisies, potentially spreading beyond your intended garden area. This is especially important if you’re growing heirloom varieties you want to preserve.
Finally, consider saving seeds from multiple plants to maintain genetic diversity in your garden. This helps ensure your Shasta daisies remain vigorous and disease-resistant over time. A little extra effort now will pay off with healthier, more resilient plants in the future.
When and how to identify mature Shasta daisy seed heads for harvesting
Harvesting Shasta daisy seeds at the right time ensures high viability for next year’s garden. The key is waiting until the flower heads fully mature—typically between late August and early September in most climates. Look for brown, dry seed heads that rattle when gently shaken, signaling it’s time to collect.
Start by inspecting your Shasta daisy plants for dried petals and brown seed pods. The center disk should turn from green to a deep brown, and the seed heads will feel crispy to the touch. Avoid harvesting too early—green or partially dry seed heads won’t produce viable seeds.
Gather your harvesting tools before you begin. You’ll need: - Garden gloves (to protect hands from prickly stems) - Sharp pruning shears or scissors (for clean cuts) - Brown paper bags (to collect seeds and allow airflow) - A tray or bucket (to organize harvested seed heads)
- 🔍 Step 1: Identify mature seed heads—look for fully brown, dry centers that rattle when shaken.
- ✂️ Step 2: Cut the seed heads with clean pruning shears, leaving a 1-inch stem attached.
- 🌿 Step 3: Place seed heads in brown paper bags (label with the variety name and harvest date).
- 💨 Step 4: Shake bags gently to dislodge seeds from the heads, then store in a cool, dry place for 1–2 weeks to finish drying.
- 📝 Step 5: Clean seeds by winnowing (removing chaff with a fan or sieve) before storing in airtight containers.
Timing is critical—harvest too early, and the seeds won’t fully develop; wait too long, and they may scatter naturally. Aim for late summer to early fall when the seed heads are crispy but haven’t yet released seeds into the soil. This ensures you capture the best-quality seeds for replanting.
Once harvested, avoid moisture exposure to prevent mold. Store seed heads in a well-ventilated area until fully dry, then transfer seeds to labeled envelopes or jars. Properly stored Shasta daisy seeds can remain viable for 2–3 years, making them a cost-effective way to propagate your favorite varieties.
Pro tip: Harvest on a dry day to minimize humidity, and avoid damp seed heads—they’re prone to rot. With patience and the right timing, you’ll have a bountiful supply of seeds ready for next spring’s planting season! 🌼