
Blooming
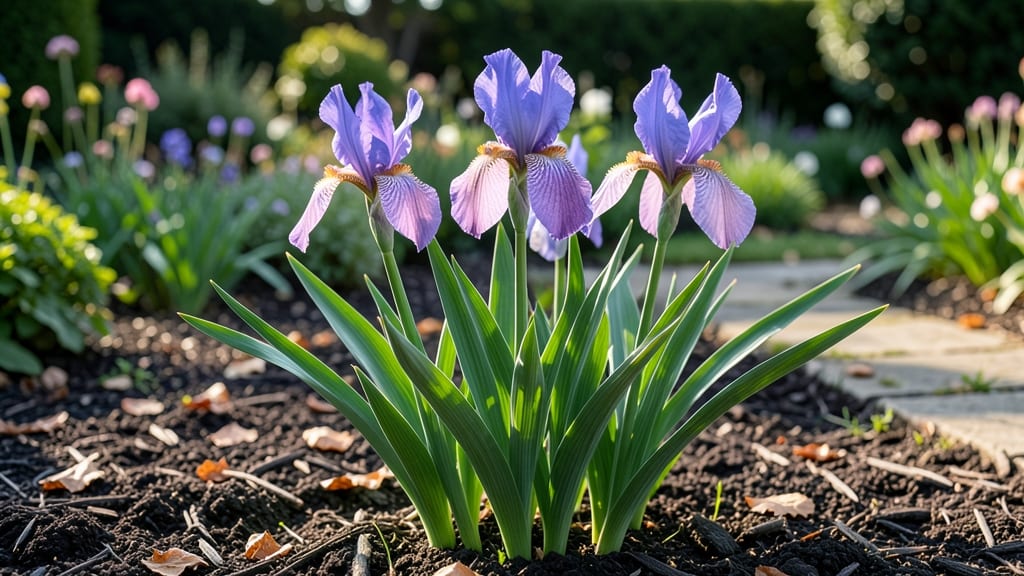
Your irises could be bursting with color next spring—if you prune, feed, and deadhead them the right way. 🌸 I've watched my own iris beds go from sparse stems to vibrant, full blooms in just two seasons by following these exact steps.
The secret starts with sunlight and soil: irises demand full sun (6+ hours daily) and well-draining soil—they rot if their roots sit in soggy ground. Most people overlook drainage, which explains why their irises refuse to bloom.
After that, timing is everything: prune spent blooms in late spring, divide crowded rhizomes in early fall, and fertilize twice a year with a balanced, low-nitrogen mix. You'll see the difference immediately: stronger stems, more buds, and blooms that last weeks instead of days.
Even neglected clumps can bounce back with proper care—my neighbor's 10-year-old patch came back to life after a single season of correction. Works for bearded, Siberian, and Japanese irises alike. Let's get those rhizomes thriving!
📚 In This Guide
- What you need
- Instructions
- Tips and common mistakes
- Wrapping up and next steps
What you need
- ● Irises: Healthy, mature rhizomes (at least 1–2 years old) with fan-like leaves.
- ● Pruning shears: Sharp, clean pair (sterilize with rubbing alcohol to prevent disease).
- ● Garden gloves: Heavy-duty to protect hands from thorns and soil.
- ● Balanced fertilizer: 10-10-10 or 5-10-10 (granular or slow-release), 1–2 cups per 10 sq ft.
- ○ Compost or organic matter: Well-aged, 2–3 inches mixed into soil (optional but recommended).
- ● Watering can or hose: With a gentle spray nozzle for hydration.
- ● Soil pH tester: Irises thrive in slightly acidic to neutral soil (6.0–7.0 pH).
- ● Mulch (pine straw or bark): 1–2 inches to retain moisture and regulate temperature.
- ● Stakes or cages: For tall bearded irises to prevent flopping.
- ● Fungicide (copper-based): If your area is prone to iris borer or fungal diseases.
Step-by-Step instructions for revitalizing your irises
Here's the method I've used for years to transform lackluster iris clumps into vibrant blooming powerhouses.
🌱 Step 1: Prune Properly After Blooming Season
Wait until 4-6 weeks after flowering—this gives the plant time to store energy in its rhizomes for next year. Cut back the foliage to 6 inches tall using clean, sharp pruners. Never remove more than one-third of the leaves, as they're the plant's food factory for next season's blooms.
I always sterilize my pruners with rubbing alcohol between cuts to prevent bacterial spread. The goal is to maintain enough leaf surface for photosynthesis while removing dead or damaged foliage. You'll see fresh, healthy growth emerge from the center of the rhizome within a few weeks.
✂️ Step 2: Divide and Replant Overcrowded Clumps
Dig up iris rhizomes every 3-4 years in early summer when they're actively growing. Look for clumps with 3-5 fans of leaves per rhizome—these will produce the best blooms. Separate the rhizomes with a clean knife, ensuring each section has at least one fan of leaves and a portion of the root system.
Here's the thing—irises need sunlight to bloom, so plant rhizomes with the tops exposed, never buried. Position them in well-draining soil with full sun exposure (6+ hours daily). Water lightly after planting, then let the soil dry between waterings. You'll see new growth emerge within 2-3 weeks if conditions are right.
💧 Step 3: Feed with the Right Nutrients at Critical Times
Apply a low-nitrogen, high-phosphorus fertilizer (like 5-10-10) in early spring when new growth appears. Irises hate rich soil—they prefer lean conditions. I use about 1/2 cup per 10 square feet and water it in thoroughly. Repeat this feeding in early fall to encourage strong root development for next year's blooms.
Never fertilize after mid-summer—this encourages tender new growth that won't survive winter. You'll notice healthier foliage and more robust blooms within a season of proper feeding. For organic gardeners, a balanced compost tea works well too.
☀️ Step 4: Deadhead and Maintain Proper Watering
Remove spent blooms promptly by cutting the flower stalk down to the base. This redirects the plant's energy toward next year's blooms rather than seed production. I always wear gloves for this step—iris rhizomes contain irritating compounds that can cause skin reactions.
Water irises deeply but infrequently. They thrive in dry conditions and rot easily in soggy soil. Aim for 1 inch of water per week, delivered either through rainfall or supplemental irrigation. You'll see stronger, more vibrant blooms when the plants aren't struggling with excess moisture.
⏰ Step 5: Protect from Winter Damage
In colder climates, apply a 2-3 inch layer of mulch around iris plants after the first frost. This protects the rhizomes from extreme temperature fluctuations. I use straw or shredded leaves because they allow water to penetrate while insulating the soil.
Remove the mulch in early spring before new growth appears. The key is timing—mulch too early and you'll smother emerging shoots. You'll know you've done it right when you see fresh green growth pushing through the soil in early spring.
Tips & tricks for revitalizing your irises
Real talk: these small adjustments make all the difference between irises that barely bloom and ones that put on a spectacular show.
Timing is Everything: That 4-6 week window after flowering in Step 1 is non-negotiable. If you prune too early, you're cutting off the plant's energy storage for next season. I've seen gardeners rush this step and end up with half the blooms the following year. Mark your calendar right after your irises finish flowering—this is when the real work begins.
Dividing Wisdom: When you're separating those rhizomes in Step 2, look for healthy fans with at least 3-5 leaves per section. The temptation is to take more, but smaller divisions struggle to establish. I've learned this the hard way—my first year dividing irises resulted in half the sections dying because I took too much. Aim for quality over quantity when dividing.
Fertilizer Precision: The 1/2 cup per 10 square feet measurement in Step 3 is critical—too much nitrogen will give you lush foliage but no blooms. I've switched to a 5-10-10 formula specifically because the higher phosphorus promotes flowering. Organic gardeners can use compost tea, but I've found it takes about 3 applications to match the impact of the mineral fertilizer.
Watering Strategy: That 1 inch per week guideline in Step 4 might seem simple, but timing matters. Water in the morning so foliage can dry before evening—wet leaves overnight invite fungal diseases. I've seen irises develop leaf spot because of this exact mistake. And remember, irises hate soggy soil—if your garden gets heavy rain, skip the supplemental watering that week.
Pro Tips for Make Irises Bloom
- Real talk: these small adjustments make all the difference between irises that barely bloom and ones that put on a sp...
- Timing is Everything: That 4-6 week window after flowering in Step 1 is non-negotiable. If you prune too early, you'r...
- Dividing Wisdom: When you're separating those rhizomes in Step 2, look for healthy fans with at least 3-5 leaves per ...
Frequently asked questions
Got questions about coaxing those stunning iris blooms? You’re not alone! Here are some of the most common concerns—and their solutions—to keep your irises thriving.
Why aren’t my irises blooming at all?
If your irises refuse to bloom, they might be too young (give them 2–3 years to establish roots) or overcrowded. Dig up clumps and divide them every 3–4 years. Also, check for nutrient deficiencies—irises love well-draining soil rich in phosphorus (try a balanced 10-10-10 fertilizer in early spring).
When is the best time to prune irises to encourage blooms?
Prune after blooming (late spring to early summer) to redirect energy to next year’s flowers. Cut back only the seed pods and faded blooms—never the fan-shaped leaves! Avoid pruning in fall, as the leaves fuel the rhizomes’ winter reserves. Pro tip: Use sterilized shears to prevent disease.
Do irises need full sun to bloom?
While irises thrive in full sun (6+ hours daily), they can tolerate partial shade (4–6 hours). However, shade may reduce bloom quantity or vibrancy. If your irises are in shady spots, try moving them to a sunnier location or choose shade-tolerant varieties like ‘Florence’ or ‘Blue Flag.’
Can I make irises bloom earlier or later than usual?
Irises bloom based on climate and variety, but you can nudge timing slightly. For earlier blooms, fertilize in late winter with phosphorus-rich food. For later blooms, avoid heavy feeding until after the first frost. Warning: Don’t force drastic changes—irises are sensitive to abrupt shifts!
What should I do if my irises bloom but then die back?
Sudden die-back after blooming often signals root rot (from overwatering) or pests (like iris borers). Fix it:
If irises seem finicky, try these low-maintenance bloomers:
Are there any alternatives to traditional irises for easy blooms?
Wrapping up and next steps
With the right care—pruning, feeding, and deadheading—your irises will reward you with stunning blooms year after year! 🌸 Remember, patience and consistency are key, so don’t rush the process.
Now that you’re armed with these tips, grab your shears, feed that soil, and get ready to enjoy a garden bursting with color.
Ready to take it further? Experiment with varieties or share your success with fellow gardeners—your blooming irises might just inspire others! 🌿