
Planting
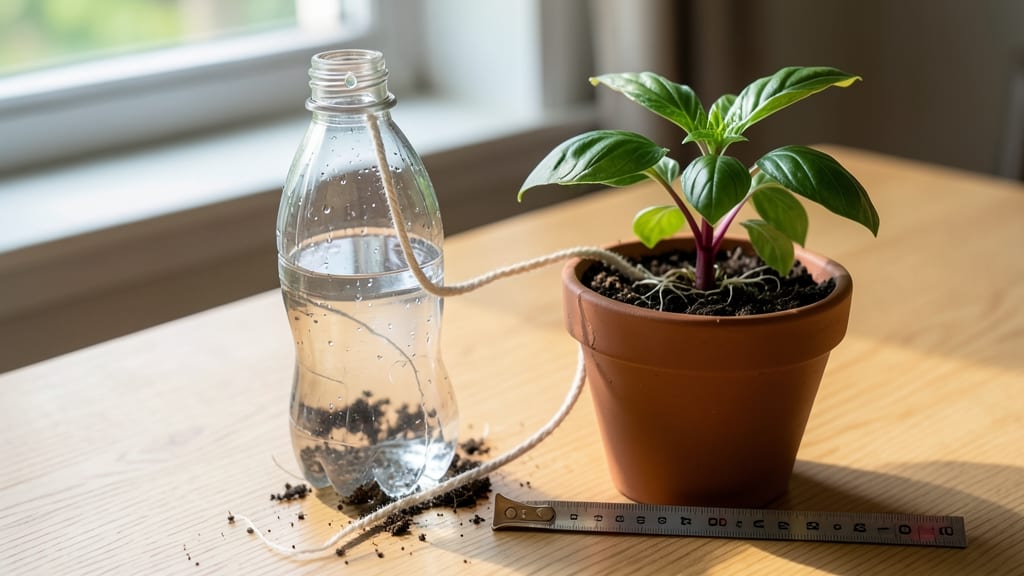
That plastic bottle collecting dust in your recycling bin could save your seedlings. 🌱 I transformed mine into a foolproof watering system that keeps roots moist without drowning them—perfect for seedlings, hanging plants, or finicky succulents.
The beauty is in the simplicity: just a bottle, a few holes, and a wick or spray nozzle. No fancy tools needed. This setup delivers precise water right where plants need it, cutting waste by up to 70% compared to overhead watering.
Plus, it’s portable—toss it in your gardening bag for on-the-go hydration.
You’ll avoid the heartbreak of overwatered seedlings or underwatered herbs. The system stays fresh for weeks if you keep the bottle clean and use distilled water. For thirsty plants like ferns or new transplants, this becomes your new best friend.
Works in containers, hanging baskets, or even for reviving wilting houseplants. Here’s how to turn trash into a gardening game-changer—without spending a dime.
📚 In This Guide
- What you need
- Instructions
- Tips and common mistakes
- Wrapping up and next steps
What you need
- ● Plastic bottle (1-2): Size: 16–32 oz (500–1000 mL) – larger bottles hold more water for thirsty plants
- ● Shape: Narrow neck (e.g., soda or water bottles) for precision spraying
- ● Spray nozzle or mister attachment (1): Type: Adjustable or fine-mist nozzle (available at hardware stores or Amazon)
- ● Alternative: Drill a small hole (1–3 mm) in the cap for a DIY spray
- ● Drill or screwdriver (1): For creating holes in the bottle cap or sides (if adding a wicking system)
- ● Ruler or measuring tape (1)
- ● Permanent marker (1)
- ● Scissors or utility knife (1)
- ○ Waterproof tape or glue (small amount): Optional but helpful for securing the nozzle or sealing leaks
- ● Wicking system (for self-watering): Cotton rope or braided wick (1–2 ft)
- ● Small reservoir bottle (e.g., 500 mL) to hold extra water
- ● Decorative paint or labels (for personalization)
- ● Bamboo or metal straw (to replace the nozzle for a gentler spray)
- ● Water-soluble fertilizer (to mix into the bottle for plant nutrition)
Step-by-Step instructions for crafting a DIY plant watering bottle
Here's how I transform everyday household items into a precision watering system that saves time and keeps roots happy.
🪴 Step 1: Select and Prepare Your Base Container
Choose a clean, empty plastic bottle with a cap—a 16-32 ounce soda or water bottle works perfectly. Remove any labels completely and give it a thorough rinse with warm, soapy water to eliminate residue. The bottle's size determines your watering capacity, so I prefer the larger size for thirsty plants like tomatoes or herbs.
Poke two small holes near the cap using a hot nail or drill bit—these create the spray mechanism. The holes should be ⅛ inch wide and positioned ¼ inch apart. This spacing ensures an even mist without clogging. Here's the thing—if you don't have a drill, a heated nail works just as well. Just heat it over a flame until red, then press firmly through the plastic.
💧 Step 2: Create the Spray Mechanism
Cut a 1-inch square from the bottom of the bottle cap using sharp scissors or a craft knife. This opening will act as your water outlet when the cap is screwed on upside-down. The square should be centered to maintain balance. I always test-fit the cap after cutting—it should still screw on securely, but now with a gap for water to flow through.
Next, insert a short piece of fine mesh screen (like from a coffee filter or window screen) over the holes in the cap. Secure it tightly with a rubber band or a dab of waterproof adhesive. This prevents soil from clogging the holes while still allowing water to spray evenly. You'll see the difference immediately—water flows freely without creating muddy streams.
✂️ Step 3: Assemble and Test Your Watering Bottle
Fill the bottle with room-temperature water—cold water can shock plant roots. Screw the modified cap onto the bottle upside-down, so the holes face downward. The mesh should now sit just above the water line when the bottle is upright. Give it a gentle shake to distribute water evenly through the system.
To test, hold the bottle 6-12 inches above a plant and press the cap lightly. You should see a fine, even mist emerge—not a stream. If the spray is too coarse, the holes are too large. Adjust by covering them partially with tape or using a smaller drill bit. The goal is a gentle rain that penetrates foliage without disturbing soil.
🌿 Step 4: Water Like a Pro
Start by watering the base of plants first, holding the bottle 4-6 inches away to avoid wetting leaves excessively. Move to taller plants, keeping the bottle 12 inches back to prevent leaf damage. I water in the early morning to allow foliage to dry quickly—this prevents fungal issues. For container plants, tilt the bottle to reach all corners of the pot.
Watch for damp but not soggy soil after watering—that's your perfect moisture level. Overwatering is the biggest mistake here. If water pools at the base, you're overdoing it. The beauty of this system is the control: you can target specific plants without oversaturating the entire garden. For thirsty plants, I refill the bottle mid-watering session to maintain consistent pressure.
⏰ Step 5: Maintain and Expand Your System
After each use, rinse the bottle thoroughly and store it upside-down to dry completely. This prevents bacterial growth in the residual water. Once a month, remove the mesh and clean the holes with a toothpick to clear any mineral buildup. I keep a small brush handy for scrubbing stubborn deposits—this ensures your spray stays fine and even.
To expand, simply make multiple bottles in different sizes. I keep a small 8-ounce bottle for seedlings and a large 32-ounce bottle for my tomato plants. The key is matching bottle size to plant needs—larger containers hold more water for deep-rooted plants, while smaller ones work perfectly for delicate herbs. This system cuts my watering time in half while keeping plants healthier than ever.
Tips & tricks for perfect DIY plant watering bottles
Transforming a simple plastic bottle into a precision watering tool is easier than you think—once you know these game-changing details.
Material Selection: While soda bottles are ideal for their wide mouths, any plastic bottle with a screw cap works—just avoid narrow-neck bottles. The key is finding one with thick, sturdy plastic that won't warp when filled. I've used milk jugs and detergent bottles successfully, but avoid thin-walled bottles that might crack under pressure. For long-term use, look for bottles with ribbed sides—they provide better grip when handling full bottles.
Precision Cutting Technique: In Step 2, when cutting the nozzle hole, I recommend using a sharp utility knife and a ruler to mark your measurements. Place the cap on a non-slip surface (like a damp paper towel) to prevent sliding while cutting. For extra control, use a hole punch designed for plastic—it creates perfectly clean edges that won't fray over time. Remember, the ¼-inch hole should be centered precisely, as off-center cuts can create uneven water flow patterns.
Water Temperature Wisdom: The instructions mention using room-temperature water for mature plants, but for seedlings, that lukewarm water recommendation is crucial. Fill your bottle with water that's just slightly warmer than room temperature—you should be able to hold your finger in it comfortably for about 10 seconds. This gentle warmth helps prevent temperature shock to delicate roots while still being safe. I keep a small thermometer in my gardening caddy to check water temps when I'm unsure.
Maintenance Rescue: If you notice your spray nozzle clogs after a few uses, the 10-minute vinegar soak in Step 5 is your best friend. For stubborn clogs, try using a toothpick to gently clear debris from the hole before soaking. After cleaning, rinse thoroughly with clean water and let air dry completely before storing. This simple maintenance keeps your watering bottle functioning like new for months, avoiding that frustrating weak spray that ruins the whole experience.
Pro Tips for Make Plant Watering Bottle
- Transforming a simple plastic bottle into a precision watering tool is easier than you think—once you know these game-changing details.
- Material Selection: While soda bottles are ideal for their wide mouths, any plastic bottle with a screw cap works—just avoid narrow-neck bottles.
- Precision Cutting Technique: In Step 2, when cutting the nozzle hole, I recommend using a sharp utility knife and a ruler to mark your measurements.
Frequently asked questions
Got questions about DIY plant watering bottles? You’re not alone! Here are answers to the most common queries to help you craft the perfect upcycled watering system for your garden.
How often should I water my plants with a DIY watering bottle?
This depends on your plants and climate! Most houseplants thrive with watering every 7–14 days, while succulents need less (every 3–4 weeks). Check soil moisture by sticking your finger 1–2 inches deep—if it’s dry, it’s time to water. Overwatering is a common mistake, so always let excess water drain away.
Can I reuse a plastic bottle from any product for this project?
Yes! Almost any clean, empty plastic bottle (soda, detergent, or even milk jugs) works, but avoid bottles with sharp edges or weak seams. Rinse thoroughly, remove labels, and ensure the cap is leak-proof. For better spray control, opt for bottles with a narrow neck (like soda bottles) or add a DIY spray nozzle.
What if my homemade sprayer clogs or leaks?
Clogs usually happen if debris gets stuck in the nozzle. Rinse the bottle and nozzle with warm water, then use a toothpick or pin to clear blockages. For leaks, check the cap’s seal—tighten it or wrap a thin layer of duct tape around the threads as a temporary fix. If the bottle cracks, replace it with a sturdier one.
Are DIY watering bottles better than store-bought ones?
Both have pros! DIY bottles are eco-friendly, customizable, and cost-free, but store-bought ones often have precise spray settings. For large gardens, consider combining both: use DIY bottles for small plants and a hose attachment for bigger areas. The key is consistency—whichever you choose, water deeply but infrequently.
How can I turn this into a self-watering system?
For a self-watering upgrade, drill a small hole in the bottle’s cap and insert a wick (cotton rope or nylon stocking) down into the soil. Fill the bottle with water—it’ll slowly seep into the roots. Place the bottle upside-down in a container with water to create a continuous flow. Perfect for travel or busy schedules!
Wrapping up and next steps
Creating your own plant watering bottle is a simple, eco-friendly way to keep your garden thriving—without breaking the bank! With just a few household items, you’ve got a reusable, customizable spray system that makes watering a breeze.
Whether you’re a beginner or a green-thumb pro, this project proves that sustainability and convenience go hand in hand. 🌱
Now that you’ve got your DIY watering bottle ready, take it a step further! Experiment with different spray patterns, track which plants thrive best with your new system, or even gift one to a fellow plant lover. Your garden—and the planet—will thank you! 💧✨